Craftsman 88957 Operation Manual - Page 15
Stopping, Engine, To Engage, Drive, Engage, Replacing, Shear
 |
View all Craftsman 88957 manuals
Add to My Manuals
Save this manual to your list of manuals |
Page 15 highlights
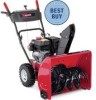
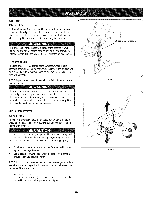
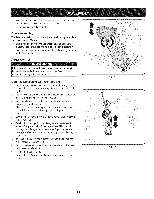
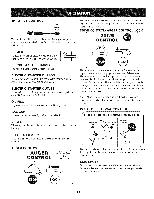
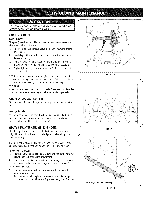
2. Movethrottlecontrolto FAST(rabbit)_T position. 3. Movechoketo the CHOKE IJl position(coldenginestart). If engineis warm,placechokein RUNposition. 4. Pushprimerthree (3) times, makingsureto covervent hole in primerbulbwhen pushing.If engineis warm,pushprimeronly once.Alwayscover venthole whenpushing.Coolweathermay requireprimingto be repeated. 5. Pushstarterbuttonto start engine.Oncethe enginestarts,immediatelyreleasestarterbutton.Electricstarteris equippedwith thermaloverloadprotection;systemwill temporarilyshut-downto allowstarterto cool if electricstarterbecomesoverloaded. 6. As theenginewarms,slowlyrotatethe chokecontrol to RUN position.If the enginefalters,restartengineand run with choke at half-chokepositionfor a short periodof time,and then slowly rotatethe chokeinto RUNposition. 7. After engineis running,disconnectpowercordfrom electric starter.Whendisconnecting,alwaysunplugthe end at the wall outletbeforeunpluggingtheoppositeend from the engine. Recoil Starter Do notpull the starterhandlewhilethe engine running. 1. Movethrottlecontrolto FAST(rabbit)_J_ position. 2. Movechoketo the CHOKE I,'_¢1position(coldenginestart). If engineis warm,placechokein RUNposition. 3. Pushprimerthree (3) times, makingsureto covervent hole when pushing.If engine iswarm,push primeronlyonce. Alwayscover vent holewhen pushing.Coolweathermay requireprimingto be repeated. 4. Pull gentlyon the starterhandleuntil it beginsto resist,then pull quicklyand forcefullyto overcomethe compression.Do not releasethe handleand allowit to snapback.Returnrope SLOWLYto original position.If required,repeatthis step. 5. As theenginewarms,slowlyrotatethe chokecontrol to RUN position.If the enginefalters,restartengineand run with choke at half-chokepositionfor a short periodof time,and then slowly rotatethe chokeinto RUNposition. TO ENGAGE DRIVE 1. With the throttlecontrolin the Fast(rabbit) '_ position,move shiftleverintoone of thesix forward(F) positionsor two reverse (R) positions.Selecta speedappropriatefor the snowconditions and a paceyou'recomfortablewith. NOTE: When selectinga DriveSpeed,use the slowerspeedsuntil you are comfortableand familiarwiththe operationof the snow thrower. 2. Squeezethe drivecontrolagainstthe handleand the snow throwerwill move.Releaseit and drive motionwill stop. NOTE:NEVERrepositionthe shiftlever(changespeedsor direction of travel)withoutfirst releasingthe drivecontrol and bringingthe snow throwerto a completestop.Doingsowill resultin prematurewearto the snow thrower'sdrivesystem. TO ENGAGE AUGER 1. Toengagethe augerand startthrowingsnow,squeezethe auger controlagainstthe left handle.Releaseto stopthe auger. REPLACING SHEAR PINS Eachauger blade is securedto the spiralshaftwith a shearpin and bow-tieclip. If an auger bladestrikesa foreignobject or icejam, the pin willshearoff to preventdamageto the blade.If an auger blade does notturn, checkto see if its pin has shearedoff. See Figure11. NEVERreplacethe auger shearpinswith anythingotherthanSears SKU#88389/0EM Part No. 738-04124Areplacementshearpins. Anydamageto the augergearboxor othercomponentsas a resultof [fa ng to do so w NOTbe coveredby yoursnow throwers warranty. Alwaysturnoff the snowthrower'sengineand removethe key prior to replacingshearpins. Toavoid unsupervisedengineoperation,neverleavethemachine unattendedwith the enginerunning.Turnthe engineoff after use and removekey. STOPPING THE ENGINE After youhavefinishedsnow-throwingr,un enginefora few minutes beforestoppingto help dry off any moistureon the engine. 1. Movethrottlecontrolto OFF position. 2. Removethekey.Removingthe key will reducethe possibilityof unauthorizedstartingof the enginewhileequipmentis notin use. Keepthe key in a safe place.The enginecannotstart withoutthe key. 3. Wipeany moistureawayfrom the controlson theengine. 15 iJ s ¸...... Figure11
-
 1
1 -
2
-
3
-
4
-
5
-
6
-
7
-
8
-
9
-
 10
10 -
 11
11 -
 12
12 -
 13
13 -
 14
14 -
 15
15 -
 16
16 -
 17
17 -
 18
18 -
 19
19 -
 20
20 -
21
-
22
-
23
-
24
-
25
-
26
-
27
-
28
-
29
-
30
-
31
-
32
-
33
-
34
-
35
-
36
-
37
-
38
-
39
-
40
-
41
-
42
-
43
-
44
-
45
-
46
-
47
-
48
-
49
-
50
-
51
-
52
-
53
-
54
-
55
-
56
-
57
-
58
-
59
-
60
-
61
-
62
-
63
-
64
-
65
-
66
-
67
-
68
-
69
-
70
-
71
-
72
 |
 |
