Craftsman 88957 Operation Manual - Page 17
-10°
 |
View all Craftsman 88957 manuals
Add to My Manuals
Save this manual to your list of manuals |
Page 17 highlights
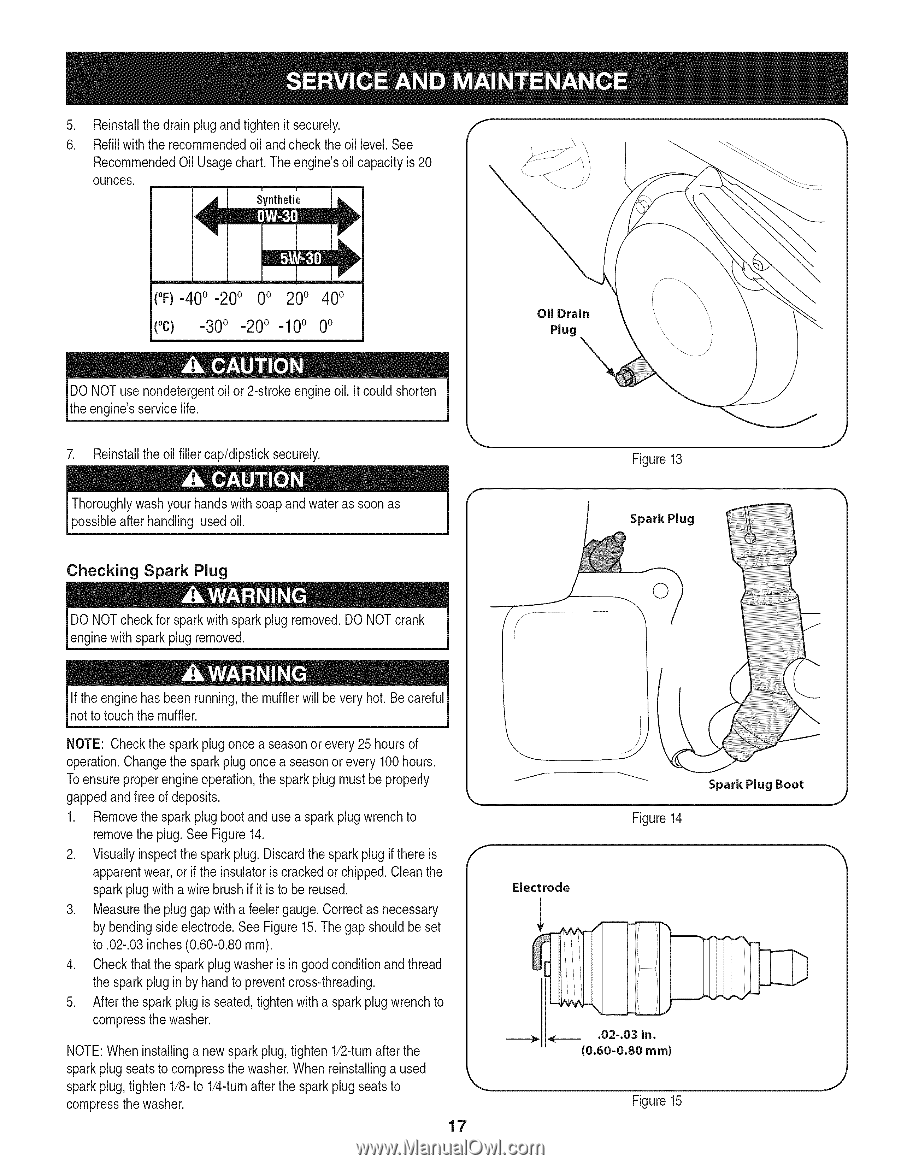
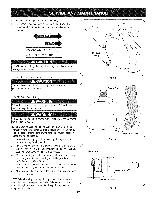
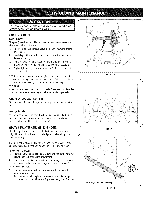
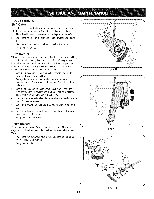
. Reinstallthe drain plugand tightenit securely. 6. Refillwith the recommendedoil and checkthe oil level.See RecommendedOil Usagechart.Theengine'soil capacityis 20 ounces. (%-400 -200 0o 200 400 ("c) -300 -200 -10° 0° Oil Drain Plug DONOTuse nondetergentoil or 2-strokeengineoil. itcould shorten the engine'sservicelife. 7. Reinstallthe oil fillercap/dipsticksecurely. Figure13 after handling usedoil. Checking Spark Plug DO NOTcheckfor sparkwith spark plug removed.DO NOTcrank enginewith sparkplug removed. Spark Plug 0 If the engine hasbeen running,the mufflerwill be very hot. Be careful notto touch the muffler. NOTE: Checkthe sparkplug oncea seasonor every 25 hoursof operation.Changethe sparkplug oncea seasonor every 100hours. Toensureproperengine operation,the sparkplug mustbe properly gappedand freeof deposits. 1. Removethespark plug bootand use a sparkplug wrenchto removethe plug.See Figure14. 2. Visuallyinspectthe spark plug.Discardthe spark plug if thereis apparentwear,or if the insulatoris crackedor chipped.Cleanthe sparkplug with a wirebrush if it is to be reused. 3. Measurethe plug gap with a feelergauge.Correctas necessary by bendingsideelectrode.See Figure15.The gap shouldbe set to .02-.03inches(0.60-0.80ram). 4. Checkthatthe sparkplug washeris in good conditionand thread the sparkplug in by handto preventcross-threading. 5. After thespark plug is seated,tightenwith a spark plugwrenchto compressthe washer. NOTE:Wheninstallinga newsparkplug,tighten 1/2-turnafter the sparkplug seatsto compressthe washer.Whenreinstallinga used sparkplug,tighten 1/8-to 1/4-turnafter the sparkplug seatsto compressthe washer. 17 J Electrode Figure14 Figure15
-
 1
1 -
2
-
3
-
4
-
5
-
6
-
7
-
8
-
9
-
10
-
11
-
 12
12 -
 13
13 -
 14
14 -
 15
15 -
 16
16 -
 17
17 -
 18
18 -
 19
19 -
 20
20 -
 21
21 -
 22
22 -
23
-
24
-
25
-
26
-
27
-
28
-
29
-
30
-
31
-
32
-
33
-
34
-
35
-
36
-
37
-
38
-
39
-
40
-
41
-
42
-
43
-
44
-
45
-
46
-
47
-
48
-
49
-
50
-
51
-
52
-
53
-
54
-
55
-
56
-
57
-
58
-
59
-
60
-
61
-
62
-
63
-
64
-
65
-
66
-
67
-
68
-
69
-
70
-
71
-
72
 |
 |