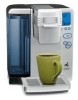
Cuisinart SS-700 SS-700 Manual - Page 3
Warning - parts
 |
UPC - 086279028907
View all Cuisinart SS-700 manuals
Add to My Manuals
Save this manual to your list of manuals |
Page 3 highlights
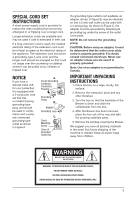
SPECIAL CORD SET INSTRUCTIONS A short power-supply cord is provided to reduce the risks resulting from becoming entangled in or tripping over a longer cord. Longer extension cords are available and may be used if care is exercised in their use. If a long extension cord is used, the marked electrical rating of the extension cord must be at least as great as the electrical rating of the appliance. The extension cord should be a grounding-type 3-wire cord, and the longer cord should be arranged so that it will not drape over the countertop or tabletop where it can be pulled on by children or tripped over. NOTICE If you have a diecast metal unit, for your protection, it is equipped with a 3-conductor cord set that has a molded 3-prong grounding-type plug, and should be used in combination with a properly connected grounding-type outlet as shown in Figure A. A. Circuit Grounding Conductor Connected Properly Grounding Prong B. Adapter Grounding Lug C. Cover Mounting Screw Cover of Grounded Outlet Box If a grounding-type outlet is not available, an adapter, shown in Figure B, may be obtained so that a 2-slot wall outlet can be used with a 3-prong plug. As shown in Figure C, the adapter must be grounded by attaching its grounding lug under the screw of the outlet cover plate. NOTE: Do not remove the grounding prong. CAUTION: Before using an adapter, it must be determined that the outlet cover plate screw is properly grounded. If in doubt, consult a licensed electrician. Never use an adapter unless you are sure it is properly grounded. Note: Use of an adapter is not permitted in Canada. IMPORTANT UNPACKING INSTRUCTIONS 1. Place the box on a large, sturdy, flat surface. 2. Remove the instruction book and any other literature. 3. Turn the box so that the backside of the Brewer is down and slide the coffeemaker from the box. 4. After the Brewer has been removed, place the box out of the way and take the pcaking materials away. 5. Remove the polybag covering the Brewer. We suggest you save all packing materials in the event that future shipping of the machine is needed. Keep all plastic bags away from children. WARNING RISK OF FIRE OR ELECTRIC SHOCK DO NOT OPEN WARNING: TO REDUCE THE RISK OF FIRE OR ELECTRIC SHOCK, DO NOT REMOVE COVER (OR BACK) NO USER-SERVICEABLE PARTS INSIDE REPAIR SHOULD BE DONE BY AUTHORIZED SERVICE PERSONNEL ONLY 3
-
 1
1 -
 2
2 -
 3
3 -
 4
4 -
 5
5 -
 6
6 -
 7
7 -
 8
8 -
 9
9 -
10
-
11
-
12
-
13
-
14
-
15
-
16
-
17
-
18
-
19
-
20
-
21
-
22
-
23
-
24
-
25
 |
 |
