D-Link DCS-6004L Quick Install Guide - Page 5
Zero Configuration Setup - d link setup
 |
View all D-Link DCS-6004L manuals
Add to My Manuals
Save this manual to your list of manuals |
Page 5 highlights
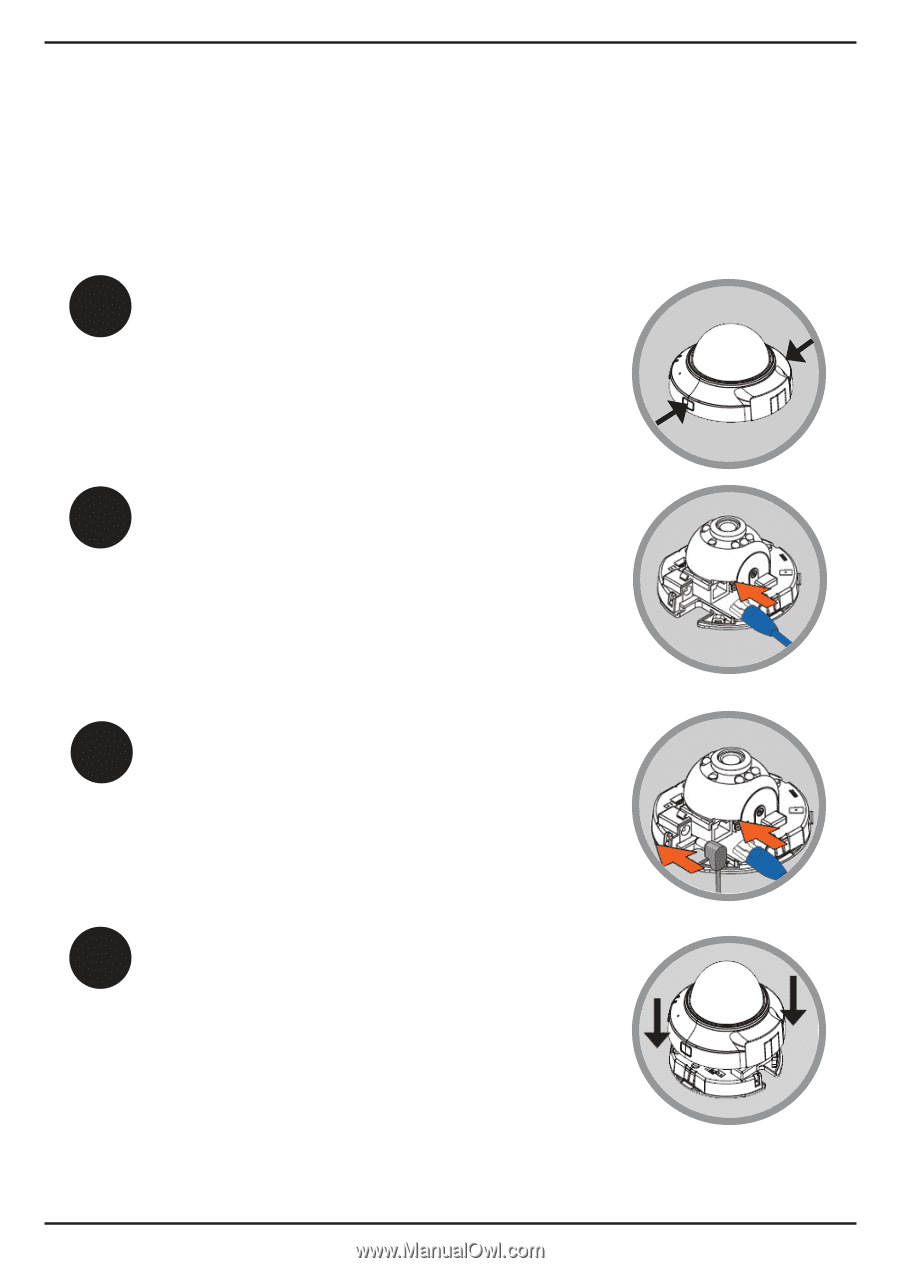
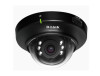
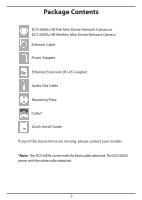
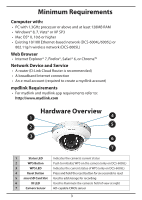
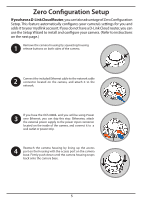
ENGLISH Zero Configuration Setup If you have a D-Link Cloud Router, you can take advantage of Zero Configuration Setup. This feature automatically configures your camera's settings for you and adds it to your mydlink account. If you do not have a D-Link Cloud router, you can use the Setup Wizard to install and configure your camera. (Refer to instructions on the next page.) 1 Remove the camera housing by squeezing housing release buttons on both sides of the camera. 2 Connect the included Ethernet cable to the network cable connector located on the camera, and attach it to the network. If you have the DCS-6004L and you will be using Power 3 over Ethernet, you can skip this step. Otherwise, attach the external power supply to the power input connector located on the inside of the camera, and connect it to a wall outlet or power strip. Reattach the camera housing by lining up the access 4 port on the housing with the access port on the camera base. Firmly push down until the camera housing snaps back onto the camera base. 5
-
 1
1 -
 2
2 -
 3
3 -
 4
4 -
 5
5 -
 6
6 -
 7
7 -
 8
8 -
 9
9 -
 10
10 -
 11
11 -
12
 |
 |