D-Link DPH-70 User Guide - Page 8
Unpacking and Installation
 |
View all D-Link DPH-70 manuals
Add to My Manuals
Save this manual to your list of manuals |
Page 8 highlights
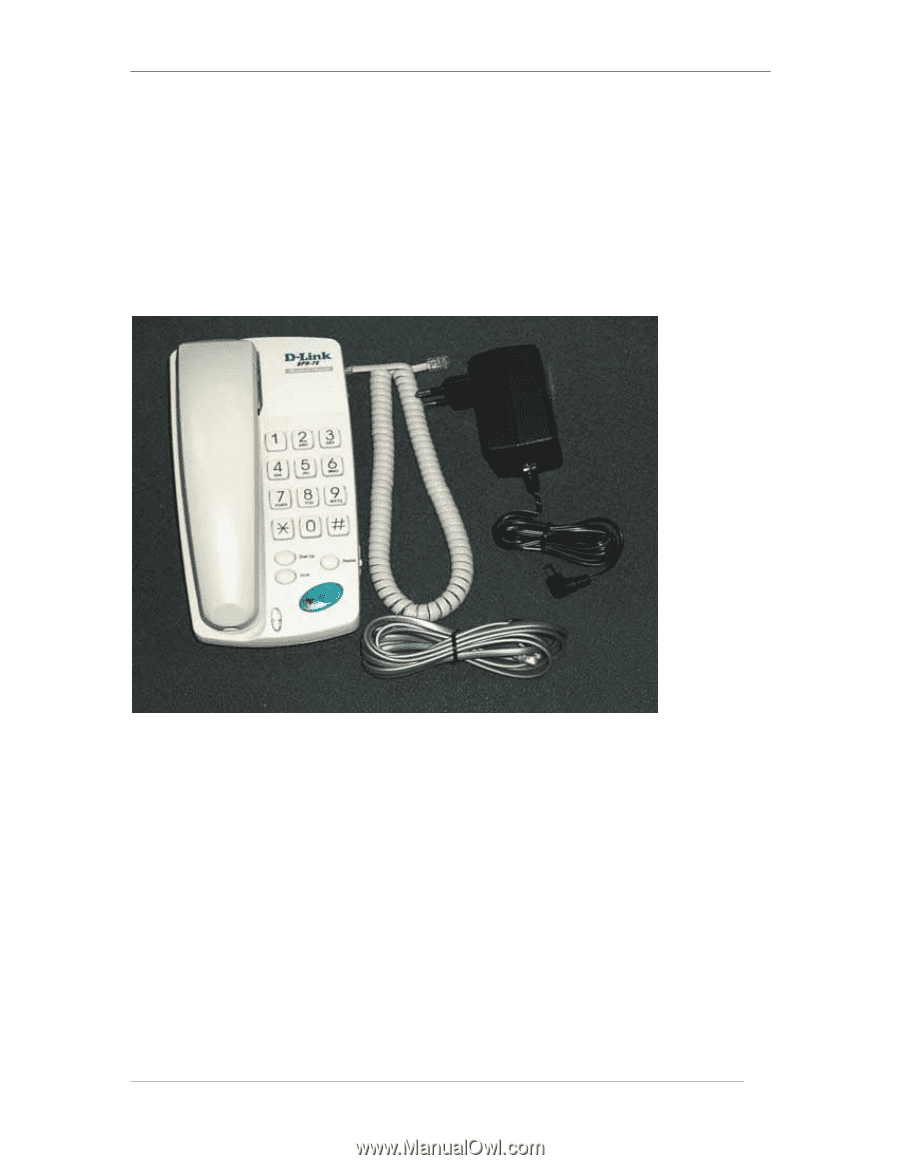
DPH-70 User's Guide 2 Unpacking and Installation Open the shipping carton and carefully remove all items. In addition to this User's Guide, make sure you have received all of the following items: • Modem IP phone, DPH-70 • One telephone cable (RJ-11) • Handset • Handset cord • Power adapter • Warranty card If any item appears to be missing or damaged, please contact your local reseller. 2.1 System Requirements You will need the following to use DPH-70. • AC power outlet (230V, 50Hz) • Local telephone line connection • Access to dial-up Internet connection (via ISP) that is PPP compatible • Account with a VoIP (Internet Telephone) service provider 2.2 Installation 1. Connect the handset to DPH-70 with handset cord. 2. Plug one end of telephone cable (RJ-11) into the LINE port on the rear panel of DPH-70 and the other end into a working telephone wall jack. 3. Plug the AC power adaptor provided into an AC outlet and insert the power cord into the connector marked "AC" on the rear panel of the DPH-70. 4. Lift the handset and listen for the dial tone that indicates the DPH-70 has been installed properly. If you do not hear a dial tone, check that the power adaptor is plugged into a live electrical outlet and that the power cord is pushed securely into the connector. 5. Now DPH-70 is ready for basic configuration as described in the next section. 8
-
 1
1 -
2
-
 3
3 -
 4
4 -
 5
5 -
 6
6 -
 7
7 -
 8
8 -
 9
9 -
 10
10 -
 11
11 -
 12
12 -
 13
13 -
14
-
15
-
16
-
17
-
18
-
19
-
20
-
21
-
22
-
23
-
24
-
25
-
26
-
27
-
28
-
29
-
30
-
31
 |
 |