D-Link DWS-3026 Product Manual - Page 48
Install the Module, Front Panel of the DEM-410X
 |
View all D-Link DWS-3026 manuals
Add to My Manuals
Save this manual to your list of manuals |
Page 48 highlights
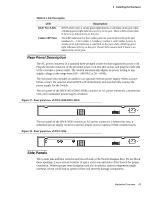
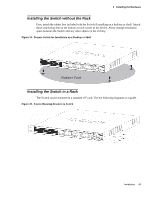
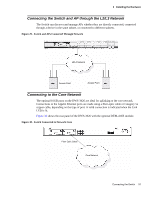
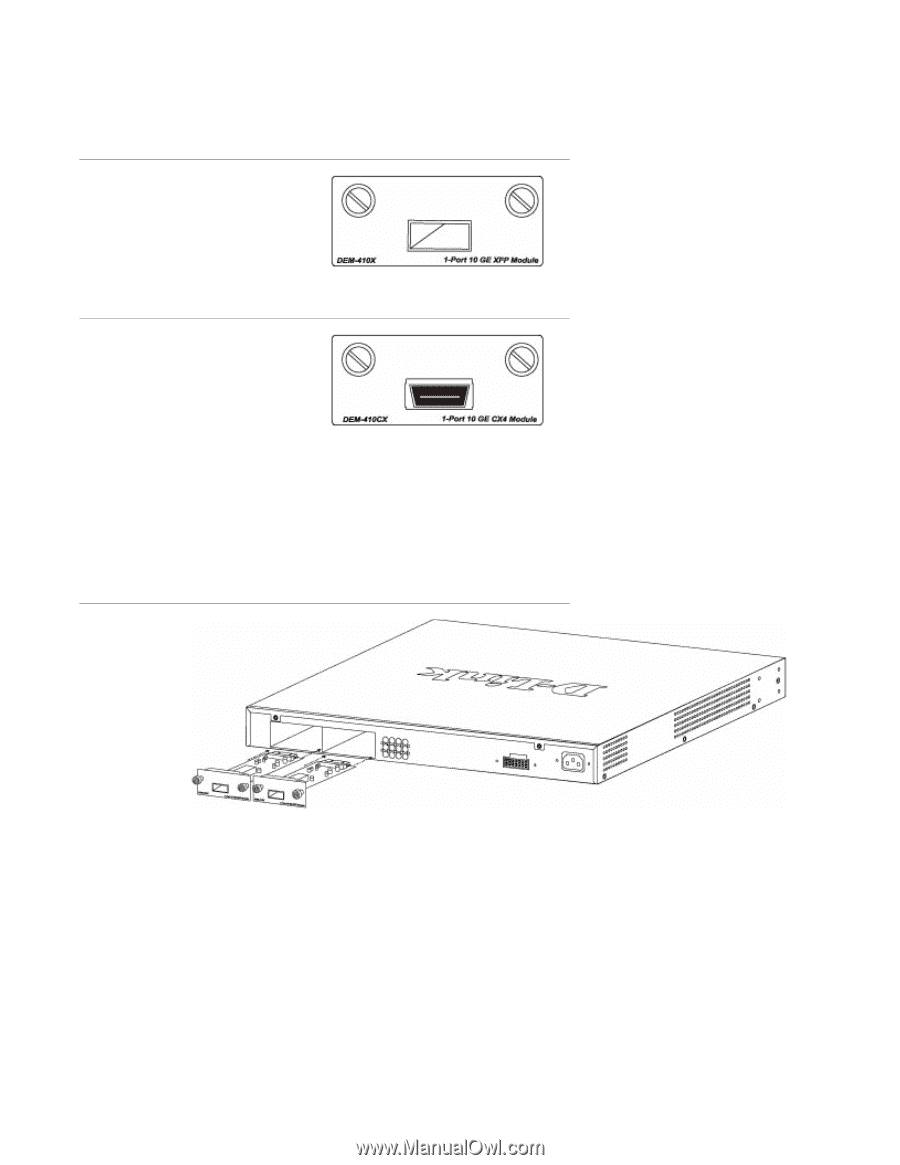
D-Link Unified Access System User Manual The front panels of the available modules are shown here: Figure 23. Front Panel of the DEM-410X Figure 24. Front Panel of the DEM-410CX Install the Module Unplug the Switch before removing the faceplate covering the empty slot. To install the module, slide it in to the available slot at the rear of the Switch until it reaches the back, as shown in the following figure. Gently, but firmly push in on the module to secure it to the Switch. The module should fit snugly into the corresponding receptors. Figure 25. Inserting the optional module into the Switch (DWS-3026) 48 © 2001- 2008 D-Link Corporation. All Rights Reserved.
-
 1
1 -
2
-
3
-
4
-
5
-
6
-
7
-
8
-
9
-
10
-
11
-
12
-
13
-
14
-
15
-
16
-
17
-
18
-
19
-
20
-
21
-
22
-
23
-
24
-
25
-
26
-
27
-
28
-
29
-
30
-
31
-
32
-
33
-
34
-
35
-
36
-
37
-
38
-
39
-
40
-
41
-
42
-
 43
43 -
 44
44 -
 45
45 -
 46
46 -
 47
47 -
 48
48 -
 49
49 -
 50
50 -
 51
51 -
 52
52 -
 53
53 -
54
-
55
-
56
-
57
-
58
-
59
-
60
-
61
-
62
-
63
-
64
-
65
-
66
-
67
-
68
-
69
-
70
-
71
-
72
-
73
-
74
-
75
-
76
-
77
-
78
-
79
-
80
-
81
-
82
-
83
-
84
-
85
-
86
-
87
-
88
-
89
-
90
-
91
-
92
-
93
-
94
-
95
-
96
-
97
-
98
-
99
-
100
-
101
-
102
-
103
-
104
-
105
-
106
-
107
-
108
-
109
-
110
-
111
-
112
-
113
-
114
-
115
-
116
-
117
-
118
-
119
-
120
-
121
-
122
-
123
-
124
-
125
-
126
-
127
-
128
-
129
-
130
-
131
-
132
-
133
-
134
-
135
-
136
-
137
-
138
-
139
-
140
-
141
-
142
-
143
-
144
-
145
-
146
-
147
-
148
-
149
-
150
-
151
-
152
-
153
-
154
-
155
-
156
-
157
-
158
-
159
-
160
-
161
-
162
-
163
-
164
-
165
-
166
-
167
-
168
-
169
-
170
-
171
-
172
-
173
-
174
-
175
-
176
-
177
-
178
-
179
-
180
-
181
-
182
-
183
-
184
-
185
-
186
-
187
-
188
-
189
-
190
-
191
-
192
-
193
-
194
-
195
-
196
-
197
-
198
-
199
-
200
-
201
-
202
-
203
-
204
-
205
-
206
-
207
-
208
-
209
-
210
-
211
-
212
-
213
-
214
-
215
-
216
-
217
-
218
-
219
-
220
-
221
-
222
-
223
-
224
-
225
-
226
-
227
-
228
-
229
-
230
-
231
-
232
-
233
-
234
-
235
-
236
-
237
-
238
-
239
-
240
-
241
-
242
-
243
-
244
-
245
-
246
-
247
-
248
-
249
-
250
-
251
-
252
-
253
-
254
-
255
-
256
-
257
-
258
-
259
-
260
-
261
-
262
-
263
-
264
-
265
-
266
-
267
-
268
-
269
-
270
 |
 |
48
© 2001- 2008 D-Link Corporation.
All Rights Reserved.
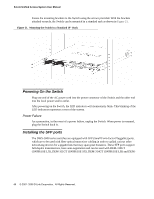
D-Link Unified Access System User Manual
The front panels of the available modules are shown here:
Figure 23. Front Panel of the DEM-410X
Figure 24. Front Panel of the DEM-410CX
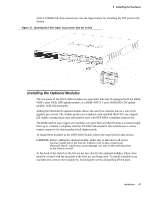
Install the Module
Unplug the Switch before removing the faceplate covering the empty slot. To install the
module, slide it in to the available slot at the rear of the Switch until it reaches the back, as
shown in the following figure. Gently, but firmly push in on the module to secure it to the
Switch. The module should fit snugly into the corresponding receptors.
Figure 25. Inserting the optional module into the Switch (DWS-3026)