DELPHI TNR800 Installation Guide - Page 16
NOTICE, Instrument Cluster Connector, XM/DVD Connector - install
 |
View all DELPHI TNR800 manuals
Add to My Manuals
Save this manual to your list of manuals |
Page 16 highlights
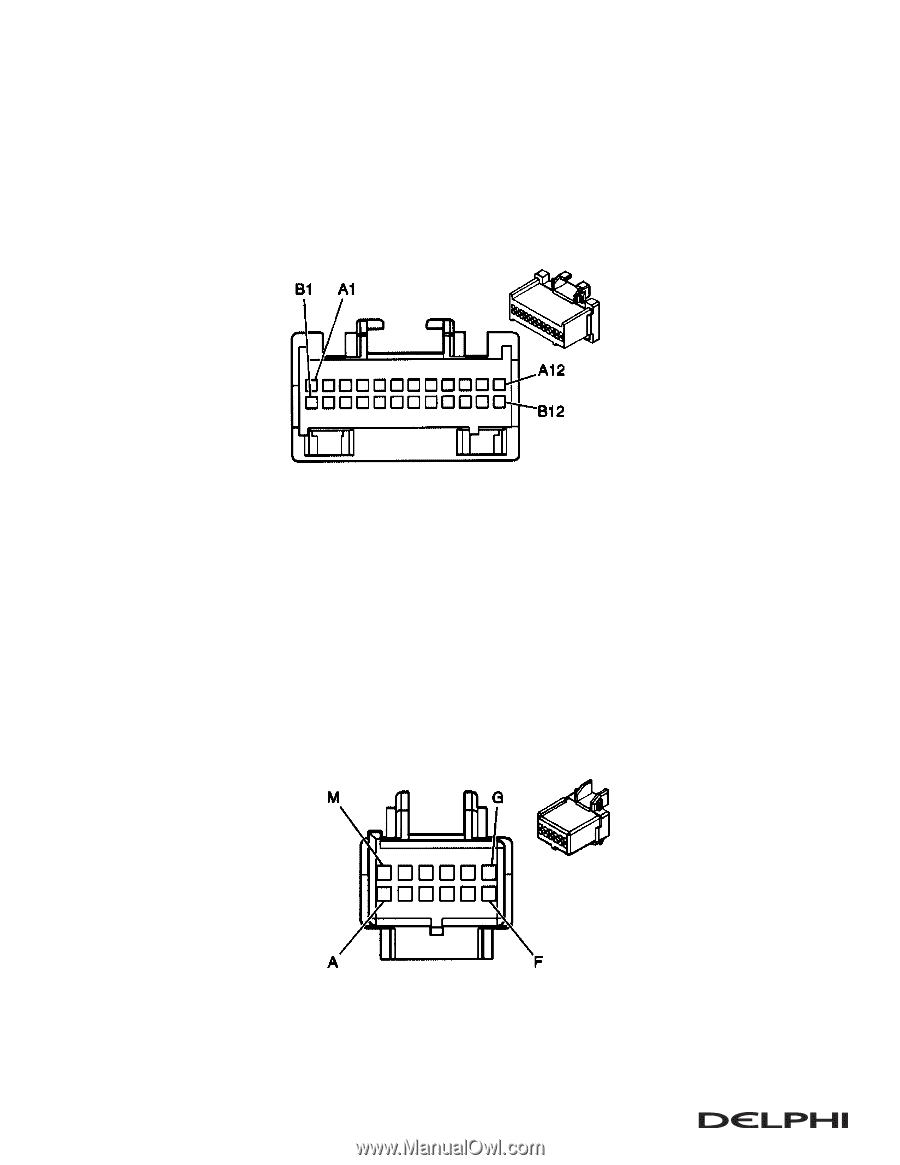
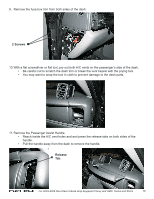
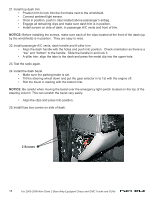
15. Install included single wire between Instrument Cluster plug and radio plug. NOTICE: Some vehicles may come with this wire installed from the factory (2004 and earlier don't usally have this wire). If you have the wire in position E of the 12-pin radio connector, skip this step. • Using the picture below, connect to the wire in position A4 on the instrument cluster connector (you can either use the included tap splice connector or solder the connection, whichever you prefer). Instrument Cluster Connector • Using the picture below, install the terminal end of the included wire in position E of the 12way radio connector. • Remove the locks from the plug using a small flat screw driver or other similar tool. • Before inserting into the connector, observe how the other terminals in the plug are orient- ed, and copy. NOTICE: This terminal is delicate and can be bent easily under force. We recommend inserting the terminal with your hands and using a plair of needle nose pliers to push it to the "lock" position. Grab the terminal with the pliers as close to the back of the terminal as possible. • Check for continuity once wire is in position (circuit tester or light tester). XM/DVD Connector 16. Install Instrument Cluster. • Install 4 screws. 16 For 2003-2006 Non-Class 2 Bose Amp Equipped Chevy and GMC Trucks and SUVs
-
 1
1 -
2
-
3
-
4
-
5
-
6
-
7
-
8
-
9
-
10
-
 11
11 -
 12
12 -
 13
13 -
 14
14 -
 15
15 -
 16
16 -
 17
17 -
 18
18 -
 19
19
 |
 |