DeLonghi PAC03 Owner Manual - Page 8
Turning, programming
 |
View all DeLonghi PAC03 manuals
Add to My Manuals
Save this manual to your list of manuals |
Page 8 highlights
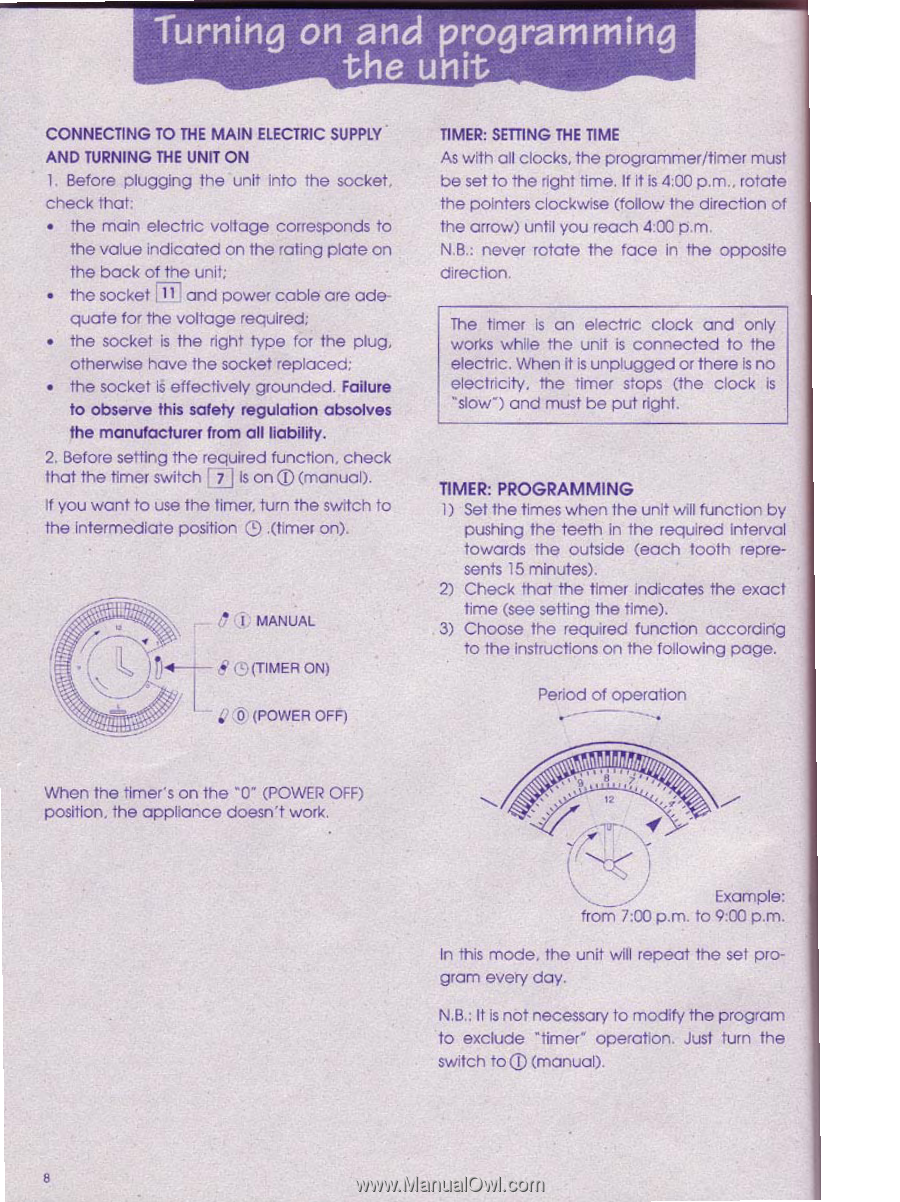
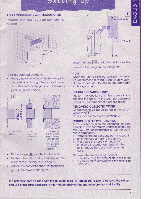
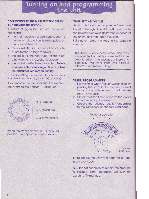
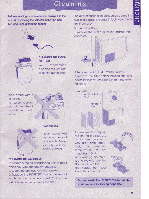
Turning on and programming the unit CONNECTING TO THE MAIN ELECTRIC SUPPLY • AND TURNING THE UNIT ON 1, Before plugging the unit into the socket, check that: • the main electric voltage corresponds to the value indicated on the rating plate on the back of the unit: TI1 • the socket and power cable are ade- quate for the voltage required; • the socket is the right type for the plug, otherwise have the socket replaced; • the socket is effectively grounded. Failure to observe this safety regulation absolves the manufacturer from all liability. 2. Before setting the required function, check that the timer switch Li] Is on C) (manual). If you want to use the timer. turn the switch to the intermediate position Q) .(timer on). MANUAL g (,(TIMER ON) 4: 6 (POWER OFF) TIMER: SETTING THE TIME As with all clocks, the programmer/timer must be set to the right time. If it is 4:00 p.m., rotate the pointers clockwise (follow the direction of the arrow) until you reach 4:00 p.m. N.B.: never rotate the face in the opposite direction. The timer is an electric clock and only works while the unit is connected to the electric. When it is unplugged or there is no electricity, the timer stops (the clock is "slow') and must be put right. TIMER: PROGRAMMING 1) Set the times when the unit will function by pushing the teeth in the required Interval towards the outside (each tooth represents /5 minutes). 2) Check that the timer indicates the exact time (see setting the time). 3) Choose the required function according to the instructions on the following page. Period of operation When the timer's on the '0" (POWER OFF) t2 position, the appliance doesn't work. Example: from 7:00 p,m. to 9:00 p.m. In this mode, the unit will repeat the set program every day. N.B.: It is not necessary to modify the program to exclude 'timer' operation. Just turn the switch toot (manual).
-
 1
1 -
2
-
 3
3 -
 4
4 -
 5
5 -
 6
6 -
 7
7 -
 8
8 -
 9
9 -
 10
10 -
 11
11 -
 12
12 -
 13
13 -
14
 |
 |