Dell 1700 Owner's Manual - Page 60
Clearing Paper Jams, Cancel, Paper Jam, Continue - drum reset
 |
UPC - 807027103116
View all Dell 1700 manuals
Add to My Manuals
Save this manual to your list of manuals |
Page 60 highlights
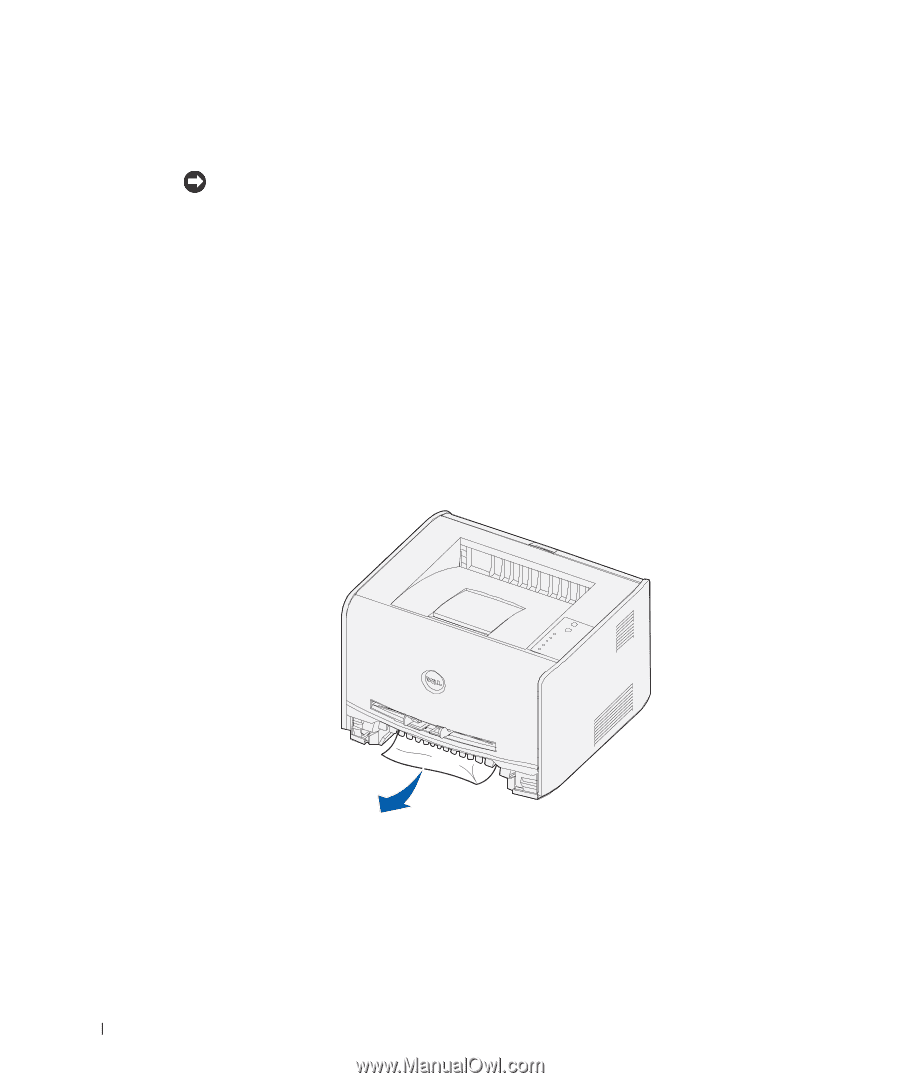
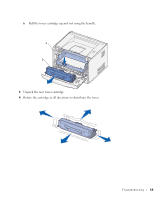
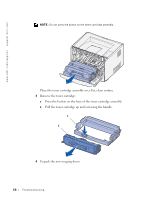
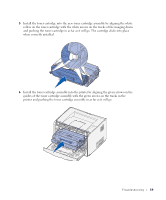
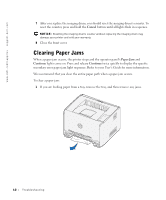
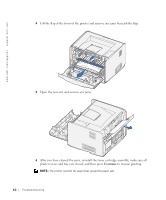
www.dell.com/supplies | support.dell.com 7 After you replace the imaging drum, you should reset the imaging drum's counter. To reset the counter, press and hold the Cancel button until all lights flash in sequence. NOTICE: Resetting the imaging drum's counter without replacing the imaging drum may damage your printer and void your warranty. 8 Close the front cover. Clearing Paper Jams When a paper jam occurs, the printer stops and the operator panel's Paper Jam and Continue lights come on. Press and release Continue twice quickly to display the specific secondary error paper jam light sequence. Refer to your User's Guide for more information. We recommend that you clear the entire paper path when a paper jam occurs. To clear a paper jam: 1 If you are feeding paper from a tray, remove the tray, and then remove any jams. 60 Troubleshooting
-
 1
1 -
2
-
3
-
4
-
5
-
6
-
7
-
8
-
9
-
10
-
11
-
12
-
13
-
14
-
15
-
16
-
17
-
18
-
19
-
20
-
21
-
22
-
23
-
24
-
25
-
26
-
27
-
28
-
29
-
30
-
31
-
32
-
33
-
34
-
35
-
36
-
37
-
38
-
39
-
40
-
41
-
42
-
43
-
44
-
45
-
46
-
47
-
48
-
49
-
50
-
51
-
52
-
53
-
54
-
 55
55 -
 56
56 -
 57
57 -
 58
58 -
 59
59 -
 60
60 -
 61
61 -
 62
62 -
 63
63 -
 64
64 -
 65
65 -
66
-
67
-
68
-
69
-
70
-
71
-
72
-
73
-
74
-
75
-
76
-
77
-
78
-
79
-
80
-
81
-
82
-
83
-
84
-
85
-
86
-
87
-
88
-
89
-
90
-
91
-
92
-
93
-
94
-
95
-
96
-
97
-
98
-
99
-
100
-
101
-
102
 |
 |