Dell A960 All In One Personal Printer User's Guide - Page 43
Using Fax Console Windows XP Only, Microsoft Windows XP
 |
View all Dell A960 All In One Personal Printer manuals
Add to My Manuals
Save this manual to your list of manuals |
Page 43 highlights
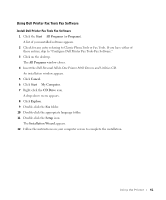
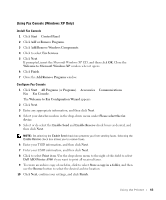
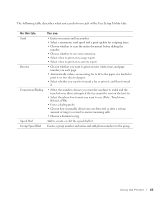
Using Fax Console (Windows XP Only) Install Fax Console 1 Click Start → Control Panel. 2 Click Add or Remove Programs. 3 Click Add/Remove Windows Components. 4 Click to select Fax Services. 5 Click Next. If prompted, insert the Microsoft Windows XP CD, and then click OK. Close the Welcome to Microsoft Windows XP window when it opens. 6 Click Finish. 7 Close the Add/Remove Programs window. Configure Fax Console 1 Click Start → All Programs (or Programs) → Accessories → Communications → Fax → Fax Console. The Welcome to Fax Configuration Wizard appears. 2 Click Next. 3 Enter any appropriate information, and then click Next. 4 Select your data/fax modem in the drop-down menu under Please select the fax device. 5 Select or de-select the Enable Send and Enable Receive check boxes as desired, and then click Next. NOTE: De-selecting the Enable Send check box prevents you from sending faxes. Selecting the Enable Receive check box allows you to receive faxes. 6 Enter your TSID information, and then click Next. 7 Enter your CSID information, and then click Next. 8 Click to select Print it on. Use the drop-down menu to the right of this field to select Dell AIO Printer A960 if you want to print all received faxes. 9 To create an archive copy of each fax, click to select Store a copy in a folder, and then use the Browse button to select the desired archive location. 10 Click Next, confirm your settings, and click Finish. Using the Printer 43
-
 1
1 -
2
-
3
-
4
-
5
-
6
-
7
-
8
-
9
-
10
-
11
-
12
-
13
-
14
-
15
-
16
-
17
-
18
-
19
-
20
-
21
-
22
-
23
-
24
-
25
-
26
-
27
-
28
-
29
-
30
-
31
-
32
-
33
-
34
-
35
-
36
-
37
-
 38
38 -
 39
39 -
 40
40 -
 41
41 -
 42
42 -
 43
43 -
 44
44 -
 45
45 -
 46
46 -
 47
47 -
 48
48 -
49
-
50
-
51
-
52
-
53
-
54
-
55
-
56
-
57
-
58
-
59
-
60
-
61
-
62
-
63
-
64
-
65
-
66
-
67
-
68
-
69
-
70
-
71
-
72
-
73
-
74
-
75
-
76
-
77
-
78
-
79
-
80
-
81
-
82
-
83
-
84
-
85
-
86
-
87
-
88
-
89
-
90
-
91
-
92
-
93
-
94
-
95
-
96
-
97
-
98
-
99
-
100
-
101
-
102
-
103
-
104
-
105
-
106
-
107
-
108
-
109
-
110
-
111
-
112
-
113
-
114
-
115
-
116
-
117
-
118
-
119
-
120
-
121
 |
 |