Dell D630 Service Manual - Page 67
Removing the Display Latch
 |
UPC - 019801087219
View all Dell D630 manuals
Add to My Manuals
Save this manual to your list of manuals |
Page 67 highlights
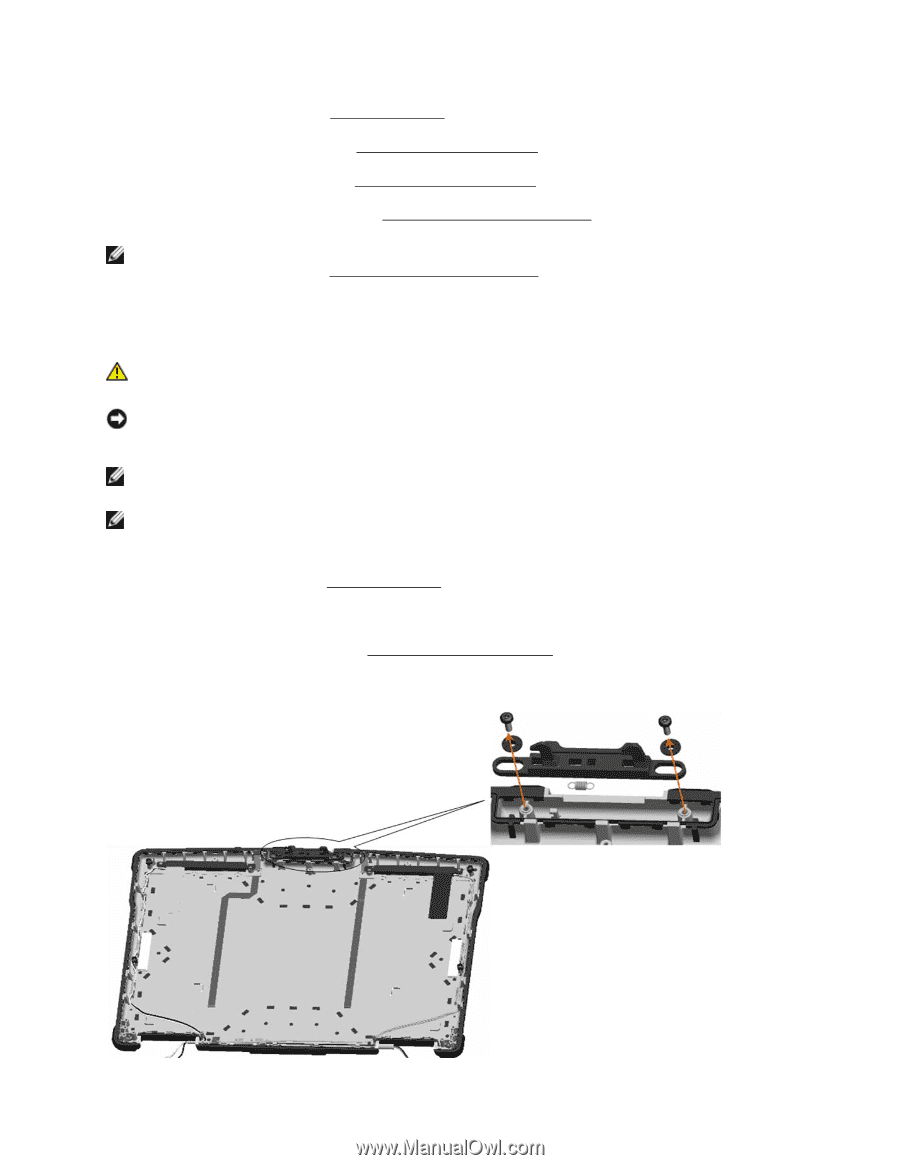
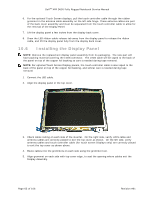
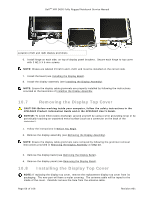
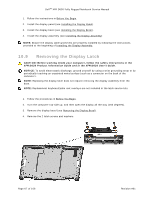
DellTM XFR D630 Fully Rugged Notebook Service Manual 1. Follow the instructions in Before You Begin. 13H 2. Install the display panel (see Installing the Display Panel). 134H 3. Install the display bezel (see Installing the Display Bezel). 135H 4. Install the display assembly (see Installing the Display Assembly) 136H NOTE: Ensure the display cable grommets are properly installed by following the instructions provided at the beginning of Installing the Display Assembly. 137H 10.9 Removing the Display Latch CAUTION: Before working inside your computer, follow the safety instructions in the XFR D630 Product Information Guide and in the XFR D630 User's Guide. NOTICE: To avoid electrostatic discharge, ground yourself by using a wrist grounding strap or by periodically touching an unpainted metal surface (such as a connector on the back of the computer). NOTE: Replacing the display latch does not require removing the display assembly from the base. NOTE: Replacement keyboard/palm rest overlays are not included in the latch service kits. 1. Follow the procedures in Before You Begin. 138H 2. Turn the computer top-side up, and then open the display all the way (160 degrees). 3. Remove the display bezel (see Removing the Display Bezel). 139H 4. Remove the 2 latch screws and washers. Page 67 of 106 Revision A01
-
 1
1 -
2
-
3
-
4
-
5
-
6
-
7
-
8
-
9
-
10
-
11
-
12
-
13
-
14
-
15
-
16
-
17
-
18
-
19
-
20
-
21
-
22
-
23
-
24
-
25
-
26
-
27
-
28
-
29
-
30
-
31
-
32
-
33
-
34
-
35
-
36
-
37
-
38
-
39
-
40
-
41
-
42
-
43
-
44
-
45
-
46
-
47
-
48
-
49
-
50
-
51
-
52
-
53
-
54
-
55
-
56
-
57
-
58
-
59
-
60
-
61
-
 62
62 -
 63
63 -
 64
64 -
 65
65 -
 66
66 -
 67
67 -
 68
68 -
 69
69 -
 70
70 -
 71
71 -
 72
72 -
73
-
74
-
75
-
76
-
77
-
78
-
79
-
80
-
81
-
82
-
83
-
84
-
85
-
86
-
87
-
88
-
89
-
90
-
91
-
92
-
93
-
94
-
95
-
96
-
97
-
98
-
99
-
100
-
101
-
102
-
103
-
104
-
105
-
106
 |
 |