Dell EqualLogic PS6610ES EqualLogic PS6610 Storage Arrays Hardware Owners Manu - Page 16
Drive, Maintenance, Requirements
 |
View all Dell EqualLogic PS6610ES manuals
Add to My Manuals
Save this manual to your list of manuals |
Page 16 highlights
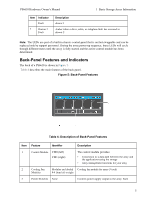
PS6610 Hardware Owner's Manual 2 Drive Maintenance • Protect drives from electrostatic discharge. Wear an electrostatic wrist strap when handling a drive. See Hardware Protection on page 6. • Store drives properly. Store replacement drives in the packaging in which they were shipped. Do not stack drives or place anything on top of a drive. • Handle drives carefully. Hold a drive only by the plastic part of the carrier or the handle. Do not drop, jolt, or force a drive into a slot. • Warm replacement drives to room temperature before installation. (Consider letting a new replacement drive sit overnight before installing it in an array.) • Do not remove a drive from its carrier. This action will void your warranty and support contract. • Keep the shipping material. Return a failed drive to your array support provider in the packaging in which the replacement drive was shipped. Shipping drives in unauthorized packaging might void your warranty. Drive Maintenance Requirements Disk drives must be installed properly and in a specific configuration to allow for the necessary airflow and cooling throughout the chassis. Failure to do so will trigger a warning condition. • Failed drives should be replaced as soon as possible. However, if a drive fails and a replacement is not readily available, leave the failed drive in the slot until it can be replaced. • When installing drives in the array, apply firm downward pressure with both hands and slide the drive toward the rear of the drawer until it snaps into place and the locking latch is fully engaged. See Install Disk Drives on page 12. • When correctly installed in the drawer, all top-facing drive surfaces should form a flat and level surface. If a drive is protruding upward in any way, reinstall the drive. • After installation, verify that the drive power LED is green or flashing green. Disk-Drive Slot Numbers Disk-drive slots in the top drawer are numbered as shown in Table 5. The disk-drive slots in the bottom drawer are numbered as shown in Table 6. Table 5: Top-Drawer Drive Numbers 28 29 30 31 32 33 34 35 36 37 38 39 40 41 14 15 16 17 18 19 20 21 22 23 24 25 26 27 0 1 2 3 4 5 6 7 8 9 10 11 12 13 Drawer Front Table 6: Bottom-Drawer Drive Numbers 70 71 72 73 74 75 76 77 78 79 80 81 82 83 56 57 58 59 60 61 62 63 64 65 66 67 68 69 42 43 44 45 46 47 48 49 50 51 52 53 54 55 Drawer Front 10
-
 1
1 -
2
-
3
-
4
-
5
-
6
-
7
-
8
-
9
-
10
-
 11
11 -
 12
12 -
 13
13 -
 14
14 -
 15
15 -
 16
16 -
 17
17 -
 18
18 -
 19
19 -
 20
20 -
 21
21 -
22
-
23
-
24
-
25
-
26
-
27
-
28
-
29
-
30
-
31
-
32
-
33
-
34
-
35
-
36
-
37
-
38
-
39
-
40
-
41
-
42
-
43
-
44
-
45
-
46
-
47
-
48
-
49
-
50
 |
 |
