Dell Inspiron 560 Service Manual - Page 18
Media Card Reader
 |
View all Dell Inspiron 560 manuals
Add to My Manuals
Save this manual to your list of manuals |
Page 18 highlights
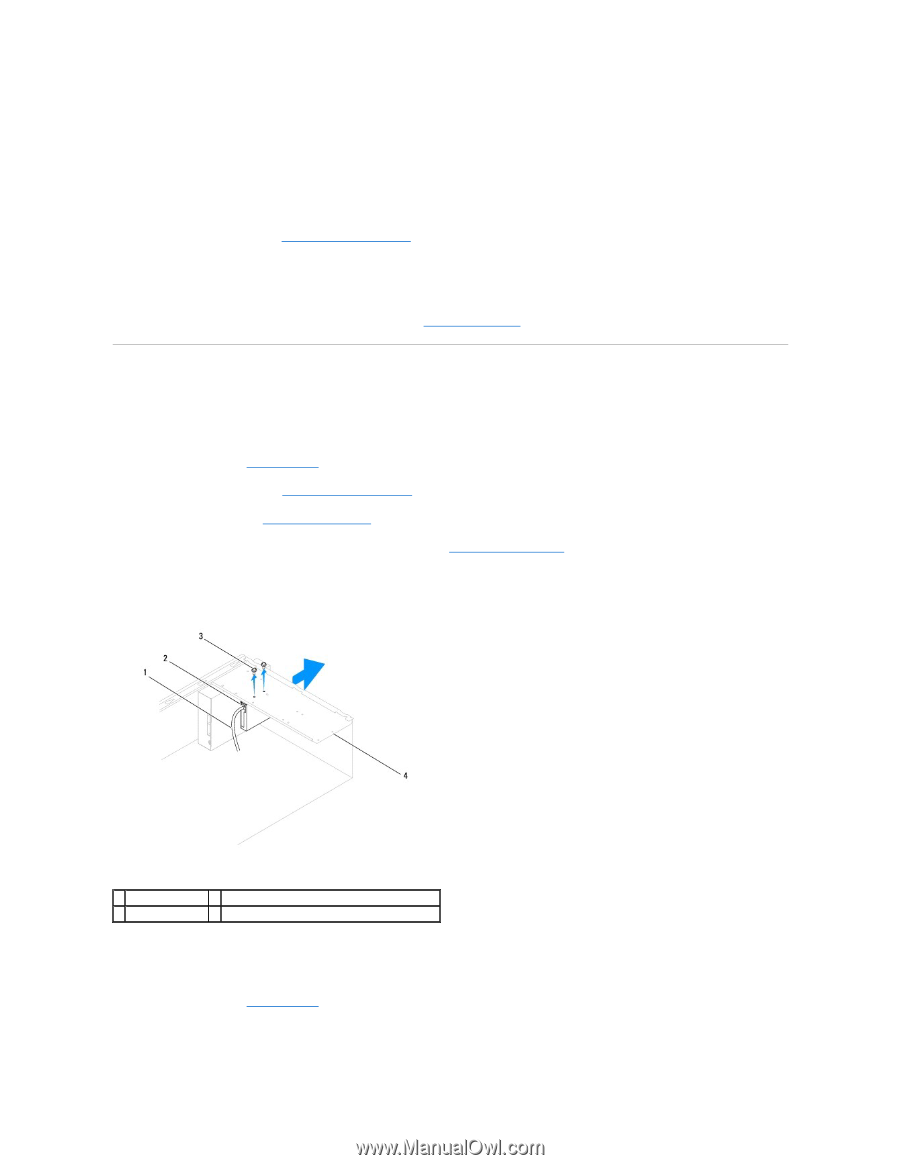
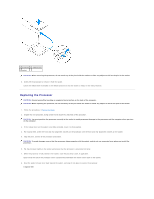
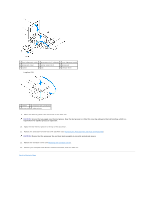
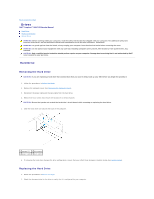
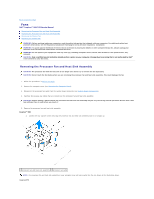
3. Slide the hard drive into the hard-drive bay. 4. Align and replace the four screws that secure the hard drive to the drive panel. 5. Connect the power cable and the data cable to the hard drive. 6. Check all cables to be certain that they are properly connected and firmly seated. 7. Replace the computer cover (see Replacing the Computer Cover). 8. Connect your computer and devices to electrical outlets, and then turn them on. 9. See the documentation that came with the hard drive for instructions on installing any software required for hard drive operation. 10. Check the System Setup for hard drive configuration changes (see Entering System Setup). Media Card Reader Removing the Media Card Reader 1. Follow the procedures in Before You Begin. 2. Remove the computer cover (see Removing the Computer Cover). 3. Remove the front bezel (see Removing the Front Bezel). 4. Disconnect the FlexBay USB cable from the system board connector (see System Board Components). 5. Remove the two screws that secure the Media Card Reader to the drive panel. 6. Slide the Media Card Reader out through the front of the computer. 1 FlexBay USB cable 2 Media Card Reader (not present on all computers) 3 screws (2) 4 drive panel Replacing the Media Card Reader 1. Follow the procedures in Before You Begin. 2. If this is a new Media Card Reader installation, remove the break-away metal plate. Align the tip of a Phillips screwdriver with the slot on the breakaway metal plate and rotate the screwdriver outwards to break and remove the metal plate.
-
 1
1 -
2
-
3
-
4
-
5
-
6
-
7
-
8
-
9
-
10
-
11
-
12
-
 13
13 -
 14
14 -
 15
15 -
 16
16 -
 17
17 -
 18
18 -
 19
19 -
 20
20 -
 21
21 -
 22
22 -
 23
23 -
24
-
25
-
26
-
27
-
28
-
29
-
30
-
31
-
32
-
33
-
34
-
35
-
36
-
37
-
38
-
39
-
40
-
41
-
42
-
43
-
44
 |
 |