Dell Inspiron 8600 Owners Manual - Page 32
Checking the Charge on the Second Battery, Removing and Installing Devices While the Computer Is
 |
View all Dell Inspiron 8600 manuals
Add to My Manuals
Save this manual to your list of manuals |
Page 32 highlights
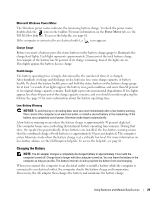
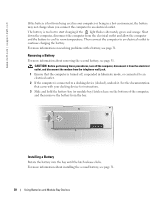
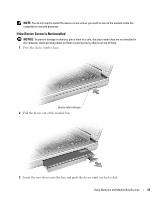
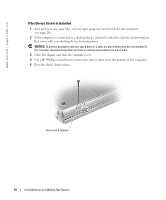
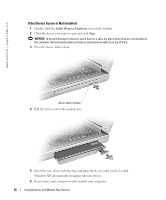
www.dell.com | support.dell.com NOTE: All devices that you install in the module bay, except a second battery, can also be installed in the Dell D/Bay. Your Dell™ computer ships with an optical drive installed in the module bay. However, the device screw is not installed in the optical drive but packaged separately. When you install your device in the module bay, you can install the device screw. NOTE: You do not need to install the device screw unless you want to secure the module inside the computer for security purposes. Checking the Charge on the Second Battery Before you install a second battery, press the status button on the battery charge gauge to illuminate the charge-level lights. Each light represents approximately 20 percent of the total battery charge. For example, if the battery has 80 percent of its charge remaining, four of the lights are on. If no lights appear, the battery has no charge. status button on the charge gauge second battery (top) Removing and Installing Devices While the Computer Is Turned Off Your computer ships with an optical drive installed in the module bay. However, the device screw is not installed in the optical drive but packaged separately. When you install your device in the module bay, you can install the device screw. 32 Using Batteries and Module Bay Devices
-
 1
1 -
2
-
3
-
4
-
5
-
6
-
7
-
8
-
9
-
10
-
11
-
12
-
13
-
14
-
15
-
16
-
17
-
18
-
19
-
20
-
21
-
22
-
23
-
24
-
25
-
26
-
 27
27 -
 28
28 -
 29
29 -
 30
30 -
 31
31 -
 32
32 -
 33
33 -
 34
34 -
 35
35 -
 36
36 -
 37
37 -
38
-
39
-
40
-
41
-
42
-
43
-
44
-
45
-
46
-
47
-
48
-
49
-
50
-
51
-
52
-
53
-
54
-
55
-
56
-
57
-
58
-
59
-
60
-
61
-
62
-
63
-
64
-
65
-
66
-
67
-
68
-
69
-
70
-
71
-
72
-
73
-
74
-
75
-
76
-
77
-
78
-
79
-
80
-
81
-
82
-
83
-
84
-
85
-
86
-
87
-
88
-
89
-
90
-
91
-
92
-
93
-
94
-
95
-
96
-
97
-
98
-
99
-
100
-
101
-
102
-
103
-
104
-
105
-
106
-
107
-
108
-
109
-
110
-
111
-
112
-
113
-
114
-
115
-
116
-
117
-
118
-
119
-
120
-
121
-
122
 |
 |
