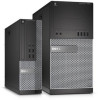
Dell OptiPlex 7020 Tower OptiPlex 7020 Mini Tower Owners Manual
Dell OptiPlex 7020 Tower Manual
 |
View all Dell OptiPlex 7020 Tower manuals
Add to My Manuals
Save this manual to your list of manuals |
Dell OptiPlex 7020 Tower manual content summary:
- Dell OptiPlex 7020 Tower | OptiPlex 7020 Mini Tower Owners Manual - Page 1
Dell OptiPlex 7020 Mini Tower Owner's Manual Regulatory Model: D13M Regulatory Type: D13M001 - Dell OptiPlex 7020 Tower | OptiPlex 7020 Mini Tower Owners Manual - Page 2
potential damage to hardware or loss of data and tells you how to avoid the problem. WARNING: A WARNING indicates a potential for property damage, personal injury, or death. Copyright © 2014 Dell Inc. All rights reserved. This product is protected by U.S. and international copyright and intellectual - Dell OptiPlex 7020 Tower | OptiPlex 7020 Mini Tower Owners Manual - Page 3
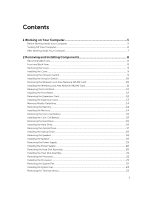
Contents 1 Working on Your Computer 5 Before Working Inside Your Computer 5 Turning Off Your Computer...6 After Working Inside Your Computer 7 2 Removing and Installing Components 8 Recommended Tools...8 Front and Back View...8 Removing the Cover...9 Installing the Cover...9 Removing the - Dell OptiPlex 7020 Tower | OptiPlex 7020 Mini Tower Owners Manual - Page 4
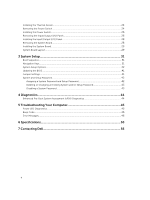
or Changing an Existing System and/or Setup Password 43 Disabling a System Password...43 4 Diagnostics...44 Enhanced Pre-Boot System Assessment (ePSA) Diagnostics 44 5 Troubleshooting Your Computer 45 Power LED Diagnostics...45 Beep Code...46 Error Messages...46 6 Specifications...50 7 Contacting - Dell OptiPlex 7020 Tower | OptiPlex 7020 Mini Tower Owners Manual - Page 5
only perform troubleshooting and simple repairs as authorized in your product documentation, or as directed by the online or telephone service and support team. Damage due to servicing that is not authorized by Dell is not covered by your warranty. Read and follow the safety instructions that came - Dell OptiPlex 7020 Tower | OptiPlex 7020 Mini Tower Owners Manual - Page 6
To avoid damaging your computer, perform the following steps before you begin working inside the computer. 1. Ensure that your work surface is flat and clean to prevent the computer cover from being scratched. 2. Turn off your computer (see Turning Off Your Computer). CAUTION: To disconnect a - Dell OptiPlex 7020 Tower | OptiPlex 7020 Mini Tower Owners Manual - Page 7
your computer and all attached devices to their electrical outlets. 4. Turn on your computer. 5. If required, verify that the computer works correctly by running the Dell Diagnostics. 7 - Dell OptiPlex 7020 Tower | OptiPlex 7020 Mini Tower Owners Manual - Page 8
: • Small flat-blade screwdriver • Phillips screwdriver • Small plastic scribe Front and Back View Figure 1. Front and Back View Of Mini-Tower 1. power button or power light 3. microphone connector 5. hard-drive activity light 7. power-supply diagnostic button 9. keyboard connector 11. display port - Dell OptiPlex 7020 Tower | OptiPlex 7020 Mini Tower Owners Manual - Page 9
15. expansion-card slots 17. padlock ring 19. network connector 21. line-out connector 16. security-cable slot 18. mouse connector 20. serial connector Removing the Cover 1. Follow the procedures in Before Working Inside Your Computer. 2. Pull up the cover release latch, and lift the cover upwards - Dell OptiPlex 7020 Tower | OptiPlex 7020 Mini Tower Owners Manual - Page 10
Installing the Intrusion Switch 1. Insert the intrusion switch into its place in the chassis rear and slide it towards the top to secure it. 2. Connect the intrusion cable to the system board. 3. Install the cover. 4. Follow the procedures in After Working Inside Your Computer. Removing the Wireless - Dell OptiPlex 7020 Tower | OptiPlex 7020 Mini Tower Owners Manual - Page 11
5. Press the blue tab and lift the latch outwards and remove the WLAN card from the connector on the system board. Installing the Wireless Local Area Network (WLAN) Card 1. Insert the WLAN card into the connector on the system board and press down until it is secured. 2. Affix the latch. 3. Place - Dell OptiPlex 7020 Tower | OptiPlex 7020 Mini Tower Owners Manual - Page 12
Removing the Front Bezel 1. Follow the procedures in Before Working Inside Your Computer. 2. Remove the cover. 3. Gently pry the front panel retention clips away from the chassis located at the edge of front panel. 4. Rotate the front panel away from the computer to release the hooks on the opposite - Dell OptiPlex 7020 Tower | OptiPlex 7020 Mini Tower Owners Manual - Page 13
4. Pull the release lever away from the PCI x16 card until you release the securing tab from the dent in the card. Lift the card out of its connector and remove it from the system board. Installing the Expansion Card 1. Insert the expansion card in the connector on the system board and press down - Dell OptiPlex 7020 Tower | OptiPlex 7020 Mini Tower Owners Manual - Page 14
Memory Module Guidelines To ensure optimal performance of your computer, observe the following general guidelines when configuring your system memory: • Memory modules of different sizes can be mixed (for example, 2 GB and 4 GB). But, all populated channels must have identical configurations. • - Dell OptiPlex 7020 Tower | OptiPlex 7020 Mini Tower Owners Manual - Page 15
Removing the Coin-Cell Battery 1. Follow the procedures in Before Working Inside Your Computer. 2. Remove: a. cover b. expansion card(s) 3. Locate the coin-cell battery on the system board. 4. Press the release latch away from the battery to allow the battery to pop-up from the socket and lift the - Dell OptiPlex 7020 Tower | OptiPlex 7020 Mini Tower Owners Manual - Page 16
Removing the Hard Drive 1. Follow the procedures in Before Working Inside Your Computer. 2. Remove the cover. 3. Disconnect the data cable and the power cable from the back of the hard drive. Press the blue securing-bracket tabs inwards and lift the hard-drive bracket out of the hard-drive bay. 4. - Dell OptiPlex 7020 Tower | OptiPlex 7020 Mini Tower Owners Manual - Page 17
Removing the Optical Drive 1. Follow the procedures in Before Working Inside Your Computer. 2. Remove: a. cover b. front bezel 3. Disconnect the data cable and the power cable from the back of the optical drive. 4. Slide and hold the optical-drive latch to unlock the optical drive and pull the - Dell OptiPlex 7020 Tower | OptiPlex 7020 Mini Tower Owners Manual - Page 18
Installing the Optical Drive 1. Push the optical drive from the front toward the back of the computer till it is secured by the opticaldrive latch. 2. Connect the data cable and power cable to the back of the optical drive. 3. Install: a. front bezel b. cover 4. Follow the procedures in After - Dell OptiPlex 7020 Tower | OptiPlex 7020 Mini Tower Owners Manual - Page 19
Removing the Power Supply 1. Follow the procedures in Before Working Inside Your Computer. 2. Remove the cover. 3. Disconnect the 4-pin and 8-in power cables from the system board and release the cable from the tab. 4. Remove the screws that secure the power supply to the back of the computer. 5. - Dell OptiPlex 7020 Tower | OptiPlex 7020 Mini Tower Owners Manual - Page 20
Installing the Power Supply 1. Place the power supply in the chassis and slide towards the back of the system to secure it. 2. Tighten the screws to secure the power supply to the back of the computer. 3. Connect the 4-pin and 8-pin power cables to the system board. 4. Thread the power cables - Dell OptiPlex 7020 Tower | OptiPlex 7020 Mini Tower Owners Manual - Page 21
Installing the Heat Sink Assembly 1. Place the heat sink assembly into the chassis. 2. Tighten the captive screws in diagonal order to secure the heat sink assembly to the computer. 3. Connect the fan cable to the system board. 4. Install the cover. 5. Follow the procedures in After Working Inside - Dell OptiPlex 7020 Tower | OptiPlex 7020 Mini Tower Owners Manual - Page 22
Removing the System Fan 1. Follow the procedures in Before Working Inside Your Computer. 2. Remove the cover. 3. Press the clip to release and disconnect the system-fan cable from the system board. 4. Pry and remove the system fan away from the four grommets securing it to the back of the computer. - Dell OptiPlex 7020 Tower | OptiPlex 7020 Mini Tower Owners Manual - Page 23
Installing the System Fan 1. Place the system fan in the chassis. 2. Pass the four grommets through the chassis and slide outward along the groove to secure in place. 3. Connect the system-fan cable to the system board. 4. Install the cover. 5. Follow the procedures in After Working Inside Your - Dell OptiPlex 7020 Tower | OptiPlex 7020 Mini Tower Owners Manual - Page 24
Installing the Thermal Sensor 1. Secure the thermal sensor to the chassis. 2. Thread the thermal-sensor cable into the chassis clips. 3. Connect the thermal-sensor cable to the system board. 4. Install the cover. 5. Follow the procedures in After Working Inside Your Computer. Removing the Power - Dell OptiPlex 7020 Tower | OptiPlex 7020 Mini Tower Owners Manual - Page 25
4. Release the power-switch cable from the chassis clips. 5. Press the clips on both side of the power switch to release it from the chassis and, slide to remove the power switch along its cable from the computer. 25 - Dell OptiPlex 7020 Tower | OptiPlex 7020 Mini Tower Owners Manual - Page 26
Installing the Power Switch 1. Slide the power switch in through the front of the computer. 2. Secure the power-switch cable to the chassis. 3. Thread the power-switch cable into the chassis clips. 4. Connect the power-switch cable to the system board. 5. Install the: a. optical drive b. front bezel - Dell OptiPlex 7020 Tower | OptiPlex 7020 Mini Tower Owners Manual - Page 27
4. Unthread and release the I/O Panel, data cable and USB data cable from the clip on the computer. 5. Remove the screw that secures the I/O panel to the computer. 6. Slide the I/O panel towards the left of the computer to release it and pull the I/O panel along with its cable out of the computer. - Dell OptiPlex 7020 Tower | OptiPlex 7020 Mini Tower Owners Manual - Page 28
Installing the Input/Output (I/O) Panel 1. Insert the I/O panel into the slot on the chassis front. 2. Slide the I/O panel towards the right of the computer to secure to the chassis. 3. Tighten the screw to secure the I/O panel to the chassis. 4. Thread the I/O panel, data cable and USB data cable - Dell OptiPlex 7020 Tower | OptiPlex 7020 Mini Tower Owners Manual - Page 29
5. Tilt the system board at 45-degrees, and then lift the system board out of the computer. Installing the System Board 1. Align the system board to the port connectors on the rear of the chassis and place the system board in the chassis. 2. Tighten the screws securing the system board to the - Dell OptiPlex 7020 Tower | OptiPlex 7020 Mini Tower Owners Manual - Page 30
1. PCI Express x16 slot (wired as X4) 2. PCI slot 3. PCIe x1 slot 4. coin-cell battery 5. PCI Express x16 slot 6. intrusion switch connector 7. 4-pin CPU power connector 8. system-fan connector 9. processor socket 10. heatsink-fan connector 11. memory connectors ( SODIMM sockets) 12. front power- - Dell OptiPlex 7020 Tower | OptiPlex 7020 Mini Tower Owners Manual - Page 31
boot device order and boot directly to a specific device (for example: optical drive or hard drive). During the Power-on Self Test (POST), when the Dell logo appears, you can: • Access System Setup by pressing key • Bring up the one-time boot menu by pressing key The one-time - Dell OptiPlex 7020 Tower | OptiPlex 7020 Mini Tower Owners Manual - Page 32
Service Code. • Memory Information - Displays Memory Installed, Memory Available, Memory Speed, Memory Channels Mode, Memory Technology, DIMM 1 Size, DIMM 2 Size, DIMM 3 Size and DIMM 4 Size. • PCI Information - Displays SLOT1, and SLOT2 • Processor Information - Displays Processor Type, Core - Dell OptiPlex 7020 Tower | OptiPlex 7020 Mini Tower Owners Manual - Page 33
Reporting Technology) specification. • Enable SMART Reporting - This option is disabled by default. USB Configuration This field configures the integrated USB controller. If Boot Support is enabled, the system is allowed to boot any type of USB mass storage devices (HDD, memory key, floppy). 33 - Dell OptiPlex 7020 Tower | OptiPlex 7020 Mini Tower Owners Manual - Page 34
USB port is disabled, the operation system cannot see any device attached to this port. USB configuration: For Mini-Tower, Small Form Factor the options are: • Enable Boot Support • Enable Front USB 2.0 Ports • Enable USB 3.0 Ports • Enable Rear-Left Dual USB 2.0 Ports • Enable Rear -Right Dual USB - Dell OptiPlex 7020 Tower | OptiPlex 7020 Mini Tower Owners Manual - Page 35
you activate or disable the BIOS module interface of the optional Computrace Service from Absolute Software. • Deactivate - This option is selected by default disable the execute disable mode of the processor. • Enable CPU XD Support - This option is enabled by default. Allows you to determine if - Dell OptiPlex 7020 Tower | OptiPlex 7020 Mini Tower Owners Manual - Page 36
Table 5. Secure Boot Secure Boot Enable Expert key Management Table 6. Performance Option Multi Core Support Intel SpeedStep C States Control Limit CPUID Value Allows you to enable or disable Secure Boot feature • Disabled - This option is selected by default. • Enabled NOTE: - Dell OptiPlex 7020 Tower | OptiPlex 7020 Mini Tower Owners Manual - Page 37
of the processor. • Disabled - Does not allow the TurboBoost driver to increase the performance state of the processor above the standard performance. been changed • System or HDD password is enabled • A Dell Encryption Accelerator is installed • The Block Sleep setting is enabled Table - Dell OptiPlex 7020 Tower | OptiPlex 7020 Mini Tower Owners Manual - Page 38
: When enabled, the fan runs at full speed. This option allows you to enable USB devices to wake the computer from standby. • Enable USB Wake Support - This option is selected by default. This option allows the computer to power up from the off state when triggered by a special LAN signal. Wake - Dell OptiPlex 7020 Tower | OptiPlex 7020 Mini Tower Owners Manual - Page 39
, and Virtualization technology for direct I/O must be enabled to use this feature. • Trusted Execution - This option is disabled by default. Description Displays the service tag of your computer. Allows you to create a system asset tag if an asset tag is not already set. This option is not set by - Dell OptiPlex 7020 Tower | OptiPlex 7020 Mini Tower Owners Manual - Page 40
Option Client Address Method Client IP Address Client SubnetMask Client Gateway DNS IP Address Domain Name Advanced Table 12. System Logs Option BIOS events Description NOTE: This field is only relevant when the Integrated NIC control in the System Configuration group is set to Enable with Cloud - Dell OptiPlex 7020 Tower | OptiPlex 7020 Mini Tower Owners Manual - Page 41
start the computer. 2. Go to dell.com/support. 3. Enter the Service Tag or Express Service Code and click Submit. NOTE: To locate the Service Tag, click Where is my Service Tag? NOTE: If you cannot find your Service Tag, click Detect My Product. Proceed with the instructions on screen. 4. If you are - Dell OptiPlex 7020 Tower | OptiPlex 7020 Mini Tower Owners Manual - Page 42
System and Setup Password You can create a system password and a setup password to secure your computer. Password Type System password Setup password Description Password that you must enter to log on to your system. Password that you must enter to access and make changes to the BIOS settings of - Dell OptiPlex 7020 Tower | OptiPlex 7020 Mini Tower Owners Manual - Page 43
Deleting or Changing an Existing System and/or Setup Password Ensure that the Password Status is Unlocked (in the System Setup) before attempting to delete or change the existing System and/or Setup password. You cannot delete or change an existing System or Setup password, if the Password Status is - Dell OptiPlex 7020 Tower | OptiPlex 7020 Mini Tower Owners Manual - Page 44
ePSA diagnostics before contacting Dell for technical assistance. The purpose of running diagnostics is to test your computer's hardware without requiring additional equipment or risking data loss. If you are unable to fix the problem yourself, service and support personnel can use the diagnostics - Dell OptiPlex 7020 Tower | OptiPlex 7020 Mini Tower Owners Manual - Page 45
Your Computer You can troubleshoot your computer using indicators like Diagnostic Lights, Beep Codes, and Error Messages during the operation of the computer. Power LED Diagnostics The power button LED - Dell OptiPlex 7020 Tower | OptiPlex 7020 Mini Tower Owners Manual - Page 46
sector. found Alert! Previous attempts at booting this system have failed at checkpoint [nnnn]. For help in resolving this problem, please note this checkpoint and contact Dell Technical Support. The computer failed to complete the boot routine three consecutive times for the same error. Contact - Dell OptiPlex 7020 Tower | OptiPlex 7020 Mini Tower Owners Manual - Page 47
. This message is usually followed by specific information-for example, Printer out of paper. Take the appropriate action to resolve the problem. Hard-disk drive The hard drive failed initialization. configuration error Hard-disk drive controller failure The hard drive failed initialization - Dell OptiPlex 7020 Tower | OptiPlex 7020 Mini Tower Owners Manual - Page 48
Error Message Description Keyboard failure A cable or connector may be loose, or the keyboard or keyboard/mouse controller may be faulty. Memory address A memory module may be faulty or improperly seated. Reinstall the memory line failure at modules and, if necessary, replace them. address, - Dell OptiPlex 7020 Tower | OptiPlex 7020 Mini Tower Owners Manual - Page 49
Message Description Plug and play The computer encountered a problem while trying to configure one or more cards. immediately back up your data and replace your hard drive by calling your support desk or Dell. Write fault The operating system cannot write to the floppy or hard drive - Dell OptiPlex 7020 Tower | OptiPlex 7020 Mini Tower Owners Manual - Page 50
of your computer, click Start (Start icon) → Help and Support, and then select the option to view information about your computer. Table 15. Processor Feature Processor type Specification • Intel Core i3/i5/i7 series • Intel Dual Core series Total Cache Up to 8 MB cache depending on processor - Dell OptiPlex 7020 Tower | OptiPlex 7020 Mini Tower Owners Manual - Page 51
slot each direction speed-16 GB/s SATA: 1.5 Gbps, 3.0 Gbps, and 6 Gbps Table 22. Cards Feature PCI: Mini-Tower Small Form Factor PCI Express x1: Mini-Tower Small Form Factor PCI-Express x16: Mini-Tower Small Form Factor Specification up to one full-height card none up to three full-height cards up - Dell OptiPlex 7020 Tower | OptiPlex 7020 Mini Tower Owners Manual - Page 52
Panel Network Adapter Serial Parallel USB 2.0: USB 3.0: Video Table 25. Internal Connectors Feature PCI 2.3 data width (maximum) - 32 bits Mini-Tower Specification one slim-optical drive bay two one two two Specification • one microphone connector • one headphone connector • one line-out connector - Dell OptiPlex 7020 Tower | OptiPlex 7020 Mini Tower Owners Manual - Page 53
Small Form Factor • one 6-pin connector • one 10-pin connector • one 12-pin connector • one 20-pin connector Thermal Sensor: Mini-Tower Small Form Factor Processor Processor Fan Service mode jumper one 2-pin connector none one 1150-pin connector one 5-pin connector one 2-pin connector 53 - Dell OptiPlex 7020 Tower | OptiPlex 7020 Mini Tower Owners Manual - Page 54
Feature Password clear jumper RTC reset jumper Internal speaker Intruder connector Power connector: Mini-Tower, Small Form Factor Specification one 2-pin connector one 2-pin connector one 5-pin connector one 3-pin connector one 8-pin, one 4-pin, one 6-pin, connector Table 26. - Dell OptiPlex 7020 Tower | OptiPlex 7020 Mini Tower Owners Manual - Page 55
is calculated by using the power supply wattage rating. Mini-Tower Small Form Factor Coin-cell battery Wattage 290 W 255 50 Hz to 60 Hz, 4.4 A 3 V CR2032 lithium coin cell Table 28. Physical Dimension Mini-Tower Height 36.00 cm (14.17 inches) Small Form Factor 29.00 cm (11.42 inches) Width - Dell OptiPlex 7020 Tower | OptiPlex 7020 Mini Tower Owners Manual - Page 56
packing slip, bill, or Dell product catalog. Dell provides several online and telephone-based support and service options. Availability varies by country and product, and some services may not be available in your area. To contact Dell for sales, technical support, or customer service issues: Go to
-
 1
1 -
 2
2 -
 3
3 -
 4
4 -
 5
5 -
 6
6 -
 7
7 -
8
-
9
-
10
-
11
-
12
-
13
-
14
-
15
-
16
-
17
-
18
-
19
-
20
-
21
-
22
-
23
-
24
-
25
-
26
-
27
-
28
-
29
-
30
-
31
-
32
-
33
-
34
-
35
-
36
-
37
-
38
-
39
-
40
-
41
-
42
-
43
-
44
-
45
-
46
-
47
-
48
-
49
-
50
-
51
-
52
-
53
-
54
-
55
-
56
 |
 |

Dell OptiPlex 7020 Mini Tower
Owner's Manual
Regulatory Model: D13M
Regulatory Type: D13M001