Dell P2011H User's Guide - Page 5
Monitor Specifications
 |
View all Dell P2011H manuals
Add to My Manuals
Save this manual to your list of manuals |
Page 5 highlights
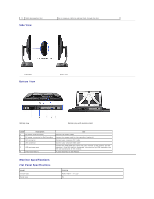
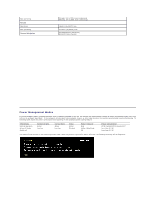
8 Cable management slot Side View Use to organize cables by placing them through the slot. Left view Bottom View Right view Bottom view Bottom view with monitor stand Label Description Use 1 AC power cord connector Connect the power cable 2 DC power connector for Dell Soundbar. Connect the power cord for the soundbar (optional) 3 DVI connector Connect your computer DVI cable 4 VGA connector Connect your computer VGA cable 5 USB upstream port Connect the USB cable that came with your monitor to the monitor and the computer. Once this cable is connected, you can use the USB connectors on the side and bottom of the monitor. 6 Stand lock feature To lock the Stand to the Monitor Monitor Specifications Flat Panel Specifications Model Screen type Panel type P2011H Active matrix - TFT LCD TN
-
 1
1 -
 2
2 -
 3
3 -
 4
4 -
 5
5 -
 6
6 -
 7
7 -
 8
8 -
 9
9 -
 10
10 -
 11
11 -
12
-
13
-
14
-
15
-
16
-
17
-
18
-
19
-
20
-
21
-
22
-
23
-
24
-
25
-
26
-
27
-
28
-
29
-
30
-
31
-
32
-
33
-
34
-
35
-
36
-
37
 |
 |
