Dell PowerConnect B-TI24x Hardware Installation Guide - Page 55
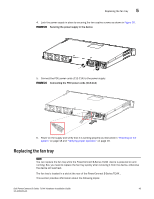
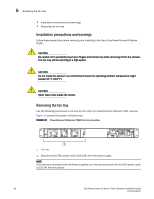
Replacing the fan tray
 |
View all Dell PowerConnect B-TI24x manuals
Add to My Manuals
Save this manual to your list of manuals |
Page 55 highlights
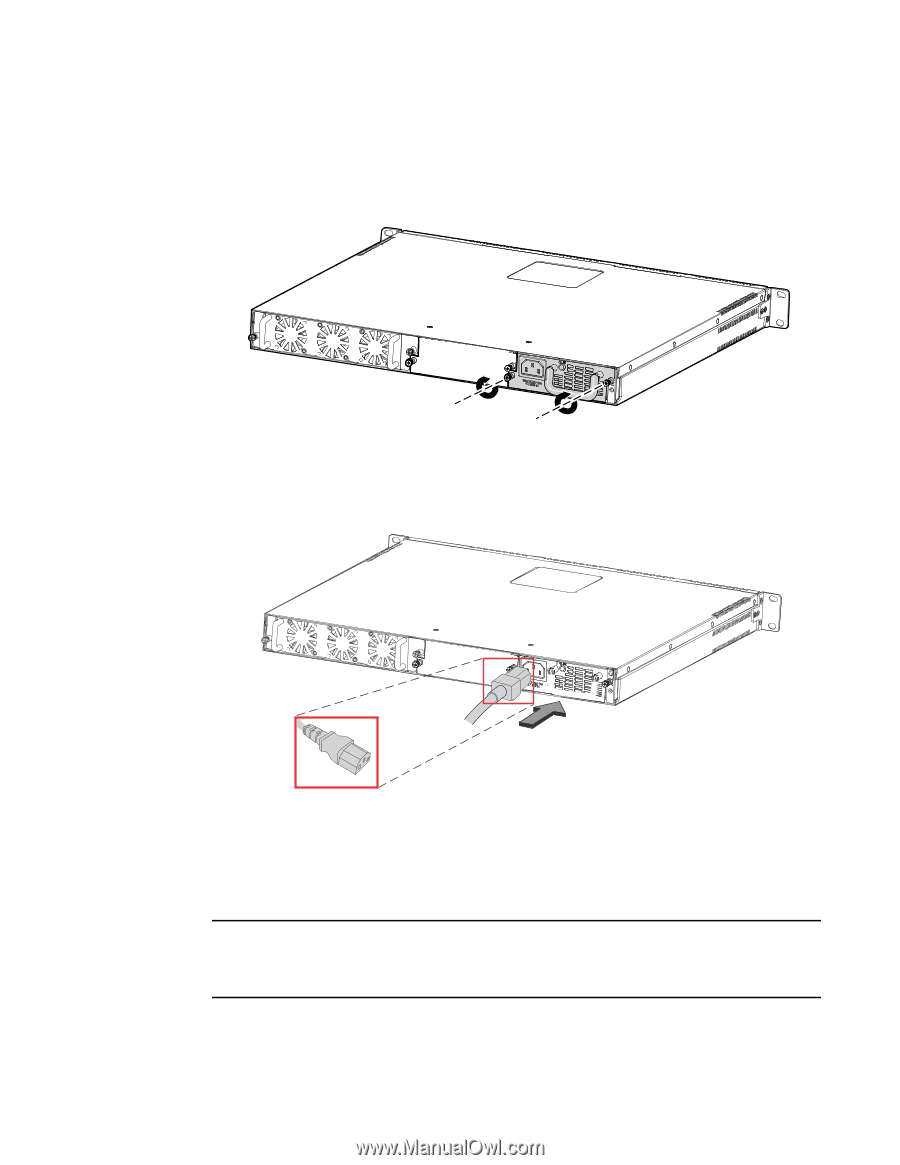
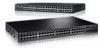
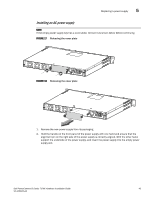
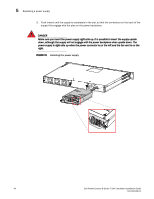
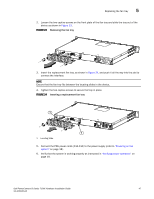
Replacing the fan tray 5 4. Lock the power supply in place by securing the two captive screws as shown in Figure 20. FIGURE 20 Securing the power supply in the device 5. Connect the PDU power cords (C13-C14) to the power supply. FIGURE 21 Connecting the PDU power cords (C13-C14) 6. Power on the supply and verify that it is working properly as instructed in "Powering on the system" on page 18 and "Verifying proper operation" on page 19. Replacing the fan tray NOTE You can replace the fan tray while the PowerConnect B-Series TI24X device is powered on and running. But, you need to replace the fan tray quickly after removing it from the device, otherwise the device will overheat. The fan tray is located in a slot at the rear of the PowerConnect B-Series TI24X . This section provides information about the following topics: Dell PowerConnect B-Series TI24X Hardware Installation Guide 45 53-1002265-01
-
 1
1 -
2
-
3
-
4
-
5
-
6
-
7
-
8
-
9
-
10
-
11
-
12
-
13
-
14
-
15
-
16
-
17
-
18
-
19
-
20
-
21
-
22
-
23
-
24
-
25
-
26
-
27
-
28
-
29
-
30
-
31
-
32
-
33
-
34
-
35
-
36
-
37
-
38
-
39
-
40
-
41
-
42
-
43
-
44
-
45
-
46
-
47
-
48
-
49
-
 50
50 -
 51
51 -
 52
52 -
 53
53 -
 54
54 -
 55
55 -
 56
56 -
 57
57 -
 58
58 -
 59
59 -
 60
60 -
61
-
62
-
63
-
64
-
65
-
66
-
67
-
68
-
69
-
70
-
71
-
72
-
73
-
74
-
75
-
76
-
77
-
78
-
79
-
80
-
81
-
82
 |
 |