Dell PowerEdge 2200 Service Manual - Page 45
Computer Cover, Computer Cover Removal, Security Keylock
 |
View all Dell PowerEdge 2200 manuals
Add to My Manuals
Save this manual to your list of manuals |
Page 45 highlights
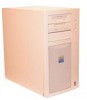
Computer Cover cover-mounting screws (4) handle Figure 4-1. Computer Cover Removal 1. Remove the four screws along the back edge of the cover. Use the key provided with the system to remove the special keylock screw if it is installed in one of the cover-mounting screw locations. key keylock screw Figure 4-2. Security Keylock Removing and Replacing Parts 4-3
-
 1
1 -
2
-
3
-
4
-
5
-
6
-
7
-
8
-
9
-
10
-
11
-
12
-
13
-
14
-
15
-
16
-
17
-
18
-
19
-
20
-
21
-
22
-
23
-
24
-
25
-
26
-
27
-
28
-
29
-
30
-
31
-
32
-
33
-
34
-
35
-
36
-
37
-
38
-
39
-
 40
40 -
 41
41 -
 42
42 -
 43
43 -
 44
44 -
 45
45 -
 46
46 -
 47
47 -
 48
48 -
 49
49 -
 50
50 -
51
-
52
-
53
-
54
-
55
-
56
-
57
-
58
-
59
-
60
-
61
-
62
-
63
-
64
-
65
-
66
-
67
-
68
-
69
-
70
-
71
-
72
-
73
-
74
-
75
-
76
-
77
-
78
-
79
-
80
-
81
-
82
 |
 |

Removing and Replacing Parts
4-3
C
omputer Cover
Figure 4-1.
Computer Cover Removal
1.
Remove the four screws along the back edge of the cover.
Use the key provided with the system to remove the special keylock screw if
it is installed in one of the cover-mounting screw locations.
Figure 4-2.
Security Keylock
cover-mounting
screws (4)
handle
key
keylock screw