Dell PowerEdge 2450 Activating the Dell PERC 3/Si (.pdf) - Page 12
hear it snap into place. - parts
 |
View all Dell PowerEdge 2450 manuals
Add to My Manuals
Save this manual to your list of manuals |
Page 12 highlights
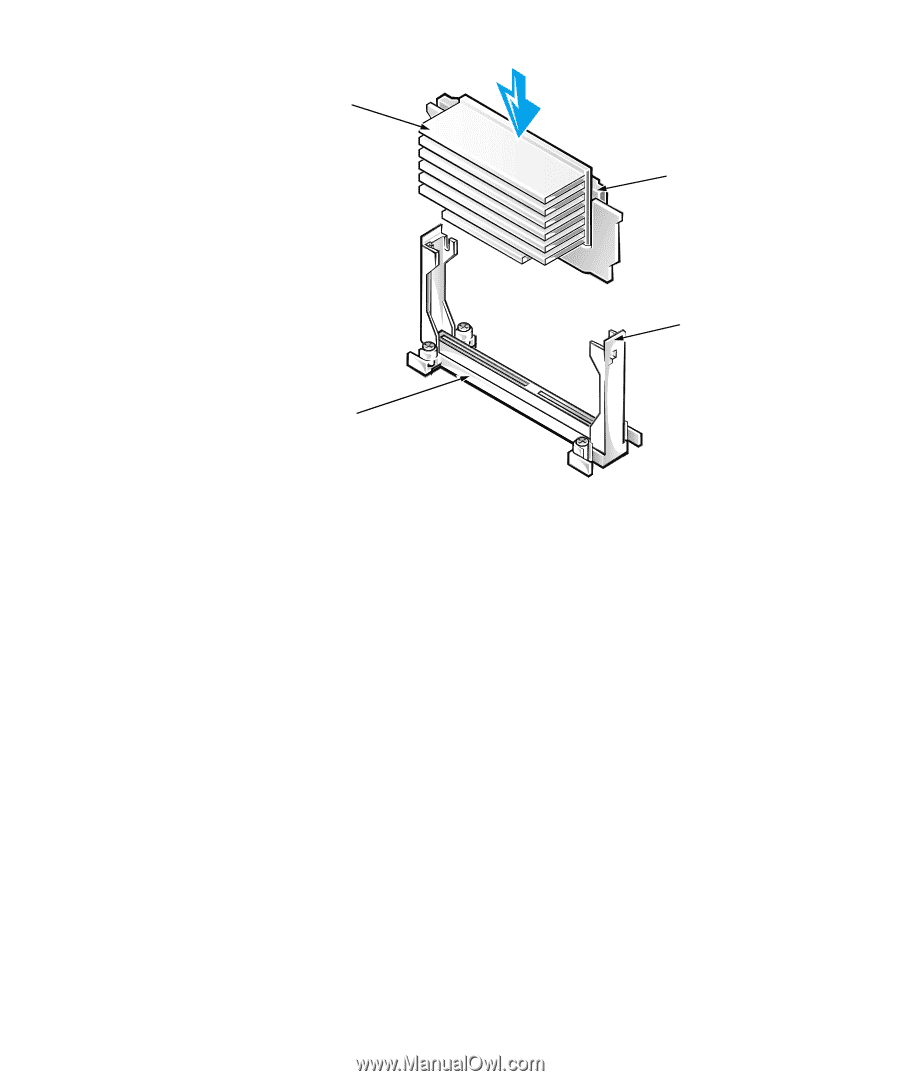
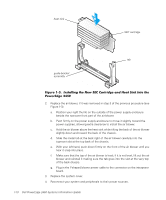
heat sink SEC cartridge tab guide-bracket assembly 2. Replace the air blower, if it was removed in step 3 of the previous procedure (see Figure 1-3). a. Position your right thumb on the outside of the power supply enclosure beside the narrower front part of the air blower. b. Push firmly on the power supply enclosure to move it slightly toward the power supplies, allowing extra clearance to install the air blower. c. Hold the air blower above the heat sink while tilting the back of the air blower slightly down and toward the back of the chassis. d. Slide the metal tab at the back right of the air blower carefully into the topmost slot at the top back of the chassis. e. With your left hand, push down firmly on the front of the air blower until you hear it snap into place. f. Make sure that the top of the air blower is level; if it is not level, lift out the air blower and reinstall it making sure the tab goes into the slot at the very top of the back chassis. g. Plug in the Y-shaped blower power cable to the connector on the interposer board. 3. Replace the system cover. 4. Reconnect your system and peripherals to their power sources. 1-10 Dell PowerEdge 2450 Systems Information Update
-
 1
1 -
2
-
3
-
4
-
5
-
6
-
 7
7 -
 8
8 -
 9
9 -
 10
10 -
 11
11 -
 12
12
 |
 |