Dell PowerEdge M910 Web Tools Administrator’s Guide - Page 90
Configuration File Name
 |
View all Dell PowerEdge M910 manuals
Add to My Manuals
Save this manual to your list of manuals |
Page 90 highlights
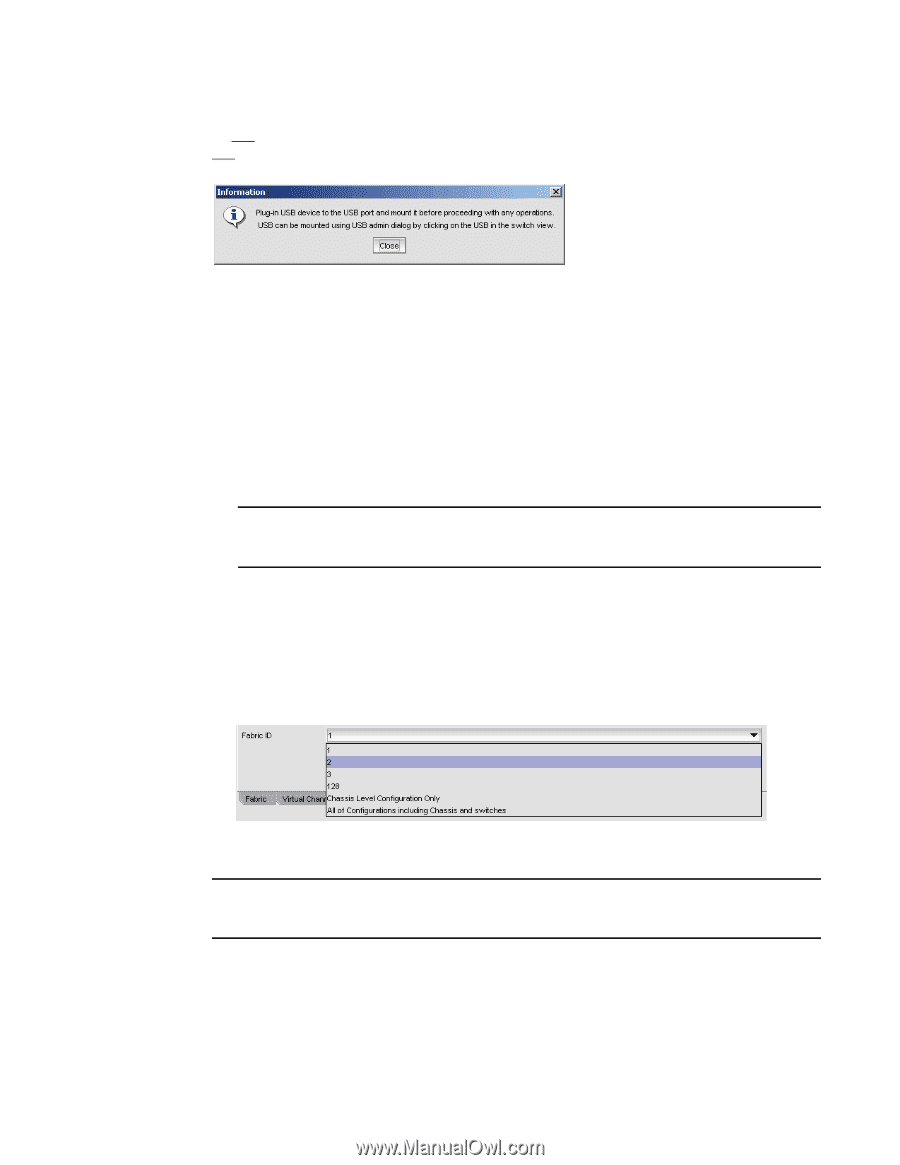
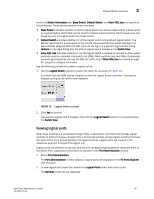
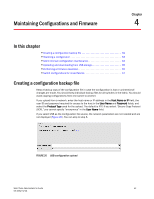
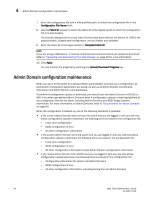
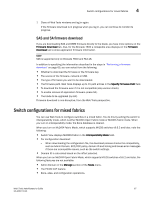
DRAFT: BROCADE CONFIDENTIAL 4 Creating a configuration backup file An info link is enabled when USB is chosen as the source of the configuration file. If you click on info, the following information message displays (Figure 21). FIGURE 21 Information dialog box To create a configuration backup file, perform the following task. 1. Open the Switch Administration window. 2. Select Show Advanced Mode. 3. Select the Configure tab. The Configure screen displays. 4. Select the Upload/Download tab. The Upload/Download configuration screen displays (Figure 20). NOTE By default, Config Upload is chosen under Function, and Network is chosen as the source of the configuration file. 5. Enter the configuration file with a fully-qualified path, or select the configuration file name in the Configuration File Name field. 6. Use the Fabric ID selector to select the fabric ID of the logical switch from which the configuration file is to uploaded. The selector displays all the virtual fabric IDs that have been defined, the default of 128 for the physical switch, chassis level configuration, and all chassis and switches. FIGURE 22 Fabric ID selector NOTE If you are using a USB device, it must be connected and mounted before you upload or download. Refer to "Uploading and downloading from USB storage" on page 65 for more information. 7. Click Apply. You can monitor the progress by watching the Upload/Download Progress bar. 62 Web Tools Administrator's Guide 53-1001772-01
-
 1
1 -
2
-
3
-
4
-
5
-
6
-
7
-
8
-
9
-
10
-
11
-
12
-
13
-
14
-
15
-
16
-
17
-
18
-
19
-
20
-
21
-
22
-
23
-
24
-
25
-
26
-
27
-
28
-
29
-
30
-
31
-
32
-
33
-
34
-
35
-
36
-
37
-
38
-
39
-
40
-
41
-
42
-
43
-
44
-
45
-
46
-
47
-
48
-
49
-
50
-
51
-
52
-
53
-
54
-
55
-
56
-
57
-
58
-
59
-
60
-
61
-
62
-
63
-
64
-
65
-
66
-
67
-
68
-
69
-
70
-
71
-
72
-
73
-
74
-
75
-
76
-
77
-
78
-
79
-
80
-
81
-
82
-
83
-
84
-
 85
85 -
 86
86 -
 87
87 -
 88
88 -
 89
89 -
 90
90 -
 91
91 -
 92
92 -
 93
93 -
 94
94 -
 95
95 -
96
-
97
-
98
-
99
-
100
-
101
-
102
-
103
-
104
-
105
-
106
-
107
-
108
-
109
-
110
-
111
-
112
-
113
-
114
-
115
-
116
-
117
-
118
-
119
-
120
-
121
-
122
-
123
-
124
-
125
-
126
-
127
-
128
-
129
-
130
-
131
-
132
-
133
-
134
-
135
-
136
-
137
-
138
-
139
-
140
-
141
-
142
-
143
-
144
-
145
-
146
-
147
-
148
-
149
-
150
-
151
-
152
-
153
-
154
-
155
-
156
-
157
-
158
-
159
-
160
-
161
-
162
-
163
-
164
-
165
-
166
-
167
-
168
-
169
-
170
-
171
-
172
-
173
-
174
-
175
-
176
-
177
-
178
-
179
-
180
-
181
-
182
-
183
-
184
-
185
-
186
-
187
-
188
-
189
-
190
-
191
-
192
-
193
-
194
-
195
-
196
-
197
-
198
-
199
-
200
-
201
-
202
-
203
-
204
-
205
-
206
-
207
-
208
-
209
-
210
-
211
-
212
-
213
-
214
-
215
-
216
-
217
-
218
-
219
-
220
-
221
-
222
-
223
-
224
-
225
-
226
-
227
-
228
-
229
-
230
-
231
-
232
-
233
-
234
-
235
-
236
-
237
-
238
-
239
-
240
-
241
-
242
-
243
-
244
-
245
-
246
-
247
-
248
-
249
-
250
-
251
-
252
-
253
-
254
-
255
-
256
-
257
-
258
-
259
-
260
-
261
-
262
-
263
-
264
-
265
-
266
-
267
-
268
-
269
-
270
-
271
-
272
-
273
-
274
-
275
-
276
-
277
-
278
-
279
-
280
-
281
-
282
-
283
-
284
-
285
-
286
-
287
-
288
-
289
-
290
-
291
-
292
-
293
-
294
-
295
-
296
-
297
-
298
-
299
-
300
-
301
-
302
-
303
-
304
-
305
-
306
-
307
-
308
-
309
-
310
 |
 |