Dell PowerEdge R760 PowerEdge RAID Controller S160 Users Guide - Page 25
Controller management, Viewing the controller properties, Changing the boot order of the virtual disks
 |
View all Dell PowerEdge R760 manuals
Add to My Manuals
Save this manual to your list of manuals |
Page 25 highlights
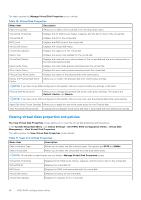
Controller management Viewing the controller properties The View Controller Information screen allows you to view your controller and firmware properties. In the System Setup Main Menu, click Device Settings > Dell PERC S160 Configuration Utility > Controller Management > View Controller Information The table explains the View Controller Information screen details: Table 9. View Controller Information Menu Item PCI ID Description Displays the PCI ID Physical disk Count Displays the total number of physical disks available on the system Virtual Disk Count Displays the total number of virtual disks available UEFI Driver Version Displays the UEFI driver version installed on the system Firmware Build Time Displays the time and date the firmware was last updated. Changing the boot order of the virtual disks Set Bootable Device allows you to change the boot order of the virtual disks. 1. Enter the Dell PERC S160 Configuration Utility. See Entering the DELL PERC S160 Configuration Utility. 2. Click Controller Management > Change Controller Properties. 3. Click Set Bootable Device. A Change Order dialog box displays the list of virtual disks available. 4. Use the arrow keys to set a virtual disk and + or - to change the order of the virtual disks that need to be booted first. 5. Click Ok. The changes to the boot order of the virtual disks are displayed. Stopping the system from booting if there is a critical BIOS error The Change Controller Properties screen allows you to either enable or disable the option to stop the system from booting if there is any critical BIOS error requiring manual intervention. 1. Enter the Dell PERC S160 Configuration Utility. See Entering the DELL PERC S160 configuration utility. 2. Click Controller Management > Change Controller Properties. 3. You can either enable or disable the Enable BIOS Stop On Error. Converting a physical disk to a Non-RAID disk 1. Enter the Dell PERC S160 Configuration Utility. See Entering the DELL PERC S160 Configuration Utility 2. Click Controller Management > Convert to Non-RAID Disk. 3. Select the interface type. 4. Select the physical disks. Click Check All to select all the disks available. 5. Click Apply Changes. Converting physical disk to RAID capable disk CAUTION: Any data already existing on the disk will be lost during this operation. Ensure that you have backed up critical data before converting the physical disk to a RAID capable disk. UEFI RAID configuration utility 25
-
 1
1 -
2
-
3
-
4
-
5
-
6
-
7
-
8
-
9
-
10
-
11
-
12
-
13
-
14
-
15
-
16
-
17
-
18
-
19
-
 20
20 -
 21
21 -
 22
22 -
 23
23 -
 24
24 -
 25
25 -
 26
26 -
 27
27 -
 28
28 -
 29
29 -
 30
30 -
31
-
32
-
33
-
34
-
35
-
36
-
37
-
38
-
39
-
40
-
41
-
42
-
43
-
44
-
45
-
46
-
47
-
48
-
49
-
50
-
51
 |
 |
