Dell PowerEdge SDS 100 Improving NFS performance on HPC clusters with Dell Flu - Page 33
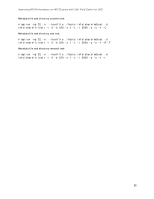
A.5. XFS and DFC configuration, su=512k, sw=40, dev/sdc, disk=/dev/sdc, dev/fldc0
 |
View all Dell PowerEdge SDS 100 manuals
Add to My Manuals
Save this manual to your list of manuals |
Page 33 highlights
Improving NFS Performance on HPC Clusters with Dell Fluid Cache for DAS Stripe Element Size Disk Cache Policy : 512 KB : Disabled A.5. XFS and DFC configuration In this final step of the configuration on the server, the XFS file system is created, DFC is configured, and the storage exported to the I/O clients via NFS. 1. Create the XFS file system on the RAID 60 virtual disk attached to the PERC H810 adapter. Note the stripe unit (su) and stripe width (sw). The stripe unit is the stripe element size that was used to format the virtual disk in step 3, Section A.4. The stripe width is the number of data drives in the virtual disk. This solution uses 48 disks, a RAID 6 configuration with a spanlength of 12 (10 data disks and 2 parity disks) and that results in a total of 40 data disks. [root@nfs-dfc ~]# mkfs.xfs -d su=512k,sw=40 -l size=128m /dev/sdc 2. Set up the cache pool for Dell Fluid Cache. Verify that the DFC service is running. [root@nfs-dfc ~]# service fluid_cache status Add two SSDs to the cache pool and check the status. [root@nfs-dfc ~]# fldc --add --ssd=/dev/rssda -v [root@nfs-dfc ~]# fldc --add --ssd=/dev/rssdb -v [root@nfs-dfc ~]# fldc -v --list --ssd Enable caching on the RAID 60 external virtual disk. Note the device and the mode for caching (write-back in the command below). [root@nfs-dfc ~]# fldc --enable --disk=/dev/sdc --mode=wb At this point, DFC will create a new device called /dev/fldc0 that includes the cache pool and the virtual disk. Check the DFC status [root@nfs-dfc ~]# fldc --status 3. Mount the file system. Note the device mounted is /dev/fldc0 [root@nfs-dfc ~]# mount -o noatime,allocsize=1g,nobarrier,inode64,logbsize=262144,attr2 /dev/fldc0 /home/xfs/ 4. Export this file system over NFS by modifying /etc/exports. Note that the share is exported with the 'sync' option. [root@nfs-dfc ~]# cat /etc/exports /home/xfs *(rw,no_root_squash,sync) 5. Restart the NFS service. Now the clients can mount the NFS share over the ib0 interface. Note that this solution recommends NFS v3 based on the results of a previous study. [root@nfs-dfc ~]# service nfs restart 33
-
 1
1 -
2
-
3
-
4
-
5
-
6
-
7
-
8
-
9
-
10
-
11
-
12
-
13
-
14
-
15
-
16
-
17
-
18
-
19
-
20
-
21
-
22
-
23
-
24
-
25
-
26
-
27
-
 28
28 -
 29
29 -
 30
30 -
 31
31 -
 32
32 -
 33
33 -
 34
34 -
 35
35 -
 36
36 -
 37
37 -
 38
38
 |
 |