Dell PowerVault LTO4-120HH Dell PowerVault LTO5-140HH Tape Drive (IBM) v2 User - Page 28
Step 4, Attaching Mounting Hardware, Step 5, Installing the Drive
 |
View all Dell PowerVault LTO4-120HH manuals
Add to My Manuals
Save this manual to your list of manuals |
Page 28 highlights
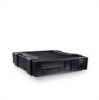
Step 4 - Attaching Mounting Hardware If your system requires special rails or other hardware to install the tape drive, mount them on the tape drive in this step. If your system does not require special mounting hardware, proceed to step 5. Step 5 - Installing the Drive Slide the tape drive into the open bay, aligning the tray or rails with the slots in the bay, as shown in Figure 7. Figure 7. Install the Drive If your system does not use mounting hardware, check that the holes in the chassis are aligned with the holes in the side of the tape drive (see Figure 8).
-
 1
1 -
2
-
3
-
4
-
5
-
6
-
7
-
8
-
9
-
10
-
11
-
12
-
13
-
14
-
15
-
16
-
17
-
18
-
19
-
20
-
21
-
22
-
 23
23 -
 24
24 -
 25
25 -
 26
26 -
 27
27 -
 28
28 -
 29
29 -
 30
30 -
 31
31 -
 32
32 -
 33
33 -
34
-
35
-
36
-
37
-
38
-
39
-
40
-
41
-
42
-
43
-
44
-
45
-
46
-
47
-
48
-
49
-
50
-
51
-
52
-
53
-
54
-
55
-
56
 |
 |

Step 4
—
Attaching Mounting Hardware
If your system requires special rails or other hardware to install the tape drive, mount them on the tape drive in this step.
If your system does not require special mounting hardware, proceed to step 5.
Step 5
—
Installing the Drive
Slide the tape drive into the open bay, aligning the tray or rails with the slots in the bay, as shown in Figure 7.
Figure 7. Install the Drive
If your system does not use mounting hardware, check that the holes in the chassis are aligned with the holes in the side of the tape drive (see Figure 8).