Dell PowerVault NX200 User Manual - Page 35
Add or Remove Snap-ins, Active Directory Domain Controller
 |
View all Dell PowerVault NX200 manuals
Add to My Manuals
Save this manual to your list of manuals |
Page 35 highlights
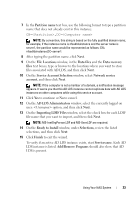
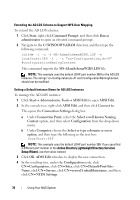
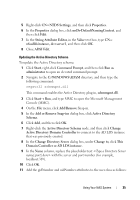
5 Right-click CN=NTDS Settings, and then click Properties. 6 In the Properties dialog box, click msDs-DefaultNamingContext, and then click Edit. 7 In the String Attribute Editor, in the Value text box, type CN= nfsadldsinstance, dc=server1, and then click OK. 8 Close ADSI Edit. Updating the Active Directory Schema To update the Active Directory schema: 1 Click Start, right-click Command Prompt, and then click Run as administrator to open an elevated command prompt. 2 Navigate to the C:\WINDOWS\ADAM directory, and then type the following command: regsvr32 schmmgmt.dll This command enables the Active Directory plug-in, schmmgmt.dll. 3 Click Start Run, and type MMC to open the Microsoft Management Console (MMC). 4 On the File menu, click Add/Remove Snap-in. 5 In the Add or Remove Snap-ins dialog box, click Active Directory Schema. 6 Click Add, and then click OK. 7 Right-click the Active Directory Schema node, and then click Change Active Directory Domain Controller to connect to the AD LDS instance that was previously created. 8 In the Change Directory Server dialog box, under Change to, click This Domain Controller or AD LDS instance. 9 In the Name column, replace the placeholder text with the server and port number (for example, localhost:389). 10 Click OK. 11 Add the gidNumber and uidNumber attributes to the user class as follows: Using Your NAS System 35
-
 1
1 -
2
-
3
-
4
-
5
-
6
-
7
-
8
-
9
-
10
-
11
-
12
-
13
-
14
-
15
-
16
-
17
-
18
-
19
-
20
-
21
-
22
-
23
-
24
-
25
-
26
-
27
-
28
-
29
-
 30
30 -
 31
31 -
 32
32 -
 33
33 -
 34
34 -
 35
35 -
 36
36 -
 37
37 -
 38
38 -
 39
39 -
 40
40 -
41
-
42
-
43
-
44
-
45
-
46
-
47
-
48
-
49
-
50
 |
 |
