Dell PowerVault NX200 User Manual - Page 41
Creating Quotas and File Screens
 |
View all Dell PowerVault NX200 manuals
Add to My Manuals
Save this manual to your list of manuals |
Page 41 highlights
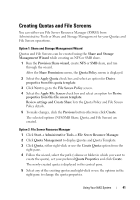
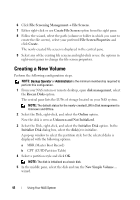
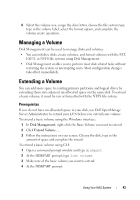
Creating Quotas and File Screens You can either use File Server Resource Manager (FSRM) from Administrative Tools or Share and Storage Management for your Quotas and File Screen operations. Option 1: Share and Storage Management Wizard Quotas and File Screens can be created using the Share and Storage Management Wizard while creating an NFS or SMB share. 1 Run the Provision Share wizard, create NFS or SMB share, and run through the wizard. After the Share Permission screen, the Quota Policy screen is displayed. 2 Select the Apply Quota check box and select an option for Derive properties from this quota template. 3 Click Next to go to the File Screen Policy screen. 4 Select the Apply File Screen check box and select an option for Derive properties from this file screen template. Review settings and Create Share lists the Quota Policy and File Screen Policy details. 5 To make changes, click the Previous button otherwise click Create. The selected options (NFS/SMB Share, Quota, and File Screen) are created. Option 2: File Server Resource Manager 1 Click Start Administrative Tools File Server Resource Manager. 2 Click Quota Management to display Quotas and Quota Template. 3 Click Quota, either right-click or use the Create Quota option from the right pane. 4 Follow the wizard, select the path (volume or folder in which you want to create the quota), set your preferred Quota Properties and click Create. The newly-created quota is displayed in the central pane. 5 Select any of the existing quotas and right-click or use the options in the right pane to change the quota properties. Using Your NAS System 41
-
 1
1 -
2
-
3
-
4
-
5
-
6
-
7
-
8
-
9
-
10
-
11
-
12
-
13
-
14
-
15
-
16
-
17
-
18
-
19
-
20
-
21
-
22
-
23
-
24
-
25
-
26
-
27
-
28
-
29
-
30
-
31
-
32
-
33
-
34
-
35
-
 36
36 -
 37
37 -
 38
38 -
 39
39 -
 40
40 -
 41
41 -
 42
42 -
 43
43 -
 44
44 -
 45
45 -
 46
46 -
47
-
48
-
49
-
50
 |
 |