Dell Precision 530 Service Manual - Page 66
Chassis Intrusion, Diskette Drive A, Drive, Secondary Drives, Primary Drives
 |
View all Dell Precision 530 manuals
Add to My Manuals
Save this manual to your list of manuals |
Page 66 highlights
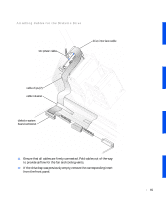
www.dell.com | support.dell.com From inside the cover, press the ends of the insert outward with your finger until the insert snaps free of the front panel. NOTE: If you are installing a hard drive, do not remove the drive bay insert. 13 Close the computer cover. 14 Stand the computer upright. 15 Reconnect the computer and devices to their electrical outlets, and turn them on. NOTE: If enabled, the Chassis Intrusion option will cause the following message to be displayed at the next computer start-up: ALERT! Cover was previously removed. 16 Enter system setup and update your drive configuration information: • Reset the Chassis Intrusion option, as described in your User's Guide. • If you installed a diskette drive, update the Diskette Drive A option to enable your new diskette drive. • If you installed an EIDE CD, zip, or tape drive, set the appropriate Drive option (0 or 1) under Secondary Drives to Auto. • If you installed a hard drive, update the drive settings under Primary Drives. After you update the system settings, exit system setup and reboot the computer. 17 If you installed a hard drive, partition and logically format the drive before proceeding to the next step. See the operating system's documentation for instructions. 18 Test the drive to verify that it is operating properly. • If the drive you installed is a hard drive, run the Dell Diagnostics to test the drive. • For other types of drives, see the drive's documentation for information on testing the drive. NOTE: Tape drives sold by Dell come with their own operating software and documentation. After you install a tape drive, refer to the documentation that came with the drive for instructions on installing and using the tape drive software. 66
-
 1
1 -
2
-
3
-
4
-
5
-
6
-
7
-
8
-
9
-
10
-
11
-
12
-
13
-
14
-
15
-
16
-
17
-
18
-
19
-
20
-
21
-
22
-
23
-
24
-
25
-
26
-
27
-
28
-
29
-
30
-
31
-
32
-
33
-
34
-
35
-
36
-
37
-
38
-
39
-
40
-
41
-
42
-
43
-
44
-
45
-
46
-
47
-
48
-
49
-
50
-
51
-
52
-
53
-
54
-
55
-
56
-
57
-
58
-
59
-
60
-
 61
61 -
 62
62 -
 63
63 -
 64
64 -
 65
65 -
 66
66 -
 67
67 -
 68
68 -
 69
69 -
 70
70 -
 71
71 -
72
-
73
-
74
-
75
-
76
-
77
-
78
-
79
-
80
-
81
-
82
-
83
-
84
-
85
-
86
-
87
-
88
-
89
-
90
-
91
-
92
-
93
-
94
-
95
-
96
-
97
-
98
-
99
-
100
-
101
-
102
-
103
-
104
-
105
-
106
-
107
-
108
-
109
-
110
-
111
-
112
-
113
-
114
-
115
-
116
-
117
-
118
-
119
-
120
-
121
-
122
-
123
-
124
-
125
-
126
 |
 |