Dell Studio Hybrid Studio Slim Setup Guide - Page 16
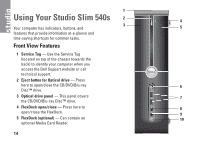
Using Your Studio Slim 540s, Front View Features
 |
View all Dell Studio Hybrid Studio Slim manuals
Add to My Manuals
Save this manual to your list of manuals |
Page 16 highlights
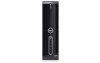
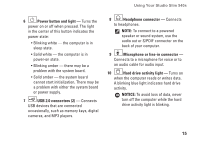
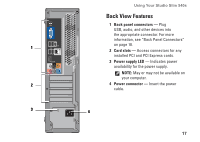
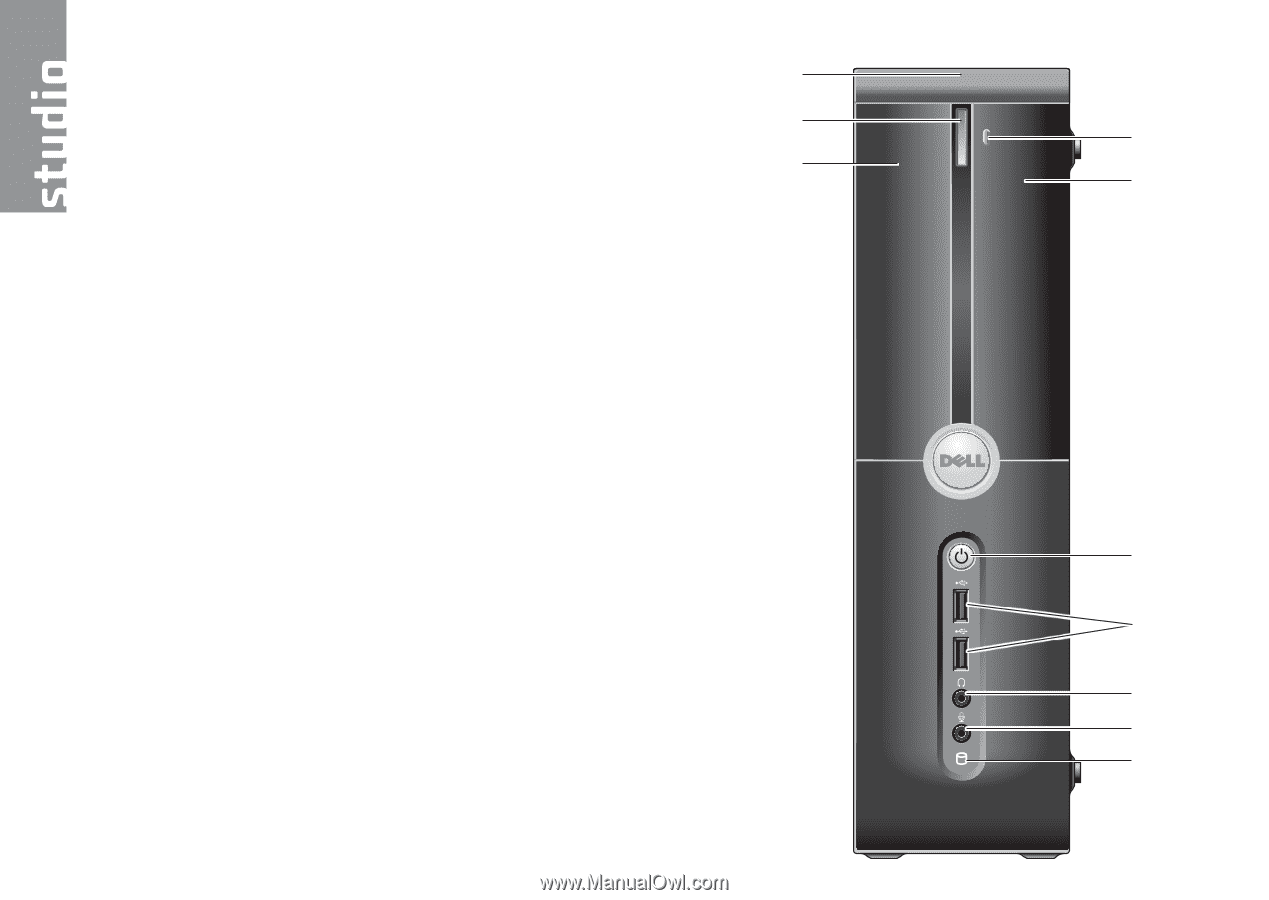
1 Using Your Studio Slim 540s 2 4 3 Your computer has indicators, buttons, and 5 features that provide information at-a-glance and time-saving shortcuts for common tasks. Front View Features 1 Service Tag - Use the Service Tag (located on top of the chassis towards the back) to identify your computer when you access the Dell Support website or call technical support. 2 Eject button for Optical drive - Press here to open/close the CD/DVD/Blu-ray 6 Disc™ drive. 3 Optical drive panel - This panel covers 7 the CD/DVD/Blu-ray Disc™ drive. 4 FlexDock open/close - Press here to 8 open/close the FlexDock. 9 5 FlexDock (optional) - Can contain an 10 optional Media Card Reader. 14
-
 1
1 -
2
-
3
-
4
-
5
-
6
-
7
-
8
-
9
-
10
-
 11
11 -
 12
12 -
 13
13 -
 14
14 -
 15
15 -
 16
16 -
 17
17 -
 18
18 -
 19
19 -
 20
20 -
 21
21 -
22
-
23
-
24
-
25
-
26
-
27
-
28
-
29
-
30
-
31
-
32
-
33
-
34
-
35
-
36
-
37
-
38
-
39
-
40
-
41
-
42
-
43
-
44
-
45
-
46
-
47
-
48
-
49
-
50
-
51
-
52
-
53
-
54
-
55
-
56
-
57
-
58
-
59
-
60
 |
 |
14
Your computer has indicators, buttons, and
features that provide information at-a-glance and
time-saving shortcuts for common tasks.
Front View Features
1
Service Tag
— Use the Service Tag
(located on top of the chassis towards the
back) to identify your computer when you
access the Dell Support website or call
technical support.
2
Eject button for Optical drive —
Press
here to open/close the CD/DVD/Blu-ray
Disc™ drive.
3
Optical drive panel —
This panel covers
the CD/DVD/Blu-ray Disc™ drive.
4
FlexDock open/close —
Press here to
open/close the FlexDock.
5
FlexDock (optional) —
Can contain an
optional Media Card Reader.
Using Your Studio Slim 540s
6
7
10
8
9
2
3
1
4
5