Dell W5300 Owner's Manual - Page 15
Finish, Automatic search for the best driver recommended, Yes recommended, Drivers and Utilities - driver windows 7
 |
View all Dell W5300 manuals
Add to My Manuals
Save this manual to your list of manuals |
Page 15 highlights
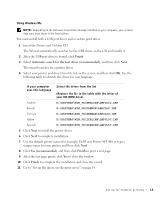
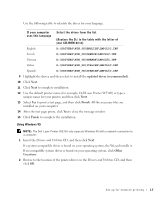
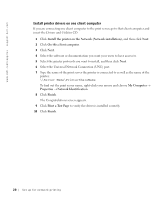
Using Windows Me NOTE: Depending on the software and printers already installed on your computer, your screens may vary from those in the instructions. You must install both a USB port driver and a custom print driver. 1 Insert the Drivers and Utilities CD. The Wizard automatically searches for the USB driver on the CD and installs it. 2 After the USB port driver is found, click Finish. 3 Select Automatic search for the best driver (recommended), and then click Next. The wizard searches for a printer driver. 4 Select your printer and driver from the list on the screen, and then click OK. Use the following table to identify the driver for your language. If your computer uses this language Select the driver from the list (Replace the D:\ in the table with the letter of your CD-ROM drive) English D:\DRIVERS\WIN_9X\ENGLISH\LMPCL5C.INF French D:\DRIVERS\WIN_9X\FRENCH\LMPCL5C.INF German D:\DRIVERS\WIN_9X\GERMAN\LMPCL5C.INF Italian D:\DRIVERS\WIN_9X\ITALIAN\LMPCL5C.INF Spanish D:\DRIVERS\WIN_9X\SPANISH\LMPCL5C.INF 5 Click Next to install the printer driver. 6 Click Next to complete installation. 7 Use the default printer name (for example, Dell Laser Printer W5300) or type a unique name for your printer, and then click Next. 8 Click Yes (recommended), and then click Finish to print a test page. 9 After the test page prints, click Yes to close the window. 10 Click Finish to complete the installation and close the wizard. 11 Go to "Set up the queue on the print server" on page 19. Set up for network printing 15
-
 1
1 -
2
-
3
-
4
-
5
-
6
-
7
-
8
-
9
-
 10
10 -
 11
11 -
 12
12 -
 13
13 -
 14
14 -
 15
15 -
 16
16 -
 17
17 -
 18
18 -
 19
19 -
 20
20 -
21
-
22
-
23
-
24
-
25
-
26
-
27
-
28
-
29
-
30
-
31
-
32
-
33
-
34
-
35
-
36
-
37
-
38
-
39
-
40
-
41
-
42
-
43
-
44
-
45
-
46
-
47
-
48
-
49
-
50
-
51
-
52
-
53
-
54
-
55
-
56
-
57
-
58
-
59
-
60
-
61
-
62
-
63
-
64
-
65
-
66
-
67
-
68
-
69
-
70
-
71
-
72
-
73
-
74
-
75
-
76
-
77
-
78
-
79
-
80
-
81
-
82
-
83
-
84
-
85
-
86
 |
 |
