Dell W5300 Owner's Manual - Page 16
Search for the best driver for your device - print driver
 |
View all Dell W5300 manuals
Add to My Manuals
Save this manual to your list of manuals |
Page 16 highlights
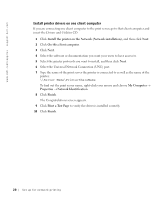
www.dell.com/supplies | support.dell.com Using Windows NT NOTE: USB support is not available for Windows NT operating systems. NOTE: You need administrative access to install printer drivers on your computer. 1 Insert the Drivers and Utilities CD. 2 Click Install the printer for Use on this Computer only (Personal Installation). When all the files are installed on your computer, the Congratulations screen appears. 3 Click Finish to complete the installation and close the wizard. 4 Go to "Set up the queue on the print server" on page 19. Using Windows 98 NOTE: Depending on the software and printers already installed on your computer, your screens may vary from those in the instructions. You must install both a USB port driver and a custom print driver. When you attached the cable and turned on the printer and computer, the Add New Hardware Wizard screen appeared on your computer screen. 1 Insert the Drivers and Utilities CD, and then click Next. 2 Select Search for the best driver for your device (recommended), and then click Next. 3 Select CD-ROM drive only, and then click Next. 4 After the wizard finds the USB port driver, click Next. 5 When the USB port driver is installed, click Finish. The wizard prompts you to search for new drivers. 6 Click Next to search for a printer driver. 7 Select Search for the best driver for your device (recommended), and then click Next. 8 Select Specify a location only and browse to the location of the printer driver on the Drivers and Utilities CD. 16 Set up for network printing
-
 1
1 -
2
-
3
-
4
-
5
-
6
-
7
-
8
-
9
-
10
-
 11
11 -
 12
12 -
 13
13 -
 14
14 -
 15
15 -
 16
16 -
 17
17 -
 18
18 -
 19
19 -
 20
20 -
 21
21 -
22
-
23
-
24
-
25
-
26
-
27
-
28
-
29
-
30
-
31
-
32
-
33
-
34
-
35
-
36
-
37
-
38
-
39
-
40
-
41
-
42
-
43
-
44
-
45
-
46
-
47
-
48
-
49
-
50
-
51
-
52
-
53
-
54
-
55
-
56
-
57
-
58
-
59
-
60
-
61
-
62
-
63
-
64
-
65
-
66
-
67
-
68
-
69
-
70
-
71
-
72
-
73
-
74
-
75
-
76
-
77
-
78
-
79
-
80
-
81
-
82
-
83
-
84
-
85
-
86
 |
 |
