Denon DN-C635 Operating Instructions - Page 14
Before Switching Off The Power, 12. Preset Functions And Operations - cd players
 |
UPC - 081757505376
View all Denon DN-C635 manuals
Add to My Manuals
Save this manual to your list of manuals |
Page 14 highlights
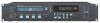
ENGLISH External synchronized recording The synchronized recording can be use when the DN-C635 is used in combination with DENON other product (DN-780R etc.). When the CD player's play button is pressed, a synchronized signal for starting is output from the EXT. SYNC. jack. When the STOP buttons on the CD player is pressed, a synchronized signal for stopping is output from the EXT. SYNC. jack. • Refer to figure 2 to connect the equipment. • Use a single RCA cable to connect the units' EXT. SYNC. OUT jacks with the units' EXT. SYNC. IN jacks. ✽ Set the infrared remote sensors of all the units to "OFF" when using this function. Also set the same infrared remote control codes for all the units. (Refer to "PRESET FUNCTIONS AND OPERATIONS" (See page 14).) Failure to make these settings could result in malfunction. 1. Load the CD into DN-C635. Load unrecorded cassette tapes into all decks. 2. Set the reverse mode and Dolby NR of all decks. 3. Adjust the twin recording level of DN-780Rs. (Master/Slave switch set to OFF.) 4. Press the Twin recording button of DN-780R. 5. Press the PLAY (1) button y of DN-C635. Recording starts all decks. NOTE: • Use tapes of the same times (lengths) as far as possible. 6. Press the STOP (2) button u of the DN-C635 to stop recording on all the connected units. Figure 2 DN-C635 LR RL DN-780R 11 BEFORE SWITCHING OFF THE POWER When you have finished using the CD player, before switching off the power be sure that the disc holder has been closed with the OPEN/CLOSE (5) button. CAUTION: • Do not forcibly close the disc holder when the power is off. It may damage the unit when it is transported. 12 PRESET FUNCTIONS AND OPERATIONS (1) List of Preset Functions • Functions can be preset using the buttons on the front panel. These presettings are stored in a permanent memory, so they are not cleared even when the power is turned off. • The functions shown on the table below can be preset. Set the functions according to the usage purpose to efficiently achieve even higher quality playback. • One of the preset functions can be used to display information on this set (microprocessor version). Preset function type Description Set upon shipment from factory No. Preset type Selection of preset type. Preset Type 1 1 Finish mode Setting of operation when playback ends. Finish Next 2 Power on mode Setting of operation when power is turned on. Power On Standby 3 Auto cue Setting of whether or not to perform the auto cue operation and the audio startup level. CueDet. -48dB 4 Setting of whether or not to automatically stop the servo Auto stop functions. Sleep 30min 5 Program 1 Setting of whether or not to play program 1. Program 1 OFF 6 Program 2 Setting of whether or not to play program 2. Program 2 OFF 7 Program 3 Setting of whether or not to play program 3. Program 3 OFF 8 Setting of whether or not to use the end monitor function End monitor and monitor time setting. End Mon. 10 s 9 E.O.M. Setting of whether or not to display the EOM and display time setting. E.O.M. 10 s 10 Setting of whether or not to standby at the next track Next track standby when the CUE button is pressed during playback. Next Stb. OFF 11 Setting of operation when select knob is turned during Next Track Reserve playback. Reserve. OFF 12 Play speed Standard playing speed setting. Normal Speed 13 Delay start Delay start time setting. Delay OFF 14 Panel lock Selection of whether or not to enable the panel buttons. Panel OFF 15 Play lock Selection of whether or not to inhibit the panel switches during playback. Play Lock OFF 16 Selection of whether or not to lock ejecting during Eject lock playback. Eject OFF 17 Time mode Setting of play mode when power is turned on. Time REMAIN 18 Frame display Selection of whether or not to display frames. FR Disp ON 19 Text display Selection of time or text display. Text OFF 20 14
-
 1
1 -
2
-
3
-
4
-
5
-
6
-
7
-
8
-
 9
9 -
 10
10 -
 11
11 -
 12
12 -
 13
13 -
 14
14 -
 15
15 -
 16
16 -
 17
17 -
 18
18 -
 19
19 -
20
-
21
-
22
-
23
-
24
-
25
-
26
-
27
-
28
-
29
-
30
 |
 |
