Denon DN-C635 Operating Instructions - Page 6
English, 1. Features, 2. Part Names And Functions - manual
 |
UPC - 081757505376
View all Denon DN-C635 manuals
Add to My Manuals
Save this manual to your list of manuals |
Page 6 highlights
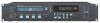
ENGLISH 2 INTRODUCTION Thank you very much for purchasing the DENON component CD / MP3 player. DENON proudly presents this advanced CD / MP3 player to audiophiles and music lovers as a further proof of DENON's non-compromising pursuit of the ultimate in sound quality. The high quality performance and easy operation are certain to provide you with many hours of outstanding listening pleasure. - TABLE OF CONTENTS - z Features 6 x Part names and functions 6~8 c Connections 8 v Opening and closing the disc holder and loading a disc 9 b Normal CD playback 9 n Advanced CD playback 10, 11 m Playing MP3 files 11~13 , The compact disc 13 . Power on playback 13 ⁄0 Expanded function 13, 14 ⁄1 Before switching off the power 14 ⁄2 Preset functions and operations 14~16 ⁄3 Troubleshooting 16 ⁄4 Specifications 17 2 ACCESSORIES Check that the following parts are included in addition to the main unit: q Operating instructions 1 w Connection Cords 1 1 FEATURES 2 99-track programming play 2 ±12 % Variable pitch playback 2 CD-R/RW playback 2 CD TEXT 2 MP3 playback 2 19 inch Rack Mountable (Height 2 U) 2 Track Search Select knob (Easy track selection) 2 Play mode and Finish mode (1) Play mode q Continuous: Play a whole disc. w Single: Play a track. (2) Finish mode (Stop, Next, Recue) q Stop: Stop after finishing to play a track. w Next: Standby at the beginning of next track after finishing to play track. e Recue: After finishing to play a track, standby at the beginning of the track. 2 Auto Cue After a disc is loaded, it is automatically cued to the point where audio starts. Cueing takes place at the point where audio starts rather than where the track starts. The level at which sound is first detected can be set between -36 to -48 dB (3 steps). 2 End Monitor Pressing the END MON button during standby instantly previews the end of the track, thus assuring perfect "end point". The point at which monitoring starts can be set within a range of 5 to 35 seconds (7 steps) prior to the track's end. ✽ In the MP3 play mode, the time of monitor may not be correctly. 2 End of Message (EOM) At the end of the track, the time display flashes, providing a visual warning to the operator that the track will end shortly. The point at which the flashing beings can be set within a range of 0 to 60 seconds (7 steps) prior to the end of the track. 2 FL Display 2 Display of Playback Locations A bar graph display indicates playback points on the track being played. Elapsed time and Remaining time displays are switched using the TIME button. 2 External control Terminals Parallel Remote (D-sub 25 pin) Serial Remote (D-sub 9 pin) 2 Cascade playback 2 Power on playback 6 CAUTION: • Whenever the power operation switch is in the OFF state, the apparatus is still connected on AC line voltage. • The DN-C635 will work normally when the player unit is mounted with the front panel within 10 degrees of the vertical plane. If the unit is tilted excessively, discs may not load or unload properly. Max. 10° DN-C635 2 PART NAMES AND FUNCTIONS (Refer to page 3.) (1) Front panel q Power operation switch (POWER) • The power turns on when the button is switched from the off position (£) to the on position (¢). • The power turns off when the button is switched from the on position (¢) to the off position (£). w Disc holder • The disc placed on this holder. Pressing the disc holder OPEN/CLOSE (5) button e will open and close the holder. When loading the CD, place it securely in the disc holder. e Disc holder open/close button (5 OPEN/CLOSE) • Press to load or eject the disc. Each press will open or close the disc holder w. r Remote control sensor (REMOTE SENSOR) • About the wireless remote control unit : Please contact local dealer or distributor. t Display • Refer to page 8 for details. y PLAY button (1) • Use this to start playback. u STOP button (2) • Press this button to stop playback. i PAUSE button (3) • Use this pause playback. o CUE button • When pressed during playback, the pickup returns to the position at which playback last started and the pause mode is set. • When pressed during manual search, the pause mode is set at that position. • When pressed while the disc holder is open, the disc holder closes and the pause mode is set. !0 Select knob (8 , 9) • Turn the knob clockwise by one click to move one track forward, counterclockwise by one click to move one track backward. • When the knob turned while pressing it in, one click corresponds to 10 tracks. • In the preset mode, use this knob to set and enter preset settings. !1 !2 Search button (6 , 7) • These buttons are used to accurately change the positions where playback will start. !3 PLAY MODE button • Press this button to switch the play mode. !4 END MON button • Press this button in the standby mode to monitor the end of the track. (End Monitor) ✽ In the MP3 play mode, the time of monitor may not be correctly. !5 PITCH button • Press this button to switch to the play speed set with the Pitch Slider. The PITCH LED flashes. • When the button is pressed again, the fixed pitch mode is set and the PITCH LED lights. • Press the button again to cancel the pitch play mode and return to normal speed.
-
 1
1 -
 2
2 -
 3
3 -
 4
4 -
 5
5 -
 6
6 -
 7
7 -
 8
8 -
 9
9 -
 10
10 -
 11
11 -
 12
12 -
13
-
14
-
15
-
16
-
17
-
18
-
19
-
20
-
21
-
22
-
23
-
24
-
25
-
26
-
27
-
28
-
29
-
30
 |
 |
