Dynex DX-NNBC User Manual (English) - Page 12
Connecting to your network, Available Networks, Connect
 |
UPC - 600603119064
View all Dynex DX-NNBC manuals
Add to My Manuals
Save this manual to your list of manuals |
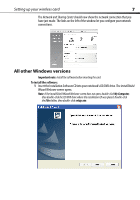
Page 12 highlights
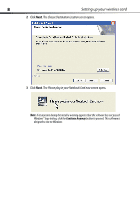
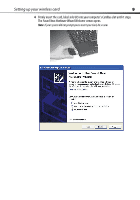
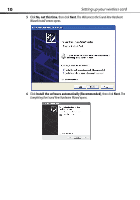
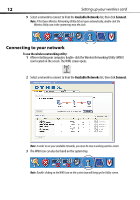
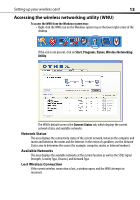
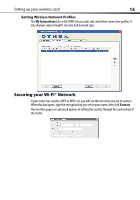
12 Setting up your wireless card 9 Select a network to connect to from the Available Networks list, then click Connect. Note: If the Dynex Wireless Networking Utility did not open automatically, double-click the Wireless Utility icon in the system tray near the clock. Connecting to your network To use the wireless networking utility: 1 After restarting your computer, double-click the Wireless Networking Utility (WNU) icon located on the screen. The WNU screen opens. 2 Select a network to connect to from the Available Networks list, then click Connect. Note: In order to see your available networks, you must be near a working wireless router. 3 The WNU icon can also be found on the system tray. Note: Double-clicking on the WNU icon on the system tray will bring up the Utility screen.
-
 1
1 -
2
-
3
-
4
-
5
-
6
-
 7
7 -
 8
8 -
 9
9 -
 10
10 -
 11
11 -
 12
12 -
 13
13 -
 14
14 -
 15
15 -
 16
16 -
 17
17 -
18
-
19
-
20
-
21
-
22
-
23
-
24
-
25
-
26
-
27
-
28
-
29
-
30
-
31
-
32
-
33
 |
 |
