Dynex DX-UPDVD2 User Manual (English) - Page 11
JPEG disc playback, Using the menus - dx up dvd
 |
UPC - 600603125119
View all Dynex DX-UPDVD2 manuals
Add to My Manuals
Save this manual to your list of manuals |
Page 11 highlights
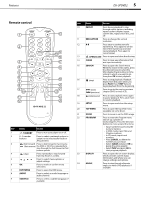
Using your DVD player DX-UPDVD2 9 • DISPLAY-Press to display information about the disc, such as title elapsed, title remain, chapter elapsed, chapter remain, and display off. JPEG disc playback When playing a JPEG disc, a navigation menu is displayed automatically. In the menu, press or to select a file, then press OK. The file will be played in a slideshow. • Press or to select the previous or the next picture. • Press to pause the current picture, then press OK to return to normal playing. • Press ZOOM to zoom in on a picture. When the picture is zoomed, press or to select a different enlargement ratio, or press the , , , or buttons to move the enlarged picture. • Press PROGRAM to select a slideshow transition. You can set transition effects for each picture. • To rotate an image, press the , , , or buttons to invert, mirror, rotate left, or rotate right. These operations are allowed only when a picture is being displayed normally and will be cancelled automatically when a new picture is displayed. Using the menus To use the General Setup Page: 1 Press SETUP. The General Setup Page opens. 2 Press the , , , or buttons to move the cursor and highlight a selection, then press OK to confirm your selection. Options include: • Angle Mark-Lets you select a particular camera angle by pressing ANGLE when playing a DVD that offers multiple angles. • OSD (on screen display) Language-Lets you select the language for the setup menus and on-screen display. • Screen Saver-Displays an animated picture on the screen whenever the DVD player is idle for a certain time. • Playback Memory-Lets you view a disc from the point where it was stopped. Unlike the resume function, the playback memory function is effective even if the DVD is removed from the player. 3 Press to return to the previous menu. 4 Press SETUP to exit the on-screen menus. To use the Audio Setup Page: 1 Press SETUP. The General Setup Page opens. 2 Press the or buttons to select Audio. The Audio Setup Page opens. Audio Setup Page Digital Audio Output HDMI Audio Dynamic Range B it Auto G o to Audio Setup Page 3 Press the , , , or buttons to move the cursor and highlight a selection, then press OK to confirm your selection. Options include: • Digital Audio Output-Sets the audio outputs. This DVD player produces two kinds of audio output, Bitstream or PCM. This surround sound format is output to a Dolby Digital/DTS decoder through the coaxial and optical jacks on the back of the player. • HDMI Audio -Selects the HDMI audio source. When in PCM mode, all the audio signals through HDMI are output in PCM format. When in AUTO mode, if the setting of Digital Audio Output is Bitstream and your TV supports Bitstream data, the output will be in Bitstream format. If not, the output will be in PCM format. • Dynamic Range-Dynamically lowers the volume and still keeps the original tone quality. This is the range, measured in decibels (dB), between the loudest and the quietest sound registers in a soundtrack. 4 Press to return to the previous menu. 5 Press SETUP to exit the on-screen menus. To use the Video Setup Page: 1 Press SETUP. The General Setup Page opens. 2 Press the or buttons to select Video. The Video Setup Page opens. Video Setup Page Resolution T V Display Auto Wide Go to Video Setup Page 3 Press the , , , or buttons to move the cursor and highlight a selection, then press OK to confirm your selection. Options include: • Resolution-Lets you select the resolution output of the player to match your TV. • TV Display-Sets the aspect ratio of the video output.
-
 1
1 -
2
-
3
-
4
-
5
-
 6
6 -
 7
7 -
 8
8 -
 9
9 -
 10
10 -
 11
11 -
 12
12 -
 13
13 -
 14
14 -
 15
15 -
 16
16 -
17
 |
 |
