EdgeStar AP13500G Owners Manual - Page 17
Manually Drain the Unit
 |
View all EdgeStar AP13500G manuals
Add to My Manuals
Save this manual to your list of manuals |
Page 17 highlights
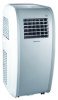
Manually Drain the Unit When the internal tank is full the LED window will display error code "H8". When this occurs, the tank must be drained manually into a drain pan. To drain the tank manually: 1. Remove drain pipe from pipe clip on back of unit. 2. Route drain pipe to drain pan or other suitable drain. 3. Remove pipe hoop and rubber stopper from end of drain pipe. 4. Allow water to drain fully. 5. Reinstall rubber stopper and pipe hoop. 6. Reinsert drain pipe into pipe clip. NOTE: Although not recommended, you may choose to connect a permanent drain hose (not included) to the drain port provided that a suitable drainage option (floor drain or sink, etc.) is available. Please note that this unit has no drain pump; all water will drain with gravity only, i.e., only "downhill." Finish Installation 1. Install the Remote Control Holster into the groove located on the side of the unit as shown below. The Remote Control Holster provides a convenient location to store your remote control. 2. Install the Power Cord Hooks by sliding each hook into grooves located on the back, left side of the unit until they click into place. The Power Cord Hooks will allow a convenient place to wind the power cord when not in use. 13
-
 1
1 -
2
-
3
-
4
-
5
-
6
-
7
-
8
-
9
-
10
-
11
-
 12
12 -
 13
13 -
 14
14 -
 15
15 -
 16
16 -
 17
17 -
 18
18 -
 19
19 -
 20
20 -
 21
21 -
 22
22 -
23
-
24
-
25
-
26
-
27
-
28
-
29
-
30
-
31
-
32
 |
 |
