EdgeStar AP13500G Owners Manual - Page 7
Parts Included, Preparations for Installing the Window Kit
 |
View all EdgeStar AP13500G manuals
Add to My Manuals
Save this manual to your list of manuals |
Page 7 highlights
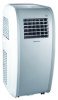
Suggested Tools- Phillips Screw Driver (Medium sized), Tape Measure/Ruler, Scissors, Saw (In the event that your window panel needs to be cut down in size for installation) Parts Included Flexible Exhaust Hose Window Exhaust Adapter Protective Grille (baffle) Adjustable Window Slider Wood Screws (4) "Joint A" Adapter Foam Seal (Adhesive Backed) Foam Sash Seal Window Lock Bracket and Screw Pipe Hoop (2) Pipe Clip and Screw Drain Pipe Rubber Drain Stopper Power Cord Hook (2) Remote Control Holster Remote Control Battery (AAA 1.5V) User Manual NOTE: You may need to contact your electrician if your room's circuit is not able to power your unit. When positioning unit, please allow for proper distance from wall as shown below. Preparations for Installing the Window Kit You must vent your portable air conditioner when running it in Cool or Dry (dehumidify) mode. Your unit includes a window exhaust kit that can be used to vent moisture out a window. Before you begin, make sure you have all the parts necessary for installation. If you have multiple windows, choose one that is near an electrical outlet that will be able to provide sufficient power to your unit. See the power requirements listed on the product label printed on the side, or on the back of your portable air conditioner. Please follow the installation instructions carefully to avoid personal injury or damage. 3
-
 1
1 -
 2
2 -
 3
3 -
 4
4 -
 5
5 -
 6
6 -
 7
7 -
 8
8 -
 9
9 -
 10
10 -
 11
11 -
 12
12 -
13
-
14
-
15
-
16
-
17
-
18
-
19
-
20
-
21
-
22
-
23
-
24
-
25
-
26
-
27
-
28
-
29
-
30
-
31
-
32
 |
 |
