Electrolux EWFLW65H Installation Instructions - Page 15
Reversing, hardware
 |
View all Electrolux EWFLW65H manuals
Add to My Manuals
Save this manual to your list of manuals |
Page 15 highlights
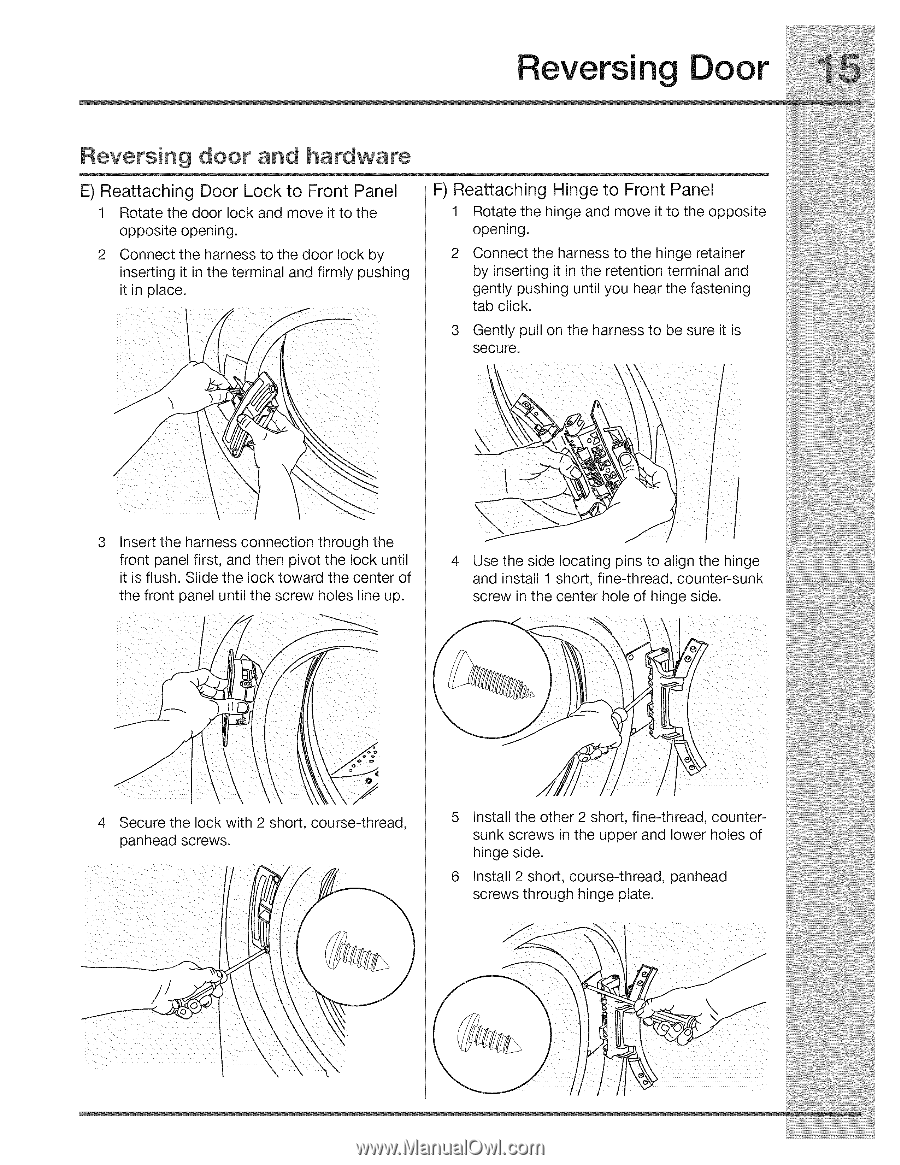
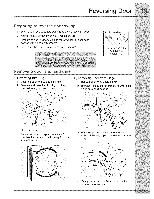
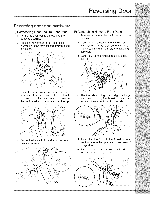
Reversing Door Reversing door and hardware E) Reattaching Door Lock to Front Panel 1 Rotate the door lock and move it to the opposite opening. 2 Connect the harness to the door lock by inserting it in the terminal and firmly pushing it in place. F) Reattaching Hinge to Front Panel 1 Rotate the hinge and move it to the opposite opening. 2 Connect the harness to the hinge retainer by inserting it in the retention terminal and gently pushing until you hear the fastening tab click. 3 Gently pull on the harness to be sure it is secure. 3 Insert the harness connection through the front panel first, and then pivot the lock until it is flush. Slide the lock toward the center of the front panel until the screw holes line up. 4 Use the side locating pins to align the hinge and install 1 short, fine-thread, counter-sunk screw in the center hole of hinge side. 4 Secure the lock with 2 short, course-thread, panhead screws. 5 Install the other 2 short, fine-thread, countersunk screws in the upper and lower holes of hinge side. 6 Install 2 short, course-thread, panhead screws through hinge plate.
-
 1
1 -
2
-
3
-
4
-
5
-
6
-
7
-
8
-
9
-
 10
10 -
 11
11 -
 12
12 -
 13
13 -
 14
14 -
 15
15 -
 16
16 -
 17
17 -
 18
18 -
 19
19 -
 20
20
 |
 |