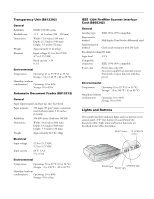
Epson 1640XL Product Information Guide - Page 5
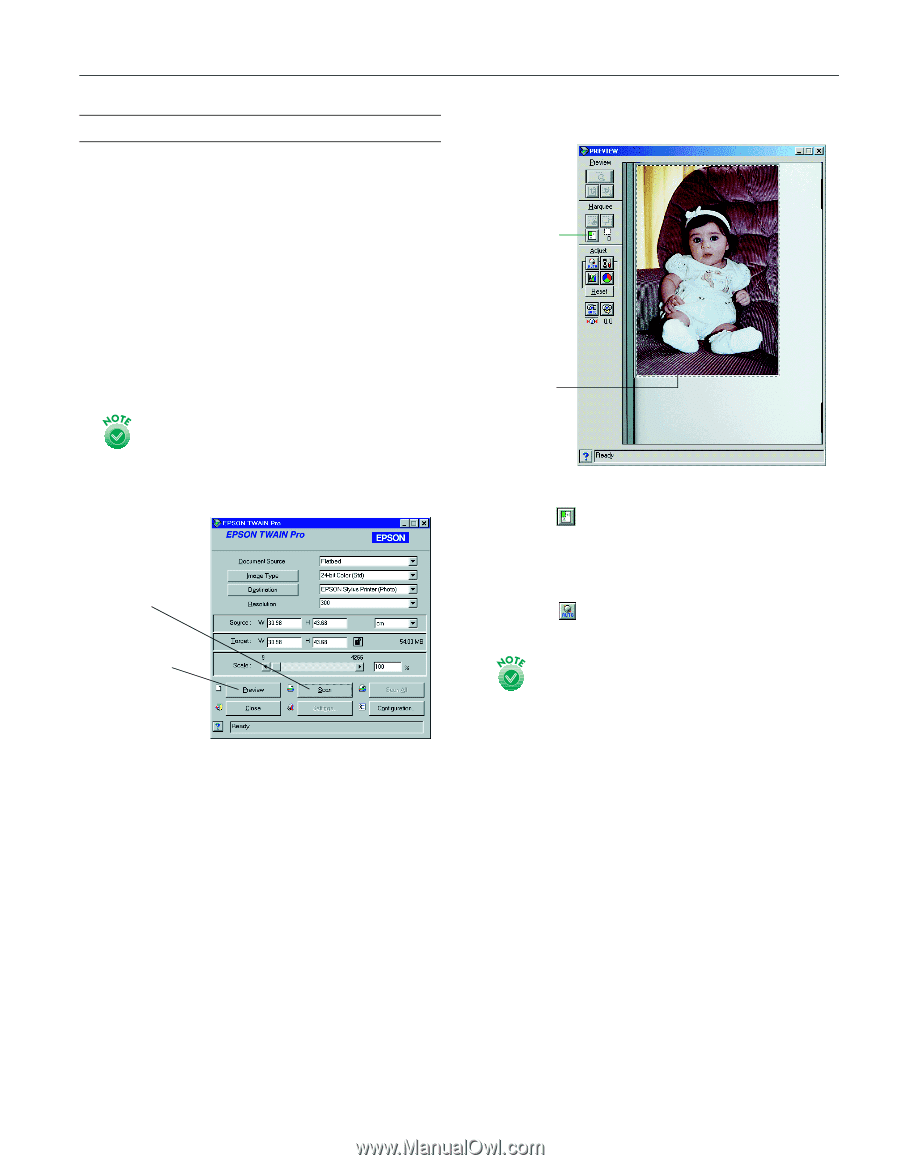
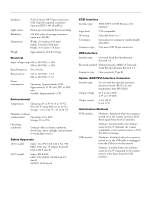
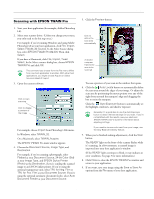
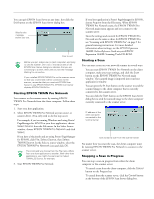
Scanning with EPSON TWAIN Pro, The EPSON TWAIN Pro main window appears.
 |
UPC - 010343833548
View all Epson 1640XL manuals
Add to My Manuals
Save this manual to your list of manuals |
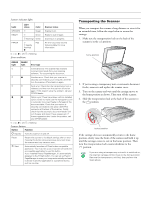
Page 5 highlights
EPSON Expression 1640XL Scanning with EPSON TWAIN Pro 1. Start your host application (for example, Adobe Photoshop LE). 2. Select your scanner driver. (Unless you change your source, you only need to do this step once.) For example, if you're running Windows and using Adobe Photoshop LE as your host application, click File, Import, Select TWAIN_32 Source. In the Select Source dialog box, select EPSON TWAIN Pro(32-bit). Then click Select. If you have a Macintosh, click File, Import, Twain Select. In the Select a source dialog box, choose EPSON TWAIN Pro and click OK. The command you choose from the File menu differs from one host application to another. With other host applications, you might choose Acquire or Select Source instead of Import. 3. Open the scanner software. Click to start scanning Click to display a preview of the image For example, choose Import from Photoshop's File menu. In Windows, select TWAIN_32. On a Macintosh, select TWAIN_Acquire. The EPSON TWAIN Pro main window appears. 4. Choose the Document Source, Image Type, and Destination. For example, if you're scanning a photograph, select Flatbed as your Document Source, 24-bit Color (Std) as your Image Type, and EPSON Stylus Printer (Photo) as the Destination, if you're sending the scanned image to an EPSON inkjet printer. If you're using the optional transparency unit, select TPU for Neg. Film or TPU for Pos. Film as your Document Source. If you're using the optional automatic document feeder, select Auto Document Feeder as your Document Source. 5. Click the Preview button. Click to define the scan area automatically A dotted marquee frames the area to be scanned You see a preview of your scan in the window that opens. 6. Click the Auto Locate button to automatically define the scan area around the edges of your image. Or adjust the scan area by positioning the mouse pointer over any of the eight boxes around the marquee's edge and dragging the box to resize the marquee. Click the Auto Exposure button to automatically set the highlight, midtones, and shadow exposure. Generally it's a good idea to use the Auto Exposure button to obtain the best settings for your scan. If you're not satisfied with the results, see your electronic EPSON TWAIN User's Guide for information about adjusting settings. If you need to remove color cast from your image, use the Gray Balance Intensity feature. 7. When you've finished making adjustments, click the Scan button. The READY light on the front of the scanner flashes while it's scanning. In a few moments, a scanned image is imported into your host application's window. (If the READY light continues to blink, it may indicate an error condition. See page 3 for more information.) 8. Click Close to close the EPSON TWAIN Pro window and return to your application. 9. If you want, save your image using the Save or Save As options from the File menu of your host application. 8/00 EPSON Expression 1640XL - 5
-
 1
1 -
 2
2 -
 3
3 -
 4
4 -
 5
5 -
 6
6 -
 7
7 -
 8
8
 |
 |