Epson 1640XL Product Information Guide - Page 6
Scanning Color Images, Selecting Resolution, Using a Network Scanner, Starting EPSON Scan Server - pro
 |
UPC - 010343833548
View all Epson 1640XL manuals
Add to My Manuals
Save this manual to your list of manuals |
Page 6 highlights
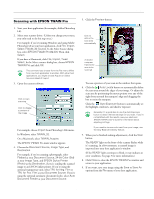
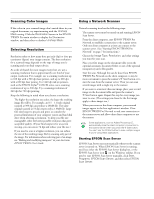
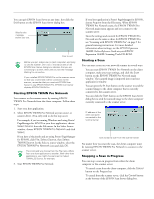
EPSON Expression 1640XL Scanning Color Images If the colors in your scanned image don't match those in your original document, try experimenting with the Unsharp Mask setting. Click the Destination button in the EPSON TWAIN Pro main window to display the Destination window, and then select or deselect Unsharp Mask. Selecting Resolution Resolution refers to how many dots per inch (dpi) or dots per centimeter (dpcm) your image contains. The best resolution for a scanned image depends on the type of image you're scanning and your final output device. As a rule of thumb for most images except line art, use a scanning resolution that is approximately one third of your output resolution. For example, use a scanning resolution up to 100 dpi with a 300 dpi laser printer, and up to 200 dpi with a 600 dpi laser printer. For 1440 dpi ink jet printers, such as the EPSON Stylus® COLOR series, use a scanning resolution of up to 300 dpi. Try a scanning resolution of 240 dpi for 720 dpi printing. Keep the following in mind when you choose a resolution: t The higher the resolution you select, the larger the resulting image file will be. For example, an 8.5 × 11-inch original scanned at 300 dpi can produce a 24MB file. The same original scanned at 72 dpi creates only a 1.3MB file. Large files take longer to process and print, so consider the practical limitations of your computer system and hard disk drive when selecting a resolution. To keep your file size manageable, select the lowest possible resolution that gives acceptable quality. (If your final output is for on-screen viewing, you can scan at 72 dpi and reduce your file size.) t If you need to scan at a higher resolution, you can reduce the size of the resulting image file by scanning only part of the image. For information about selecting part of an image, see "Making and modifying marquees" in your electronic EPSON TWAIN User's Guide. Using a Network Scanner Network scanning involves the following steps: t The scanner server must be turned on and running EPSON Scan Server. t From the client computer, start EPSON TWAIN Pro Network to establish a connection to the scanner server. Only one client computer at a time can connect to the scanner server. (See "Starting EPSON TWAIN Pro Network" on page 7 for instructions.) t Choose the Image Type, Resolution, and other settings you want for your scan. t Place your first image on the document table (or in the optional automatic document feeder or one of the optional transparency unit's film guides). t Start the scan. Although this can be done from EPSON TWAIN Pro Network on the client computer, it may be more convenient to press the scanner's ] Start button or to start the scan from the scanner server. Then you can scan several images with a single trip to the scanner. t If you want to scan more than one image, place your second image on the document table and press the scanner's ] Start button again. Repeat this step for every image you want to scan. (The settings you chose for the first image apply to these images too.) t When you return to the client computer, your scanned images appear in the host application's window. Close EPSON TWAIN Pro Network to end your connection to the scanner server and allow other client computers to use the scanner. Some applications, such as Adobe Photoshop LE, automatically close the client computer's connection to the scanner server when you press the ] Start button. You can't use the ] Start button to scan multiple images if you're using these applications. Starting EPSON Scan Server EPSON Scan Server starts automatically whenever the scanner server is turned on. When EPSON Scan Server is running, you'll see either the EPSON Scan Server dialog box, or the EPSON Scan Server icon on the Windows taskbar. If you need to start EPSON Scan Server manually, click Start, Programs, EPSON Scan Server, and then select EPSON Scan Server. 6 - EPSON Expression 1640XL 8/00
-
 1
1 -
 2
2 -
 3
3 -
 4
4 -
 5
5 -
 6
6 -
 7
7 -
 8
8
 |
 |