Epson 2000P Product Information Guide - Page 7
Loading Roll Paper, load/eject button to feed the paper into the printer. Avoid - stylus photo driver
 |
UPC - 010343838550
View all Epson 2000P manuals
Add to My Manuals
Save this manual to your list of manuals |
Page 7 highlights
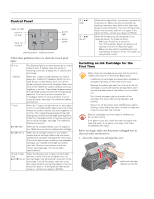
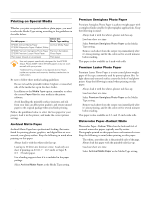
EPSON Stylus Photo 2000P Loading Roll Paper When loading roll paper, be sure to follow the instructions in this section. Also, make sure Roll Paper is selected as your Paper Source in the printer driver. 1. Before loading the roll, make sure the edge is cut cleanly-at a 90-degree angle in each corner-to ensure proper loading. If necessary, trim the edge using a straight-edge tool. 2. To make loading easier, roll the first several inches of the paper backward to uncurl it. Use the plastic sheet included with your printer to prevent your hands from marring the printable surface. (Or you can use a folded sheet of paper.) 5. Load the end of the paper into the printer as far as it will go, then slide the left edge guide against the paper. 6. Gently hold the paper in place as you press and release the E load/eject button to feed the paper into the printer. Avoid handling the paper excessively, to prevent contamination with dirt or grease. 3. Remove the printer's paper support and install the roll paper holder in the same mounting slots. 4. Insert the roll paper onto the spindle, making sure it's oriented as shown here. Then place the spindle with the roll paper onto the holder. (If the paper doesn't feed properly, lift the paper out and then reload it. If the paper doesn't come out easily, hold down the E load/eject button for three seconds. Then turn the printer off, remove the paper, and turn the printer back on to reset it. When reloading, make sure the end is cut straight and not curled or damaged. If necessary, re-trim the paper as shown in step 1.) 7. Make sure the output tray is open but the extensions are closed, and leave ample room at the front of the printer for your paper to eject smoothly. 6/00 EPSON Stylus Photo 2000P - 7
-
 1
1 -
 2
2 -
 3
3 -
 4
4 -
 5
5 -
 6
6 -
 7
7 -
 8
8 -
 9
9 -
 10
10 -
 11
11 -
 12
12
 |
 |
