Epson 2255U Users Guide - Page 145
On/Off, Clear, Add New, Return, Enter, Setup complete, Schedule Reset, Parent topic
 |
View all Epson 2255U manuals
Add to My Manuals
Save this manual to your list of manuals |
Page 145 highlights
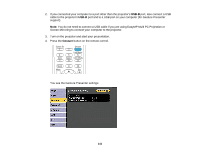
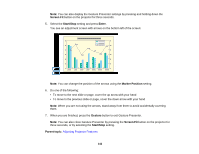
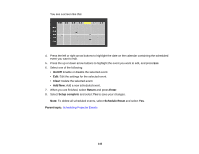
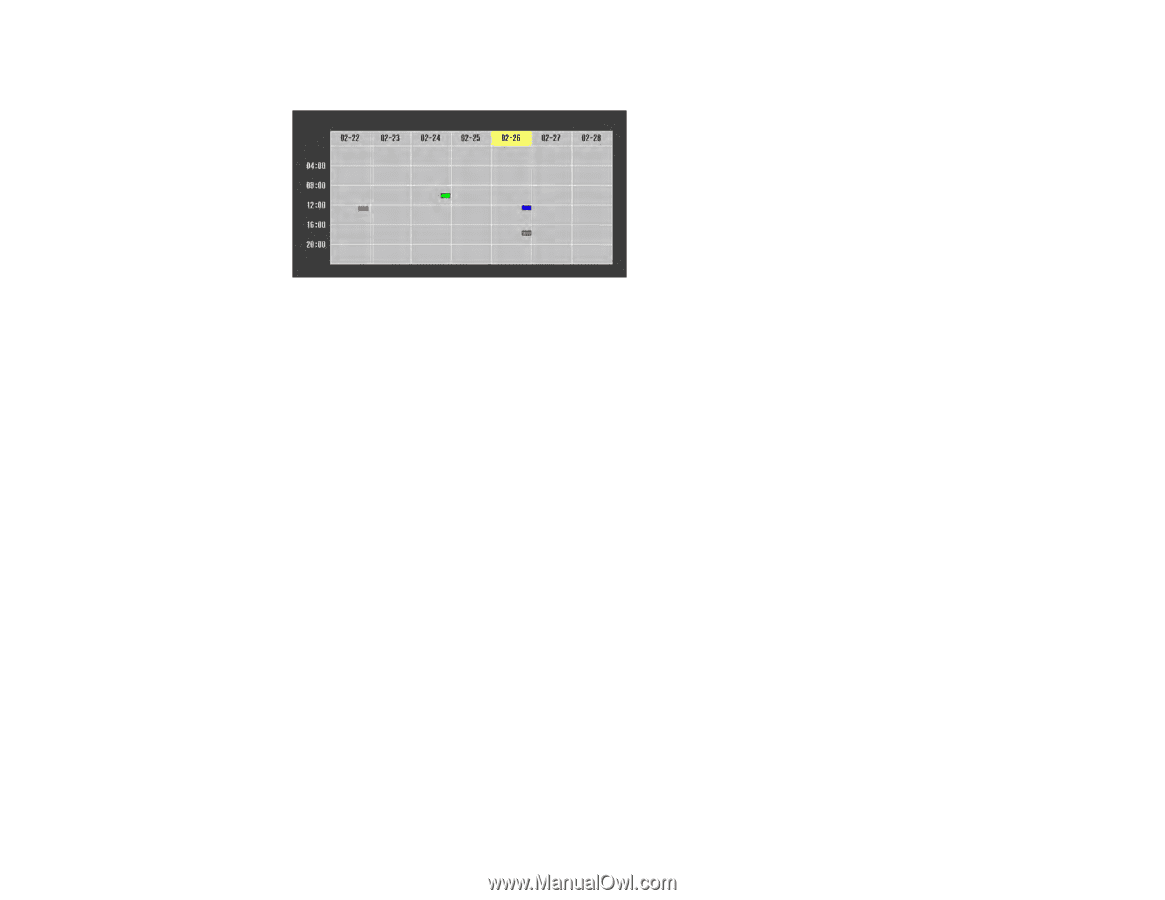
You see a screen like this: 4. Press the left or right arrow buttons to highlight the date on the calendar containing the scheduled event you want to edit. 5. Press the up or down arrow buttons to highlight the event you want to edit, and press Esc. 6. Select one of the following: • On/Off: Enable or disable the selected event. • Edit: Edit the settings for the selected event. • Clear: Delete the selected event. • Add New: Add a new scheduled event. 7. When you are finished, select Return and press Enter. 8. Select Setup complete and select Yes to save your changes. Note: To delete all scheduled events, select Schedule Reset and select Yes. Parent topic: Scheduling Projector Events 145
-
 1
1 -
2
-
3
-
4
-
5
-
6
-
7
-
8
-
9
-
10
-
11
-
12
-
13
-
14
-
15
-
16
-
17
-
18
-
19
-
20
-
21
-
22
-
23
-
24
-
25
-
26
-
27
-
28
-
29
-
30
-
31
-
32
-
33
-
34
-
35
-
36
-
37
-
38
-
39
-
40
-
41
-
42
-
43
-
44
-
45
-
46
-
47
-
48
-
49
-
50
-
51
-
52
-
53
-
54
-
55
-
56
-
57
-
58
-
59
-
60
-
61
-
62
-
63
-
64
-
65
-
66
-
67
-
68
-
69
-
70
-
71
-
72
-
73
-
74
-
75
-
76
-
77
-
78
-
79
-
80
-
81
-
82
-
83
-
84
-
85
-
86
-
87
-
88
-
89
-
90
-
91
-
92
-
93
-
94
-
95
-
96
-
97
-
98
-
99
-
100
-
101
-
102
-
103
-
104
-
105
-
106
-
107
-
108
-
109
-
110
-
111
-
112
-
113
-
114
-
115
-
116
-
117
-
118
-
119
-
120
-
121
-
122
-
123
-
124
-
125
-
126
-
127
-
128
-
129
-
130
-
131
-
132
-
133
-
134
-
135
-
136
-
137
-
138
-
139
-
 140
140 -
 141
141 -
 142
142 -
 143
143 -
 144
144 -
 145
145 -
 146
146 -
 147
147 -
 148
148 -
 149
149 -
 150
150 -
151
-
152
-
153
-
154
-
155
-
156
-
157
-
158
-
159
-
160
-
161
-
162
-
163
-
164
-
165
-
166
-
167
-
168
-
169
-
170
-
171
-
172
-
173
-
174
-
175
-
176
-
177
-
178
-
179
-
180
-
181
-
182
-
183
-
184
-
185
-
186
-
187
-
188
-
189
-
190
-
191
-
192
-
193
-
194
-
195
-
196
-
197
-
198
-
199
-
200
-
201
-
202
-
203
-
204
-
205
-
206
-
207
-
208
-
209
-
210
-
211
-
212
-
213
-
214
-
215
-
216
-
217
-
218
-
219
-
220
-
221
-
222
-
223
-
224
-
225
-
226
-
227
-
228
-
229
-
230
-
231
-
232
-
233
-
234
-
235
-
236
-
237
-
238
-
239
-
240
-
241
-
242
-
243
-
244
-
245
-
246
-
247
-
248
-
249
-
250
-
251
-
252
-
253
-
254
-
255
-
256
-
257
-
258
-
259
-
260
-
261
-
262
-
263
-
264
-
265
-
266
-
267
-
268
-
269
-
270
-
271
-
272
-
273
-
274
-
275
-
276
-
277
-
278
-
279
-
280
-
281
-
282
-
283
-
284
-
285
-
286
-
287
-
288
 |
 |
145
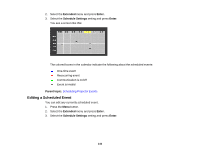
You see a screen like this:
4.
Press the left or right arrow buttons to highlight the date on the calendar containing the scheduled
event you want to edit.
5.
Press the up or down arrow buttons to highlight the event you want to edit, and press
Esc
.
6.
Select one of the following:
•
On/Off
: Enable or disable the selected event.
•
Edit
: Edit the settings for the selected event.
•
Clear
: Delete the selected event.
•
Add New
: Add a new scheduled event.
7.
When you are finished, select
Return
and press
Enter
.
8.
Select
Setup complete
and select
Yes
to save your changes.
Note:
To delete all scheduled events, select
Schedule Reset
and select
Yes
.
Parent topic:
Scheduling Projector Events