Epson 8300NL Product Information Guide - Page 9
Adjusting the Image, Focusing and Zooming Your Image, Adjusting the Height of Your Image - powerlite manual
 |
UPC - 010343846029
View all Epson 8300NL manuals
Add to My Manuals
Save this manual to your list of manuals |
Page 9 highlights
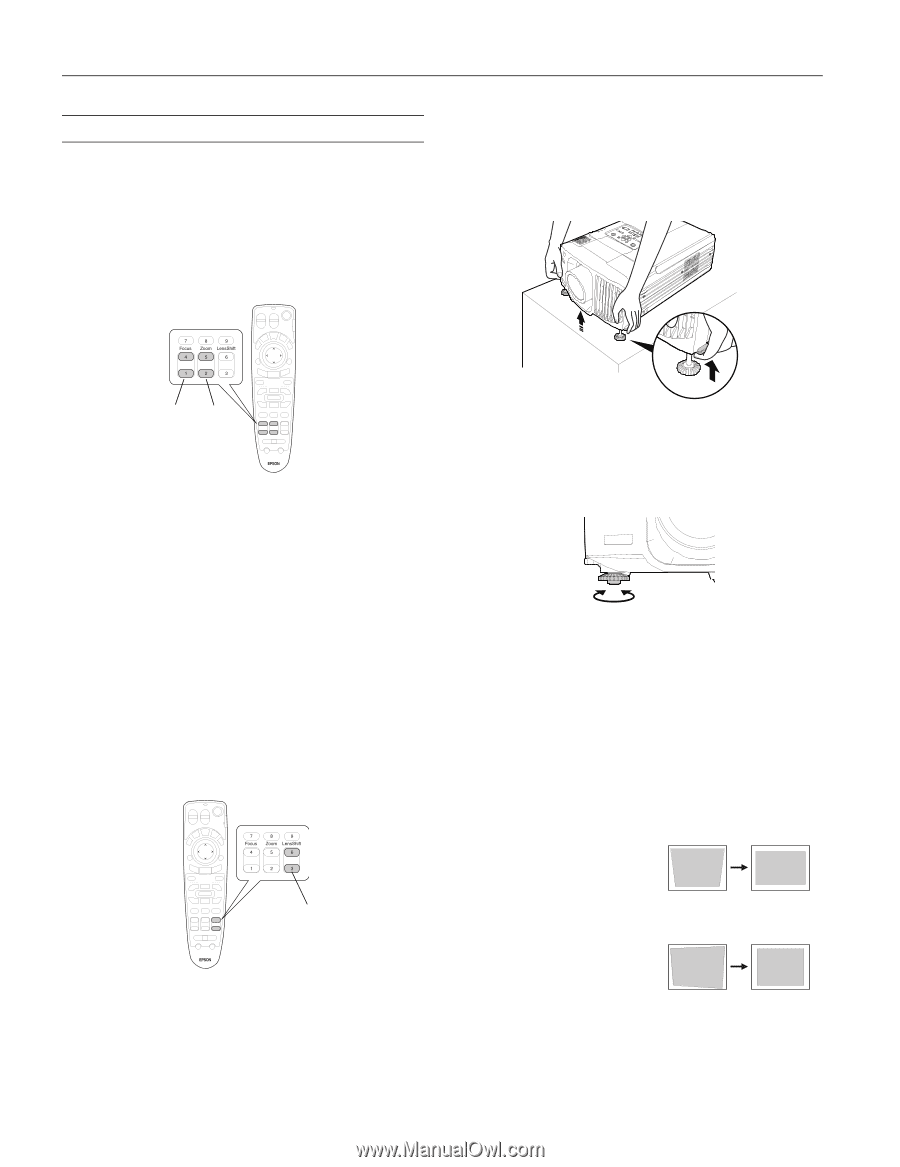
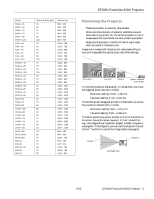
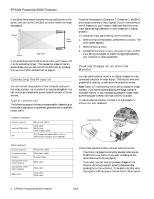
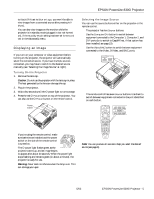
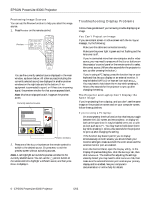
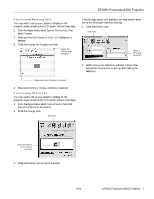
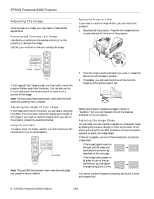
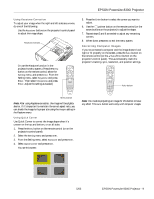
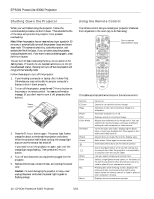
EPSON PowerLite 8300i Projector Adjusting the Image Once you see your image, you may need to make certain adjustments. Focusing and Zooming Your Image Use the Focus buttons on the remote control (or on the projector) to sharpen the image. Use the Zoom buttons to reduce or enlarge the image. Raising the Projector's Feet If you need to raise the image further, you can incline the projector: 1. Stand behind the projector. Press the foot release buttons on each side and lift the front of the projector. Focus Zoom If the image still isn't large enough, you may need to move the projector farther away from the screen. You can also use the E-Zoom buttons on the remote control to zoom in on a portion of the image. Note: The Focus and Zoom buttons won't work when the wideangle rear projection lens is installed. Adjusting the Height of Your Image If the image is too low on the screen, you can raise it using the Lens Shift. This is the best method for adjusting the height of the image. If you need to raise the image further, you can tilt the projector upward by extending the feet. Using the Lens Shift To raise or lower the image, use the Lens Shift buttons on the remote control (or on the projector). Lens Shift Note: The Lens Shift buttons won't work when the wide-angle rear projection lens is installed. 2. Once the image is positioned where you want it, release the buttons to lock the feet in position. 3. If necessary, you can level the picture or fine-tune the height by turning the projector feet. Raising the projector causes the image to distort or "keystone," but you can manually correct the shape as described in the next section. Adjusting the Image Shape In most cases, you can maintain a square or rectangular image by placing the projector directly in front of the center of the screen and using the Lens Shift (instead of tilting the projector upward) to adjust the image height. If this isn't possible, use one of these methods to correct the image shape: ❏ If the image tapers inward on the right and left sides only, use Keystone correction as described on the next page. ❏ If the image looks uneven on all sides, or just on the top and bottom, you can adjust its shape using Quick Corner. You cannot use both Keystone correction and Quick Corner at the same time. 8 - EPSON PowerLite 8300i Projector 5/03
-
 1
1 -
2
-
3
-
 4
4 -
 5
5 -
 6
6 -
 7
7 -
 8
8 -
 9
9 -
 10
10 -
 11
11 -
 12
12 -
 13
13 -
 14
14 -
15
-
16
-
17
-
18
-
19
-
20
 |
 |