Epson CX5600 User Guide - Page 16
Print, EPSON Stylus CX5600 Series, Paper size settings, Reduce/Enlarge Document, Defined - printer
 |
UPC - 010343865341
View all Epson CX5600 manuals
Add to My Manuals
Save this manual to your list of manuals |
Page 16 highlights
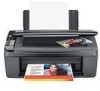
3. Click the Print icon at the top of the screen, then select Print from the drop-down menu that appears. 4. Select EPSON Stylus CX5600 Series, then choose the size and type of paper that you loaded in the printer. Paper size settings You can load paper in these sizes and select the size in the printer software. (Wider papers are for use only when reducing large images with the Reduce/Enlarge Document option.) A User Defined option is also available so you can create a custom size. 16
-
 1
1 -
2
-
3
-
4
-
5
-
6
-
7
-
8
-
9
-
10
-
 11
11 -
 12
12 -
 13
13 -
 14
14 -
 15
15 -
 16
16 -
 17
17 -
 18
18 -
 19
19 -
 20
20 -
 21
21 -
22
-
23
-
24
-
25
-
26
-
27
-
28
-
29
-
30
-
31
-
32
-
33
-
34
-
35
-
36
-
37
-
38
-
39
-
40
-
41
-
42
-
43
-
44
-
45
-
46
-
47
-
48
-
49
-
50
-
51
-
52
-
53
-
54
-
55
-
56
-
57
-
58
-
59
-
60
-
61
-
62
-
63
-
64
-
65
-
66
-
67
-
68
-
69
-
70
-
71
-
72
-
73
-
74
-
75
-
76
-
77
-
78
-
79
-
80
-
81
-
82
-
83
-
84
-
85
-
86
-
87
-
88
-
89
-
90
-
91
-
92
-
93
-
94
-
95
-
96
-
97
-
98
-
99
-
100
 |
 |

16
3.
Click the
Print
icon at the top of the screen, then select
Print
from the drop-down menu that
appears.
4.
Select
EPSON Stylus CX5600 Series
, then choose the size and type
of paper that you loaded
in the printer.
Paper size settings
You can load paper in these sizes and select the size in the printer software. (Wider papers are for
use only when reducing large images with the
Reduce/Enlarge Document
option.) A
User
Defined
option is also available so you can create a custom size.