Epson CX6600 Product Information Guide - Page 10
Control Panel Error Messages, Cleaning the Print Head - ink cartridge
 |
UPC - 010343851436
View all Epson CX6600 manuals
Add to My Manuals
Save this manual to your list of manuals |
Page 10 highlights
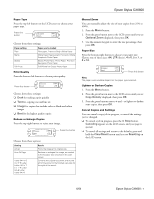
Epson Stylus CX6600 Control Panel Error Messages To diagnose some problems, check the LCD screen on the CX6600 for these error messages: Error Message No XXX ink cartridge - - - > Press the Color button to install new ink cartridge. XXX ink out - - - > Press the Color button to begin replacement ink cartridge. XXX ink cartridge error - - - > Cartridge replacement is necessary. Press the Color button to begin. Paper jam - - - > Press the Color button. Remove any remaining jammed paper by hand. Paper out - - - > Load paper into the sheet feeder, then press the Color button. Scanner unit open - - - > Close the scanner unit Scanner error - - - > See your documentation and call service if necessary. Printer error - - - > See your documentation and call service if necessary. Multi-page feed error - > Multiple pages have been fed into the printer at once. Remove and reload the paper, then press the Color button. The B&W button cannot be used to print in this mode. Press the Color button to print. The adjust lever is in the ^ position. Except when printing on envelopes, the m position is recommended. Service required. Cannot be stored saved in the XXX mode. Solution The indicated ink cartridge is not installed. Install the cartridge as described on page 11. The indicated ink cartridge is out of ink. Replace the cartridge as described on page 11. There is something wrong with the ink cartridge. Replace the cartridge as described on page 11. Paper is jammed. Press the x Color button to clear the jam. If the jam isn't cleared, remove the paper by hand. Load paper in the sheet feeder, then press the x Color button to continue printing. Carefully close the scanner unit and press down on it until it clicks securely into place. Press the P On button to turn off the CX6600, then turn it back on. If the error message still appears, contact your dealer or Epson, as described in your Quick Reference or online Reference Guide. Open the scanner unit to make sure any tape securing the ink cartridge holder has been removed; close the scanner unit. Press the P On button to turn off the CX6600, then turn it back on. If the error message still appears, contact your dealer or Epson, as described in your Quick Reference or online Reference Guide. The CX6600 has fed more than one sheet into the paper path. Remove and reload the paper. Make sure you lower the feeder guard back over the paper. Then press the x Color button. You must press the x Color button when you print directly from the memory card. Set the paper thickness lever to the m position. See page 1 to locate the lever. Contact your dealer or Epson, as described in the Quick Reference or online Reference Guide. You can only use the l Save button to save settings in Copy Mode. Error Message Solution Cannot recognize the memory card. Do you want to format the card? Make sure the CX6600 supports your memory card; see page 3. If it does, then format the card or, if you don't want to format it, insert a new memory card. No memory card. Operation canceled. Make sure your card is supported and inserted in the correct slot; see page 3 for details. There is not enough free space on the memory card. Operation canceled. The memory card doesn't have enough available space to save the image. Insert a new memory card. The memory card is write- Release the card's write protection, or protect. Operation canceled. insert another memory card. Cannot create a memory card You cannot create a folder on the folder. Operation canceled. memory card. Insert a new card. The memory card was The memory card was ejected during removed. Operation canceled. the operation. Insert a new card. The data on the memory card has changed. Print a new Index Sheet, then try again. An image was added or removed from the memory card after the index form was printed. Print a new index form. There is no Index Sheet or it is not set correctly. Please perform again after a check. The index form is not positioned correctly on the scanner glass. Make sure the sheet is oriented as shown on page 5. Check of a picture is not carried out or marking is not right. Please perform again after a check. The index form was not filled in correctly. Be sure to fill in the entire oval under the image(s) you want to print. See page 8 for guidelines. Paper is not selected on the Index Sheet or the oval is not filled in correctly. Check the Index Sheet, then try again. Be sure to fill in the entire oval under the paper you want to use. See page 8 for guidelines. Cleaning the Print Head If your printouts are unexpectedly light, colors are not correct, or dots or lines are missing, you may need to clean the print head. This unclogs the nozzles so they can deliver ink properly. Print head cleaning uses ink, so clean it only if quality declines. Note: You can also use a printer software utility to clean the print head from your computer. Select the ? or Help button on your printer settings window for instructions. 10 - Epson Stylus CX6600 6/04
-
 1
1 -
2
-
3
-
4
-
 5
5 -
 6
6 -
 7
7 -
 8
8 -
 9
9 -
 10
10 -
 11
11 -
 12
12 -
 13
13
 |
 |
