Epson EX7230 Pro User Manual - Page 52
Selecting Wireless Network Settings in Windows, Display the QR Code, Enter, Parent topic, Connect
 |
View all Epson EX7230 Pro manuals
Add to My Manuals
Save this manual to your list of manuals |
Page 52 highlights
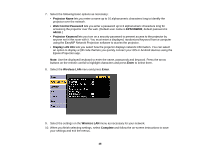
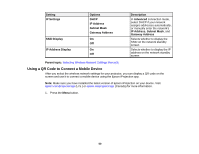
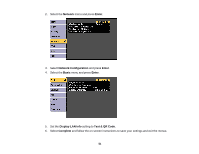
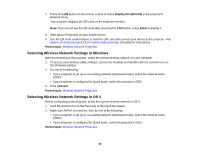
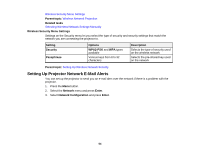
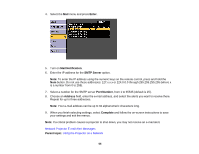
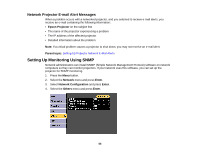
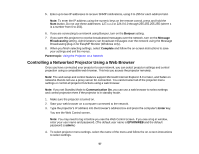
7. Press the LAN button on the remote control or select Display the QR Code in the projector's Network menu. Your projector displays the QR code on the projection surface. Note: If you do not see the QR code after pressing the LAN button, press Enter to display it. 8. Start Epson iProjection on your mobile device. 9. Use the QR code reader feature to read the QR code and connect your device to the projector. Visit epson.com/projectorapp (U.S.) or epson.ca/projectorapp (Canada) for instructions. Parent topic: Wireless Network Projection Selecting Wireless Network Settings in Windows Before connecting to the projector, select the correct wireless network on your computer. 1. To access your wireless utility software, access the Desktop and double-click the network icon on the Windows taskbar. 2. Do one of the following: • If your projector is set up on an existing network (Advanced mode), select the network name (SSID). • If your projector is configured for Quick mode, select the projector's SSID. 3. Click Connect. Parent topic: Wireless Network Projection Selecting Wireless Network Settings in OS X Before connecting to the projector, select the correct wireless network in OS X. 1. Click the AirPort icon on the menu bar at the top of the screen. 2. Make sure AirPort is turned on, then do one of the following: • If your projector is set up on an existing network (Advanced mode), select the network name (SSID). • If your projector is configured for Quick mode, select the projector's SSID. Parent topic: Wireless Network Projection 52
-
 1
1 -
2
-
3
-
4
-
5
-
6
-
7
-
8
-
9
-
10
-
11
-
12
-
13
-
14
-
15
-
16
-
17
-
18
-
19
-
20
-
21
-
22
-
23
-
24
-
25
-
26
-
27
-
28
-
29
-
30
-
31
-
32
-
33
-
34
-
35
-
36
-
37
-
38
-
39
-
40
-
41
-
42
-
43
-
44
-
45
-
46
-
 47
47 -
 48
48 -
 49
49 -
 50
50 -
 51
51 -
 52
52 -
 53
53 -
 54
54 -
 55
55 -
 56
56 -
 57
57 -
58
-
59
-
60
-
61
-
62
-
63
-
64
-
65
-
66
-
67
-
68
-
69
-
70
-
71
-
72
-
73
-
74
-
75
-
76
-
77
-
78
-
79
-
80
-
81
-
82
-
83
-
84
-
85
-
86
-
87
-
88
-
89
-
90
-
91
-
92
-
93
-
94
-
95
-
96
-
97
-
98
-
99
-
100
-
101
-
102
-
103
-
104
-
105
-
106
-
107
-
108
-
109
-
110
-
111
-
112
-
113
-
114
-
115
-
116
-
117
-
118
-
119
-
120
-
121
-
122
-
123
-
124
-
125
-
126
-
127
-
128
-
129
-
130
-
131
-
132
-
133
-
134
-
135
-
136
-
137
-
138
-
139
-
140
-
141
-
142
-
143
-
144
-
145
-
146
-
147
-
148
-
149
-
150
-
151
-
152
-
153
-
154
-
155
-
156
-
157
-
158
-
159
-
160
-
161
-
162
-
163
-
164
-
165
-
166
-
167
-
168
-
169
-
170
-
171
-
172
-
173
-
174
-
175
-
176
-
177
-
178
-
179
-
180
-
181
-
182
-
183
-
184
-
185
-
186
-
187
-
188
-
189
-
190
-
191
-
192
-
193
-
194
-
195
-
196
-
197
-
198
-
199
-
200
-
201
-
202
-
203
-
204
-
205
-
206
-
207
-
208
-
209
-
210
-
211
-
212
-
213
-
214
-
215
-
216
-
217
-
218
-
219
-
220
-
221
-
222
-
223
-
224
-
225
-
226
 |
 |
