Epson LQ-1170 User Manual - Page 72
Tear Off, Using the Tear-Off Mode, CAUTION, Using the Printer
 |
View all Epson LQ-1170 manuals
Add to My Manuals
Save this manual to your list of manuals |
Page 72 highlights
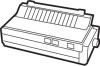
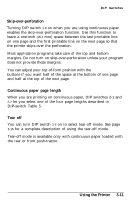
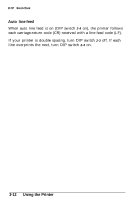
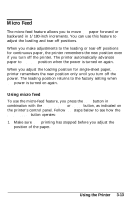
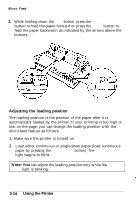
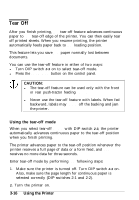
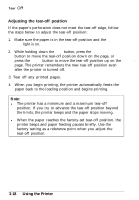
Tear Off After you finish printing, the tear-off feature advances continuous paper to the tear-off edge of the printer. You can then easily tear off printed sheets. When you resume printing, the printer automatically feeds paper back to the loading position. This feature lets you save the paper normally lost between documents. You can use the tear-off feature in either of two ways: l Turn DIP switch 2-3 on to select tear-off mode. l Press the TEAR OFF button on the control panel. 0 CAUTION: l The tear-off feature can be used only with the front or rear push-tractor feeding systems. l Never use the tear-off feature with labels. When fed backward, labels may come off the backing and jam the printer. Using the tear-off mode When you select tear-off mode with DIP switch 2-3, the printer automatically advances continuous paper to the tear-off position when you finish printing. The printer advances paper to the tear-off position whenever the printer receives a full page of data or a form feed, and then receives no more data for three seconds. Enter tear-off mode by performing the following steps: 1. Make sure the printer is turned off. Turn DIP switch 2-3 on. Also, make sure the page length for continuous paper is selected correctly (DIP switches 2-1 and 2-2). 2. Turn the printer on. 3-16 Using the Printer
-
 1
1 -
2
-
3
-
4
-
5
-
6
-
7
-
8
-
9
-
10
-
11
-
12
-
13
-
14
-
15
-
16
-
17
-
18
-
19
-
20
-
21
-
22
-
23
-
24
-
25
-
26
-
27
-
28
-
29
-
30
-
31
-
32
-
33
-
34
-
35
-
36
-
37
-
38
-
39
-
40
-
41
-
42
-
43
-
44
-
45
-
46
-
47
-
48
-
49
-
50
-
51
-
52
-
53
-
54
-
55
-
56
-
57
-
58
-
59
-
60
-
61
-
62
-
63
-
64
-
65
-
66
-
 67
67 -
 68
68 -
 69
69 -
 70
70 -
 71
71 -
 72
72 -
 73
73 -
 74
74 -
 75
75 -
 76
76 -
 77
77 -
78
-
79
-
80
-
81
-
82
-
83
-
84
-
85
-
86
-
87
-
88
-
89
-
90
-
91
-
92
-
93
-
94
-
95
-
96
-
97
-
98
-
99
-
100
-
101
-
102
-
103
-
104
-
105
-
106
-
107
-
108
-
109
-
110
-
111
-
112
-
113
-
114
-
115
-
116
-
117
-
118
-
119
-
120
-
121
-
122
-
123
-
124
-
125
-
126
-
127
-
128
-
129
-
130
-
131
-
132
-
133
-
134
-
135
-
136
-
137
-
138
-
139
-
140
-
141
-
142
-
143
-
144
-
145
-
146
-
147
-
148
-
149
-
150
-
151
-
152
-
153
-
154
-
155
-
156
-
157
-
158
-
159
 |
 |
