Epson LQ-850 User Manual - Page 114
Troubleshooting, Problems and solutions
 |
View all Epson LQ-850 manuals
Add to My Manuals
Save this manual to your list of manuals |
Page 114 highlights
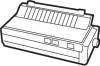
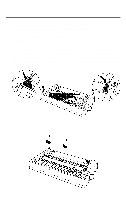
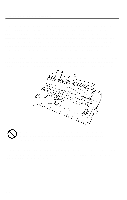
Troubleshooting This chapter discusses problems you may encounter, and their likely solution. At the back of the chapter, is a section on the data dump mode. This mode helps more experienced users determine the causes of communication problems between the printer and application programs. Problems and solutions This section lists possible problems and likely solutions. The printer does not print l Make sure that the printer is turned on and the POWER light is on. If the printer is turned on and the POWER light is not on, see that the printer is fully plugged in and that the electrical outlet is also turned on. l See that the ON LINE light is on. If it is not on, press the ON LINE button. l Make sure that the printer is connected to the computer. Check both ends of the cable between the printer and the computer. If the printer still does not print, try the self test described in Chapter 1. If the self test works properly, the printer is all right, and the problem probably lies in the computer, the software or the cable. If the self test does not work, contact your Epson dealer. The printout is faint or uneven See that the ribbon is properly installed. See the section on ribbon installation in Chapter 1. The ribbon may be worn out. See the section on replacing the ribbon in Chapter 5. The paper thickness lever may be in the wrong position. See the section on the paper thickness lever in Chapter 2. The print head may be worn out. This is especially likely if parts of printed characters are missing. Contact your dealer to have the head replaced. Never attempt to replace the head yourself because other parts of the printer should be checked at the same time. 6-2
-
 1
1 -
2
-
3
-
4
-
5
-
6
-
7
-
8
-
9
-
10
-
11
-
12
-
13
-
14
-
15
-
16
-
17
-
18
-
19
-
20
-
21
-
22
-
23
-
24
-
25
-
26
-
27
-
28
-
29
-
30
-
31
-
32
-
33
-
34
-
35
-
36
-
37
-
38
-
39
-
40
-
41
-
42
-
43
-
44
-
45
-
46
-
47
-
48
-
49
-
50
-
51
-
52
-
53
-
54
-
55
-
56
-
57
-
58
-
59
-
60
-
61
-
62
-
63
-
64
-
65
-
66
-
67
-
68
-
69
-
70
-
71
-
72
-
73
-
74
-
75
-
76
-
77
-
78
-
79
-
80
-
81
-
82
-
83
-
84
-
85
-
86
-
87
-
88
-
89
-
90
-
91
-
92
-
93
-
94
-
95
-
96
-
97
-
98
-
99
-
100
-
101
-
102
-
103
-
104
-
105
-
106
-
107
-
108
-
 109
109 -
 110
110 -
 111
111 -
 112
112 -
 113
113 -
 114
114 -
 115
115 -
 116
116 -
 117
117 -
 118
118 -
 119
119 -
120
-
121
-
122
-
123
-
124
-
125
-
126
-
127
-
128
-
129
-
130
-
131
-
132
-
133
-
134
-
135
-
136
-
137
-
138
-
139
-
140
-
141
-
142
-
143
-
144
-
145
-
146
-
147
-
148
-
149
-
150
-
151
-
152
-
153
-
154
-
155
-
156
-
157
-
158
-
159
-
160
-
161
-
162
-
163
-
164
-
165
-
166
-
167
-
168
-
169
-
170
-
171
-
172
-
173
-
174
-
175
-
176
-
177
-
178
-
179
-
180
-
181
-
182
-
183
-
184
-
185
-
186
-
187
-
188
-
189
-
190
-
191
-
192
-
193
-
194
-
195
-
196
-
197
-
198
-
199
-
200
-
201
-
202
-
203
-
204
-
205
-
206
-
207
-
208
-
209
-
210
-
211
-
212
-
213
-
214
-
215
-
216
-
217
-
218
-
219
-
220
-
221
-
222
 |
 |
