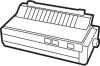
Epson LX-90 User Manual - Apple IIc 8699 PIC for LX-90 - Page 9
Printing the Self Test, Connecting the Printer to Your Apple IIc, results of both tests.
 |
View all Epson LX-90 manuals
Add to My Manuals
Save this manual to your list of manuals |
Page 9 highlights
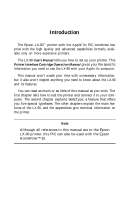
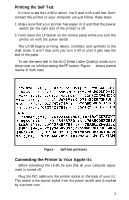
Printing the Self Test It's time to see the LX-90 in action. You'll start with a self test. Don't connect the printer to your computer yet-just follow these steps: 1. Make sure that your printer has paper in it and that the power switch (on the right side of the printer) is off. 2. Hold down the LF button on the control panel while you turn the printer on with the power switch. The LX-90 begins printing letters, numbers, and symbols in the draft mode. It won't stop until you turn it off or until it gets near the end of the paper. To see the same test in the NLQ (Near Letter Quality) mode, turn the printer on while pressing the FF button. Figure l-2 shows partial results of both tests. Draft Figure 1-3. Self-test printouts Connecting the Printer to Your Apple IIc Before connecting the LX-90, be sure that all your computer equipment is turned off. Plug the PIC cable into the printer socket in the back of your IIc. This socket is the second socket from the power switch and is marked by a printer icon. 5
-
 1
1 -
2
-
3
-
 4
4 -
 5
5 -
 6
6 -
 7
7 -
 8
8 -
 9
9 -
 10
10 -
 11
11 -
 12
12 -
 13
13 -
 14
14 -
15
-
16
-
17
-
18
-
19
-
20
-
21
-
22
-
23
-
24
-
25
-
26
-
27
-
28
-
29
-
30
-
31
-
32
-
33
-
34
-
35
-
36
-
37
-
38
-
39
-
40
-
41
-
42
-
43
-
44
-
45
-
46
-
47
-
48
-
49
-
50
-
51
-
52
-
53
-
54
-
55
-
56
-
57
-
58
-
59
-
60
-
61
-
62
-
63
-
64
-
65
-
66
-
67
-
68
-
69
-
70
-
71
-
72
-
73
-
74
-
75
-
76
-
77
-
78
-
79
-
80
-
81
-
82
-
83
-
84
-
85
-
86
-
87
-
88
-
89
-
90
-
91
-
92
-
93
-
94
-
95
-
96
-
97
-
98
-
99
-
100
-
101
-
102
-
103
-
104
-
105
-
106
-
107
-
108
-
109
-
110
-
111
-
112
-
113
-
114
-
115
-
116
 |
 |
