Epson PP-100II Product Information Guide - Page 6
Cleaning the Discproducer Interior, Cleaning the Filters, Transporting the Discproducer
 |
View all Epson PP-100II manuals
Add to My Manuals
Save this manual to your list of manuals |
Page 6 highlights
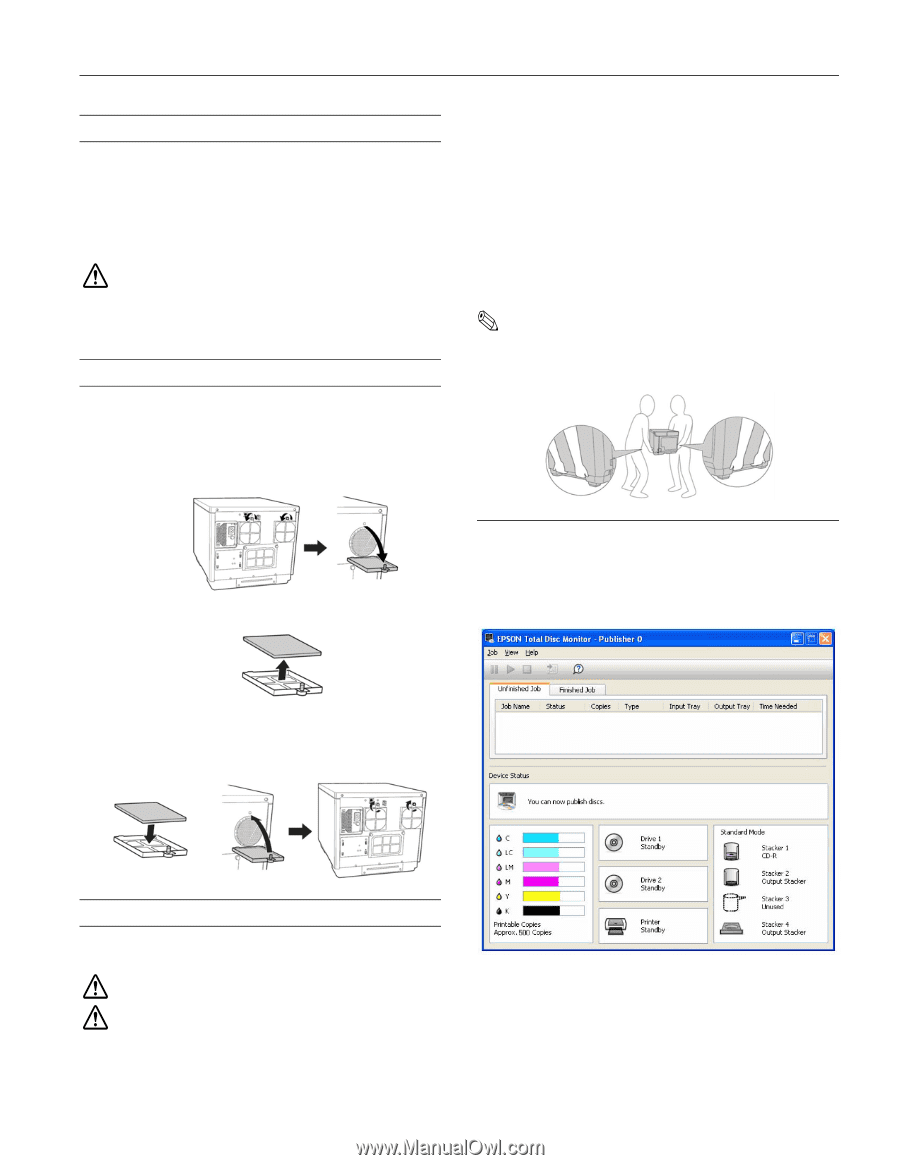
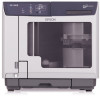
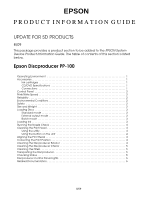
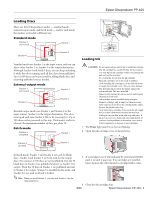
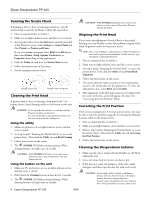
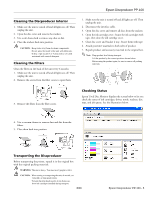
Epson Discproducer PP-100 Cleaning the Discproducer Interior 1. Make sure the unit is turned off and all lights are off. Then unplug the unit. 2. Open the disc cover and remove the stackers. 3. Use a soft clean cloth to remove any dust or dirt. 4. Place the stackers back into position. CAUTION: Keep water away from electronic components. Do not spray the inside of the unit with lubricants. If dirty, wipe stacker 3 or 4 clean with a soft cloth moistened with a nutral detergent. Cleaning the Filters Clean the filters in the back of the unit every 6 months. 1. Make sure the unit is turned off and all lights are off. Then unplug the unit. 2. Remove the screws from the filter covers to open them. 1. Make sure the unit is turned off and all lights are off. Then unplug the unit. 2. Disconnect the interface cable. 3. Open the disc cover and remove all discs from the stackers. 4. Open the ink cartridge cover. Secure the ink cartridges with tape, then close the ink cartridge cover. 5. Close disc cover and Stacker 4 tray. Secure them with tape. 6. Attach protective materials to both sides of product. 7. Repack product and accessory materials in the original box. Note: Keep product level during transport. Lift the product by the correct positions shown below. Before using the product again, be sure to remove all packing materials. 3. Remove the filters from the filter covers. Checking Status Epson Total Disc Monitor displays the screen below to let you check the status of ink cartridges, drives, mode, stackers, disc type, and job queue. See the illustration below. 4. Use a vacuum cleaner to remove dust and dirt from the filters. 5. Place them back into position. Transporting the Discproducer Before transporting the printer, repack it in the original box with the original packing materials. WARNING: The unit is heavy. You must use 2 people to lift it. CAUTION: When storing or transporting the unit, do not tilt, set vertically, or turn upside down. To keep the print head nozzles from drying out, leave ink cartridges installed during transport. 8/09 Epson Discproducer PP-100 - 5
-
 1
1 -
 2
2 -
 3
3 -
 4
4 -
 5
5 -
 6
6 -
 7
7
 |
 |