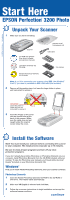
Epson Perfection 3200 Photo Start Here Card - Page 6
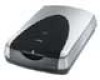
Scanner Basics - desktop scanner
 |
View all Epson Perfection 3200 Photo manuals
Add to My Manuals
Save this manual to your list of manuals |
Page 6 highlights
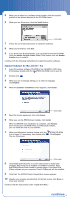
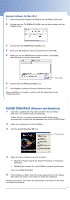
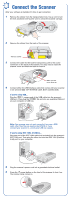
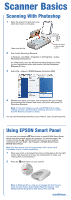
Scanner Basics Scanning With Photoshop 1 Raise the scanner lid and place your photo face down on the glass. Then close the lid. Place the photo in the top right corner 2 Start Adobe Photoshop Elements. In Windows, click Start > Programs or All Programs > Adobe Photoshop Elements 2.0. On a Macintosh, open the Adobe Photoshop Elements 2 folder (in your Applications folder) and double-click the Photoshop Elements 2.0 icon. 3 Select File > Import > EPSON Scanner Perfection 3200. 4 EPSON Scan starts, pre-scans, and recognizes the type of image you placed on the scanner, then scans your photo and opens it in Photoshop Elements. Note: To fine-tune images, you can use EPSON Scan to make settings and see a preview before scanning. See your on-screen Scanner Reference Guide for details. You can use Photoshop Elements to edit, enhance, save, and print your file. Using EPSON Smart Panel You can use your scanner's Start button to open EPSON Smart Panel, which gives you several options for scanning. You can also open it by double-clicking the EPSON Smart Panel icon on your desktop. In Windows XP, click Start > All Programs > EPSON Smart Panel > EPSON Smart Panel. Note: The Start button does not support Mac OS X. Smart Panel is available only as a Classic application. 1 Place your photo or document face down on the glass in the top right corner, then close the lid. (If you are scanning film or slides, see "Placing Film on the Scanner.") 2 Press the Start button on your scanner. Note: In Windows XP, you may see a message the first time you press the Start button. Select Smart Panel for Scanner, click Always use this program for this action, then click OK. continue
-
 1
1 -
 2
2 -
 3
3 -
 4
4 -
 5
5 -
 6
6 -
 7
7 -
 8
8
 |
 |
