Epson PowerLite 955WH Operation Guide - EasyMP Multi PC Projection - Page 53
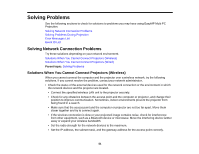
Solutions When You Cannot Connect Projectors (Wired), Solving Network Connection Problems
 |
View all Epson PowerLite 955WH manuals
Add to My Manuals
Save this manual to your list of manuals |
Page 53 highlights
• Make sure the projector supports the EasyMP Multi PC Projection version being used. Install EasyMP Multi PC Projection from the EPSON Projector Software CD-ROM supplied with the projector (if available) or download it from the Epson Web site. • Install the latest version of EasyMP Multi PC Projection on all computers. The maximum number of computer connections and the availability of the moderator function varies depending on the projector model, no matter which version of EasyMP Multi PC Projection you are using. • When another user is already connected, you can only connect to projectors in the same mirroring group as that selected by the other user. Select a projector from the same mirroring group as the user who is already connected, or select a projector that is in standby status. Parent topic: Solving Network Connection Problems Related references Set options - General settings Related tasks Searching for Network Projectors by Specifying an IP Address or Projector Name Solutions When You Cannot Connect Projectors (Wired) When you cannot connect the computer and the projector over a wired network, try the following solutions. If you cannot resolve the problem, contact your network administrator. • Check the status of the external devices used for the network connection or the environment in which the network devices and the projector are located. • Connect the network cable securely. Note: • Use a commercially available 100BASE-TX or 10BASE-T LAN cable. • To prevent malfunctions, use a category 5 or higher shielded LAN cable. • Check the projector's network settings. • Set DHCP to Off. When DHCP is set to On, it may take some time to enter LAN standby status if an available DHCP server is not found. • Set the IP address, the subnet mask, and the gateway address for the projector correctly. • Close network settings on the projector, and then return to the LAN standby screen. • Check the computer's network settings. • Enable LAN settings on your computer. 53
-
 1
1 -
2
-
3
-
4
-
5
-
6
-
7
-
8
-
9
-
10
-
11
-
12
-
13
-
14
-
15
-
16
-
17
-
18
-
19
-
20
-
21
-
22
-
23
-
24
-
25
-
26
-
27
-
28
-
29
-
30
-
31
-
32
-
33
-
34
-
35
-
36
-
37
-
38
-
39
-
40
-
41
-
42
-
43
-
44
-
45
-
46
-
47
-
 48
48 -
 49
49 -
 50
50 -
 51
51 -
 52
52 -
 53
53 -
 54
54 -
 55
55 -
 56
56 -
 57
57 -
 58
58 -
59
-
60
-
61
-
62
-
63
-
64
-
65
-
66
-
67
-
68
-
69
-
70
-
71
-
72
-
73
-
74
-
75
-
76
-
77
-
78
-
79
-
80
-
81
-
82
-
83
-
84
-
85
-
86
-
87
 |
 |
